
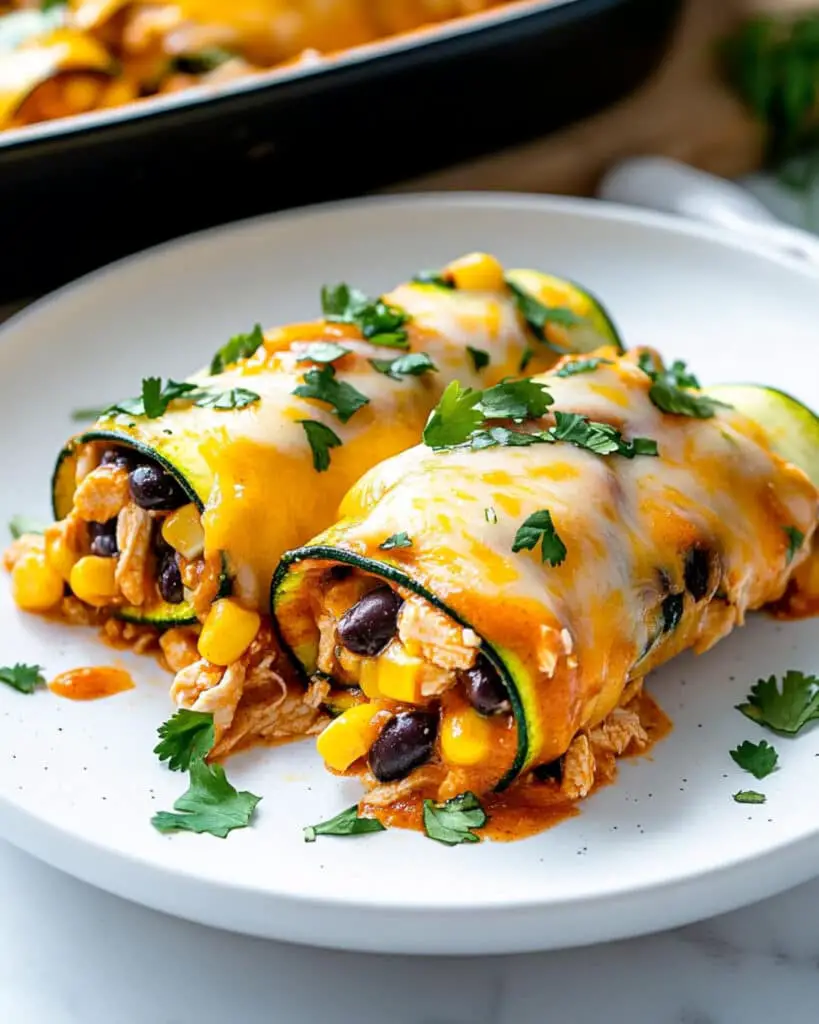
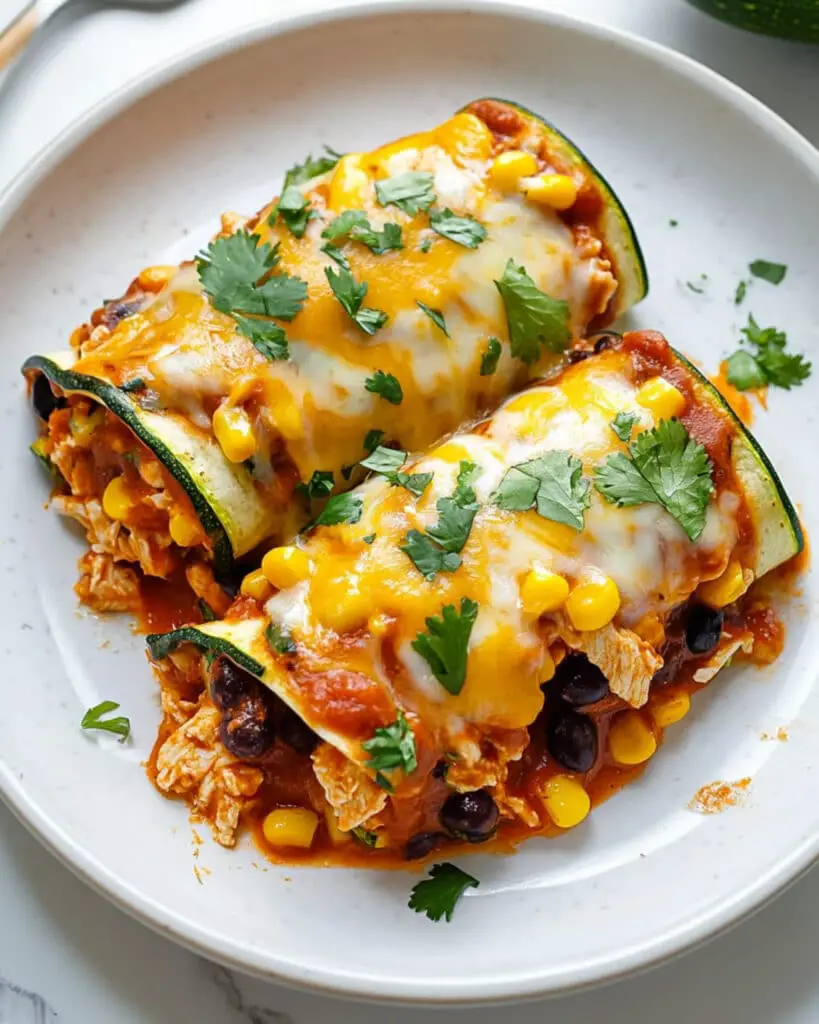
These Zucchini Enchilada Roll Ups are a game-changer for weeknight dinners! Swapping traditional tortillas for thin zucchini slices creates a lighter, veggie-packed twist on classic enchiladas without sacrificing any of the flavors you love. Filled with seasoned chicken, black beans, and corn, then smothered in enchilada sauce and melty cheese, these roll-ups deliver Mexican-inspired comfort food that’s both satisfying and surprisingly simple to make. Perfect for meal prep or serving a crowd, this dish brings a fresh approach to enchiladas that everyone will love.
Why You’ll Love This Recipe
- Low-Carb Alternative: These zucchini roll ups give you all the enchilada flavors you crave without the heavy tortillas. It’s a perfect option if you’re watching your carb intake or simply want to add more vegetables to your meals.
- Make-Ahead Friendly: You can assemble these roll ups earlier in the day or even the night before, then just pop them in the oven when you’re ready to eat. Dinner prep has never been easier!
- Family-Approved: Even veggie-skeptics tend to love these roll ups because the zucchini takes on all those delicious enchilada flavors. The familiar filling of chicken, beans, and corn appeals to everyone at the table.
- Versatile: This recipe is incredibly adaptable to what you have on hand. Leftover protein, different beans, various cheeses – it all works beautifully in these roll ups.
Ingredients You’ll Need
- Zucchini: The star of the show! Choose medium to large zucchini that are straight rather than curved for easier slicing. The zucchini slices replace traditional tortillas, adding moisture, nutrients, and a tender texture.
- Chicken: Use pre-cooked chicken for convenience. Rotisserie chicken works perfectly here, bringing ready-made flavor and juiciness to the filling.
- Black Beans: These add protein, fiber, and a hearty texture to the filling. Make sure to rinse them well to remove excess sodium.
- Corn: Provides sweet pops of flavor and a pleasant textural contrast. Fresh corn cut off the cob is amazing when in season, but frozen corn works beautifully year-round.
- Enchilada Sauce: The backbone of flavor in this dish. Store-bought sauce is a time-saver, but homemade takes these roll ups to another level if you have the time.
- Cheddar Cheese: Creates that irresistible golden, melty topping. Sharp cheddar brings the best flavor punch, but a Mexican blend works wonderfully too.
- Cilantro: A fresh, bright finishing touch that balances the rich flavors. If you’re not a cilantro fan, substitute with green onions or fresh parsley.
Note: You’ll find the complete list of ingredients, along with their exact measurements, in the printable recipe card at the bottom of this post.
Variations
Protein Options
Swap the chicken for ground beef, shredded pork, or go vegetarian with additional beans or crumbled tofu. For a seafood twist, try using flaked cooked salmon or shrimp.
Vegetarian Version
Replace the chicken with an extra cup of black beans, or add sautéed mushrooms and bell peppers for a hearty meatless filling that’s just as satisfying.
Cheese Varieties
Try pepper jack for a spicy kick, monterey jack for extra meltiness, or a combination of cheeses for complex flavor. Crumbled queso fresco as a finishing touch adds authentic Mexican flair.
Sauce Swaps
Green enchilada sauce creates a completely different flavor profile. For a creamy version, mix some sour cream into your enchilada sauce before pouring over the roll ups.
How to Make Zucchini Enchilada Roll Ups
Step 1: Prepare the Zucchini
Trim the ends off your zucchini and slice them lengthwise into thin, flexible strips (about 1/8-inch thick). A mandoline makes this task much easier and ensures even slices, but a sharp knife works too. Pat the slices dry with paper towels to remove excess moisture.
Step 2: Mix the Filling
In a large bowl, combine the shredded chicken, drained and rinsed black beans, corn, and 1 cup of enchilada sauce. Mix thoroughly so all ingredients are coated in sauce. Taste and adjust seasoning if needed.
Step 3: Prepare the Baking Dish
Spread 1/2 cup of enchilada sauce evenly across the bottom of a large baking dish. This prevents sticking and adds flavor to the bottom of the roll ups.
Step 4: Assemble the Roll Ups
On a flat work surface, lay out 2-3 zucchini slices with their edges slightly overlapping to create a 3-4 inch wide base. Place 2-3 tablespoons of filling at one end of the zucchini slices. Carefully roll up the zucchini, enclosing the filling, and place seam-side down in the prepared baking dish.
Step 5: Add Final Touches
Once all roll ups are in the dish, drizzle the remaining 1/2 cup of enchilada sauce over the top. Sprinkle evenly with shredded cheddar cheese, making sure each roll up gets some cheesy goodness.
Step 6: Bake to Perfection
Bake in a preheated 375°F oven for 20-25 minutes, until the cheese is completely melted and bubbly, and the edges of the dish are simmering. The zucchini should be tender but not mushy.
Pro Tips for Making the Recipe
- Slice Zucchini Properly: Aim for slices about 1/8-inch thick. Too thin and they’ll fall apart; too thick and they won’t roll easily.
- Remove Excess Moisture: Take time to pat your zucchini slices dry with paper towels. This prevents your dish from becoming watery during baking.
- Even Distribution: Make sure your roll ups are similar in size so they cook evenly. Using about the same amount of filling in each helps with consistency.
- Don’t Overstuff: It’s tempting to pile in the filling, but overstuffed rolls can burst open during baking. About 2-3 tablespoons per roll is perfect.
- Arrange Strategically: Place the roll ups close together in the baking dish to help them stay closed during cooking.
How to Serve
Perfect Pairings
These zucchini enchilada roll ups pair beautifully with Mexican rice, a simple green salad with lime vinaigrette, or roasted sweet potatoes for a complete meal.
Toppings Bar
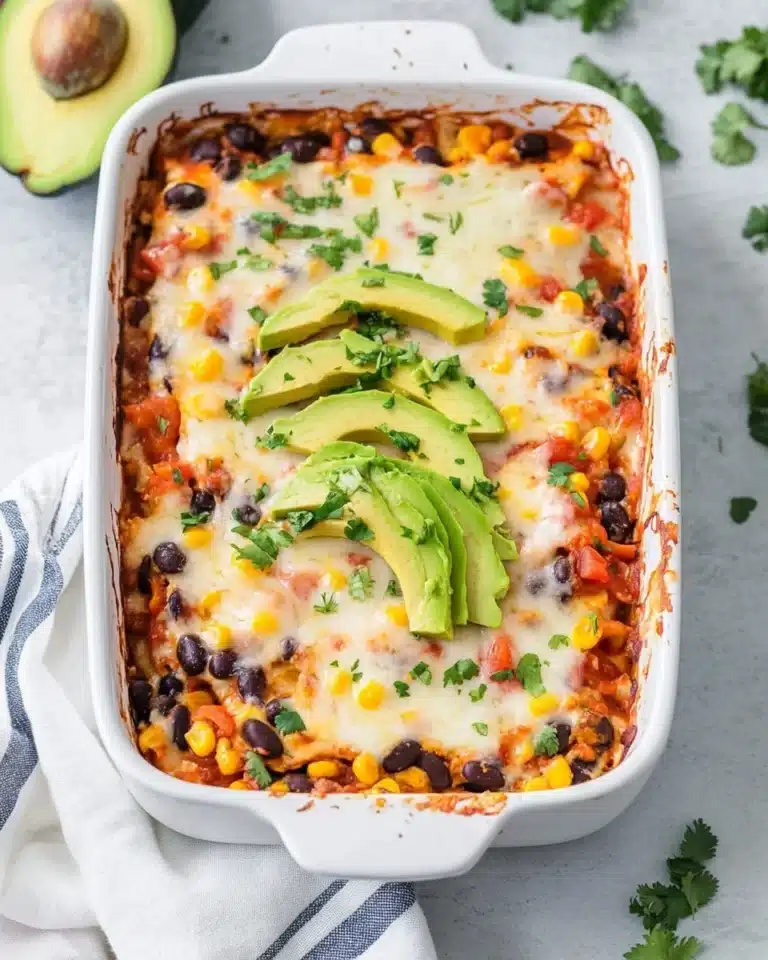
Create a toppings station with diced avocado, sour cream, pico de gallo, sliced jalapeños, and extra cilantro so everyone can customize their portion.
Make It a Fiesta
For entertaining, serve alongside fresh guacamole, homemade salsa, and a pitcher of margaritas or horchata for a Mexican-inspired feast.
Make Ahead and Storage
Storing Leftovers
Store leftover roll ups in an airtight container in the refrigerator for up to 3 days. The flavors actually develop nicely overnight, making these roll ups sometimes even better the next day!
Freezing
You can freeze these roll ups either before or after baking. For unbaked roll ups, freeze them in the baking dish, covered tightly with plastic wrap and foil. For baked roll ups, cool completely, then transfer to a freezer-safe container. Freeze for up to 3 months.
Reheating
For refrigerated leftovers, reheat in a 350°F oven for about 15 minutes or until heated through. Microwaving works in a pinch but may make the zucchini softer. For frozen unbaked roll ups, thaw overnight in the refrigerator before baking as directed, adding about 10 minutes to the baking time.
FAQs
-
How do I prevent my zucchini roll ups from becoming watery?
The key is removing excess moisture from your zucchini slices before assembly. Pat them dry with paper towels, and if you have time, lay them out on towels with a light sprinkle of salt for 15 minutes to draw out more moisture. Be sure to pat them dry again before using. Also, avoid overcooking, as zucchini releases more water the longer it cooks.
-
Can I make these ahead of time for a party?
Absolutely! These roll ups are perfect for make-ahead entertaining. You can assemble them up to 24 hours in advance, cover with plastic wrap, and refrigerate. When ready to serve, remove from the refrigerator while the oven preheats, then bake as directed, adding about 5-10 minutes to account for the chilled ingredients.
-
What can I use instead of zucchini?
Yellow summer squash works perfectly as a substitute with a similar texture and mild flavor. For a different twist, try using thinly sliced eggplant (which may need a quick pre-roast to make it flexible) or even large collard green leaves blanched briefly to soften them.
-
How can I make sure my roll ups hold together?
The trick is in the assembly: slightly overlap your zucchini slices to create a stronger base, don’t overfill, and place the roll ups seam-side down, snugly against each other in the baking dish. The cheese on top also helps bind everything together as it melts.
Final Thoughts
These Zucchini Enchilada Roll Ups are what I call “everyday special” – simple enough for a weeknight dinner but impressive enough for company. The way the tender zucchini wraps around that savory filling creates something truly magical in every bite. It’s one of those recipes that makes you feel good about what you’re eating without sacrificing any of the comfort food satisfaction. Give them a try next time you’re craving Mexican flavors but want something a little lighter – I promise they’ll become a regular in your dinner rotation!
Print
Zucchini Enchilada Roll Ups Recipe
- Prep Time: 20 minutes
- Cook Time: 20 minutes
- Total Time: 40 minutes
- Yield: 6 servings 1x
- Category: Main-course
- Method: Baking
- Cuisine: Mexican-inspired
- Diet: Gluten Free
Description
Zucchini Enchilada Roll Ups are a healthy, low-carb and gluten-free twist on classic enchiladas. Sliced zucchini replaces tortillas and is filled with a savory mixture of shredded chicken, black beans, corn, and enchilada sauce, then baked with cheddar cheese until bubbly and delicious. Perfect as a main course for a satisfying family meal.
Ingredients
Main Ingredients
- 2 cups cooked chicken, shredded or sliced/diced
- 1 cup black beans, drained and rinsed
- 1 cup corn (fresh or frozen)
- 2 cups enchilada sauce, divided
- 2 pounds zucchini (about 2-4 medium-large), sliced thinly lengthwise*
- 1 cup cheddar cheese, shredded
- 2 tablespoons cilantro, chopped (optional, for garnish)
Optional
- Additional cilantro for serving
Instructions
- Prepare Filling: In a large bowl, mix the cooked chicken, black beans, corn, and 1 cup of the enchilada sauce until the ingredients are well combined and evenly coated.
- Prepare Baking Pan: Spread 1/2 cup enchilada sauce over the bottom of a large baking pan or dish to prevent sticking and add extra flavor to the zucchini roll ups.
- Make Zucchini Rolls: Lay 2-3 thin slices of zucchini slightly overlapping on a clean working surface, forming a 3-4 inch wide strip. Add 2-3 tablespoons of the chicken mixture at one end, then gently roll the zucchini slices around the filling. Place each roll seam-side down in the prepared baking pan. Repeat this process with remaining zucchini and filling, making approximately 24 rolls.
- Add Sauce and Cheese: Drizzle the remaining 1/2 cup of enchilada sauce evenly over the top of the arranged zucchini rolls. Sprinkle the shredded cheddar cheese generously over the rolls to cover.
- Bake: Preheat your oven to 375°F (190°C). Bake the roll ups in the oven for 20-25 minutes, or until the cheese is melted and the sauce is bubbling nicely around the edges.
- Garnish and Serve: Remove from the oven and let cool slightly. Garnish with chopped cilantro if desired before serving. Enjoy your flavorful and nutritious zucchini enchilada roll ups!
Notes
- *Use a mandoline or sharp knife to slice zucchini very thin for easier rolling and proper texture.
- Rotisserie chicken can be used for convenience.
- To make this vegetarian, omit chicken and increase black beans or add cooked quinoa.
- Dairy-free cheese may be substituted for a dairy-free option.
- Serve with a dollop of sour cream, avocado, or extra enchilada sauce on the side.
Nutrition
- Serving Size: 1/6 of recipe (about 4 rolls)
- Calories: 260
- Sugar: 6g
- Sodium: 670mg
- Fat: 10g
- Saturated Fat: 4g
- Unsaturated Fat: 5g
- Trans Fat: 0g
- Carbohydrates: 19g
- Fiber: 5g
- Protein: 24g
- Cholesterol: 57mg


