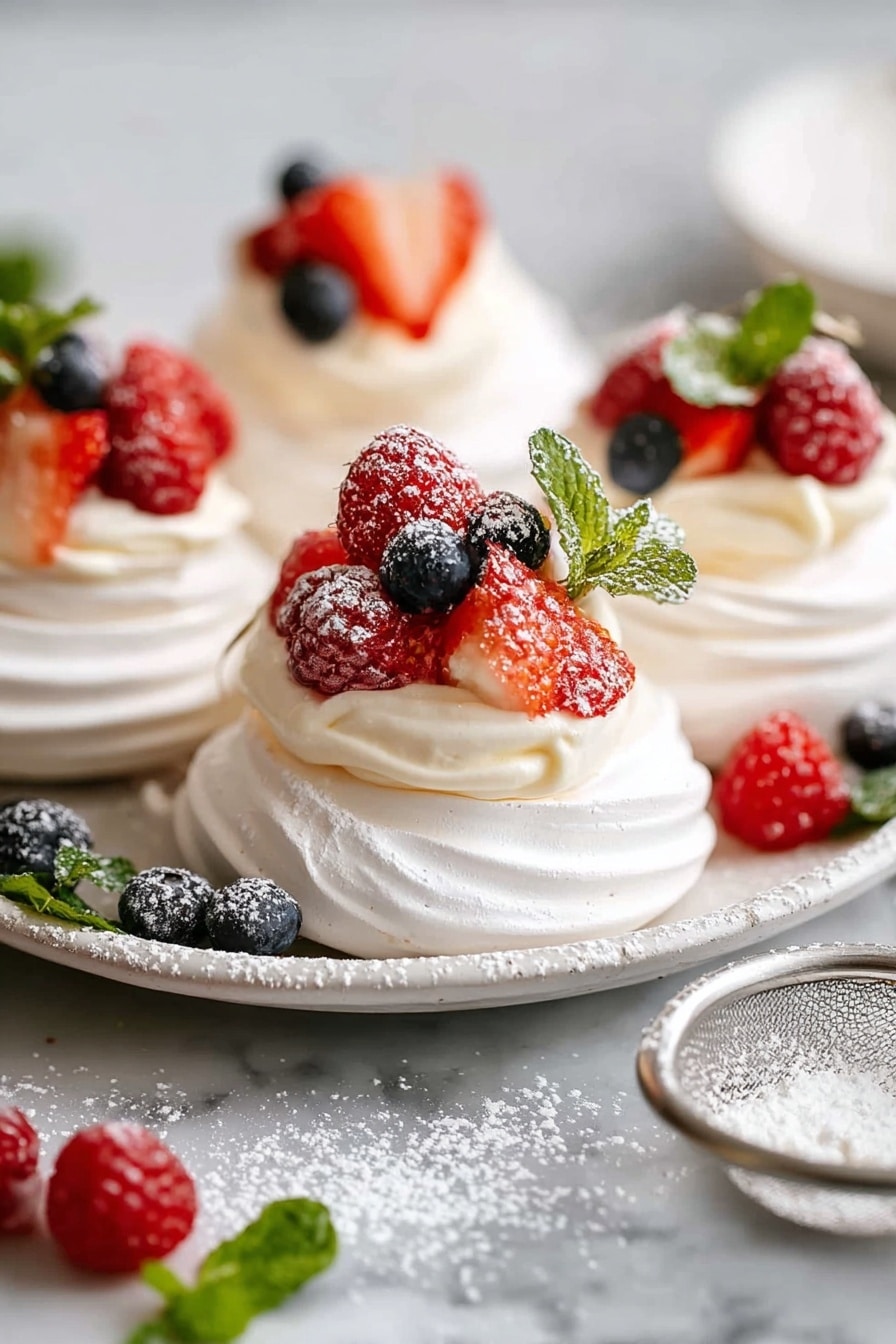
If you’re looking for a dessert that feels fancy but is surprisingly easy to make, you need to try this Mini Pavlova Cups with Fresh Fruit Recipe. I absolutely love how these little meringue cups turn out—crispy on the outside, marshmallow-soft inside, and topped with fresh, juicy fruit and fluffy cream. They’re elegant, light, and perfect for impressing guests or treating yourself on a sunny afternoon. Stick with me, and I’ll walk you through every step so you’ll nail this recipe even if you’ve never made pavlova before.
Why You’ll Love This Recipe
- Elegant yet Easy: Mini pavlova cups look like a showstopper but come together with a few simple ingredients and steps.
- Light & Refreshing: The crispy shell with a soft center topped with fresh fruit and cream makes for a perfect balance of textures and flavors.
- Customizable Topping: You can mix and match fruits and garnishes to suit any season or occasion.
- Make-Ahead Friendly: The meringue cups store well, so you can prep in advance and assemble just before serving.
Ingredients You’ll Need
These ingredients come together beautifully to create the perfect pavlova texture and flavor. The sugar and egg whites give you that crisp, marshmallowy meringue, while the cream and mascarpone add richness and stability to your topping. For the fruit, I love using whatever’s freshest and most colorful at the market.
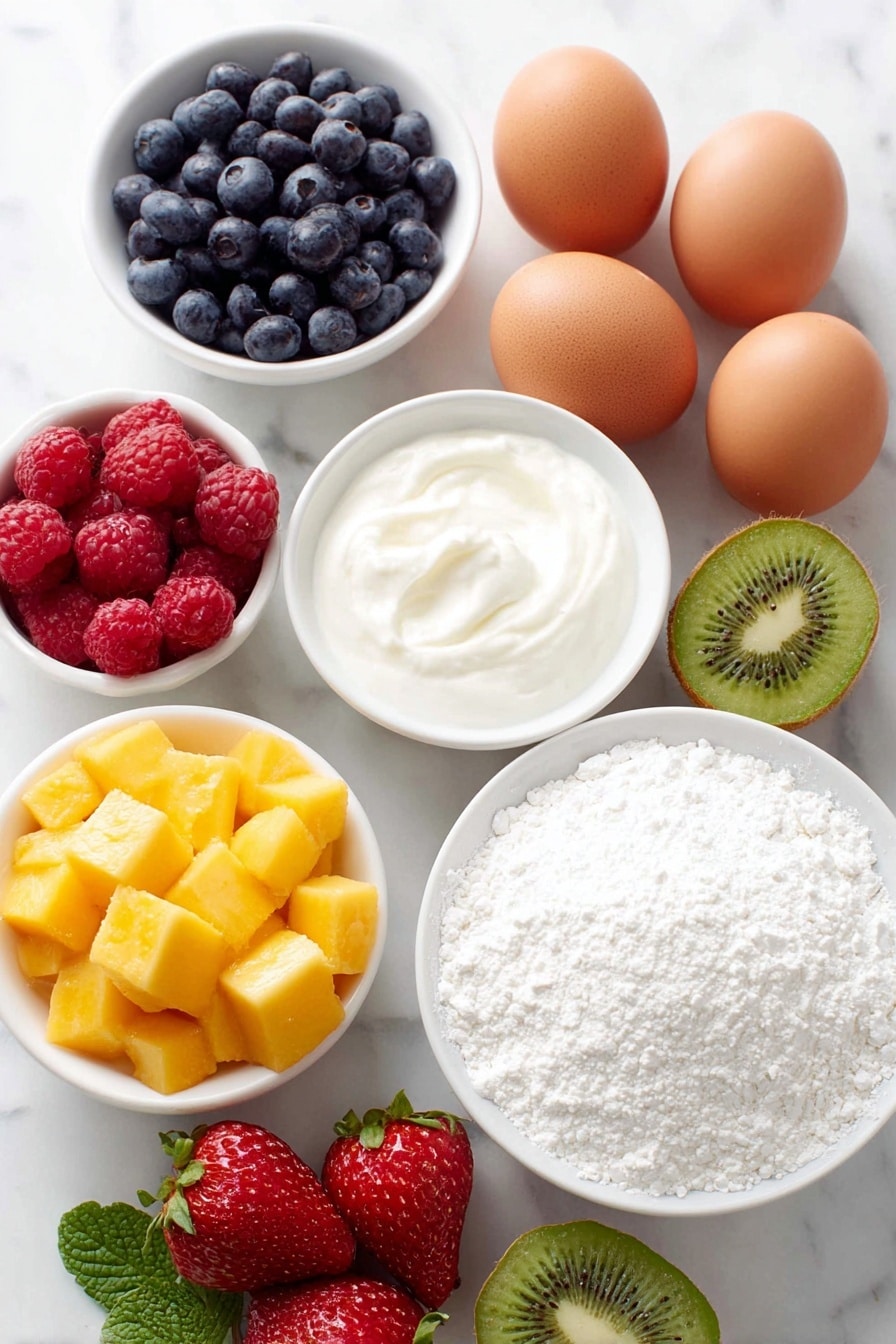
- Egg whites: Fresh eggs work best, and measuring helps because different eggs vary in size.
- Caster sugar (superfine sugar): This dissolves quickly, preventing graininess in your meringue.
- Cornflour (cornstarch): It helps keep your pavlova stable and crack-free—I always keep some in the pantry for this.
- White vinegar: Just plain distilled vinegar to stabilize the meringue without altering flavor.
- Heavy (thickened) cream: Make sure it’s very cold for easier whipping.
- Mascarpone (optional): A little magic ingredient that stabilizes the whipped cream so you can prep it ahead of time.
- Vanilla extract: Adds warm, comforting flavor to your cream topping.
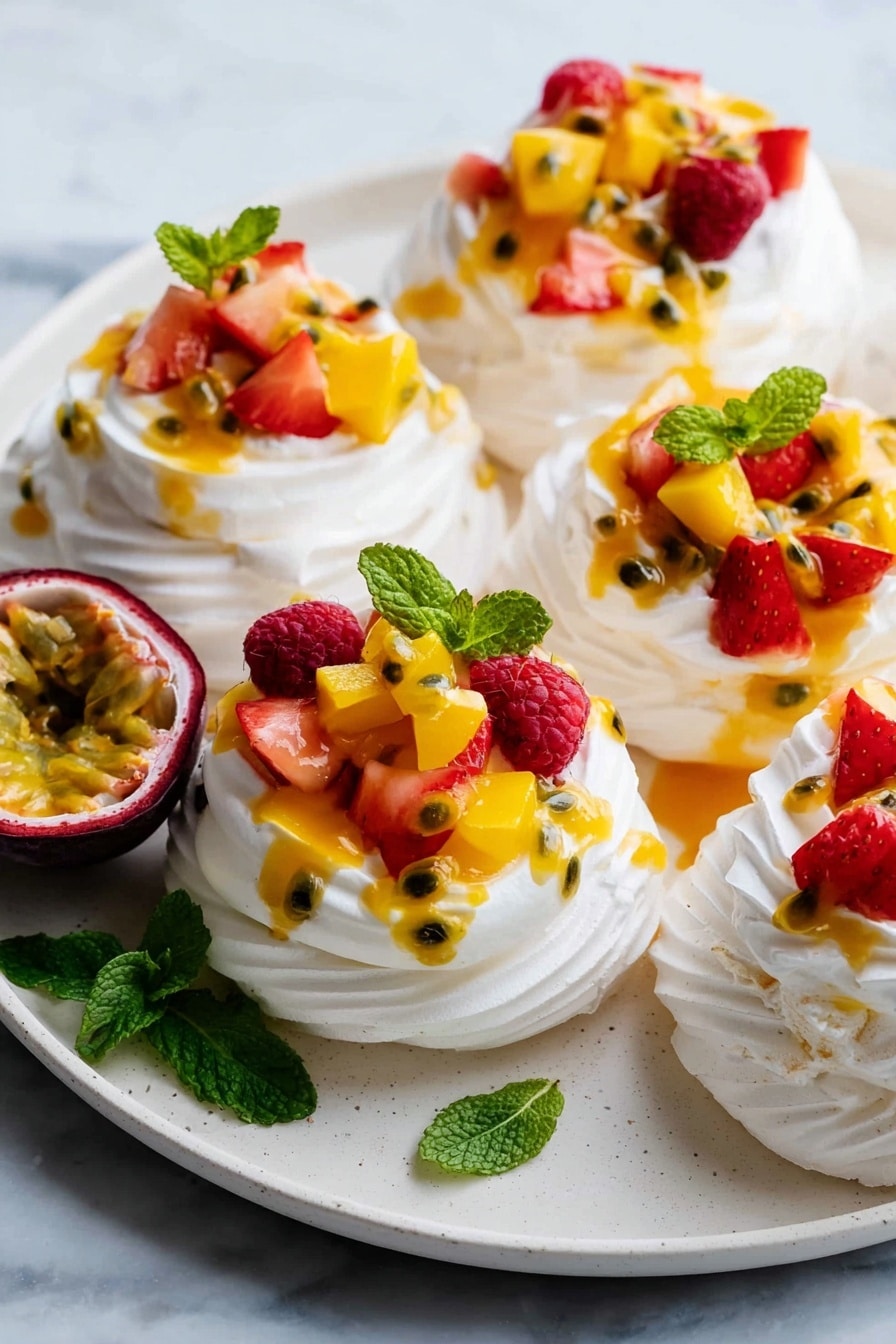
- Fresh fruit: Strawberries, blueberries, kiwi, passionfruit, mango—choose a mix for color and freshness.
- Mint sprigs and icing sugar: For garnish and a pretty finish.
Variations
I love how flexible this Mini Pavlova Cups with Fresh Fruit Recipe is! I’ve played around with different toppings and found some easy swaps that make it fit just about any dietary need or flavor mood.
- Dairy-Free Variation: Swap whipped cream for coconut cream—just chill a can overnight and whip the solid part. Keeps that creamy texture but dairy-free.
- Fruit Mix & Match: I’ve tossed on stone fruits like peaches in summer or even pomegranate seeds for a festive crunch.
- Stabilized Cream Tip: Including mascarpone means you can whip your cream a day ahead, which saved me big time for parties.
- Fully Crisp Meringue Nests: If you want a crunchier, crisp-throughout base, you can pipe nests thicker and bake longer for 2 hours—great for pairing with fruit sauces.
How to Make Mini Pavlova Cups with Fresh Fruit Recipe
Step 1: Get Your Egg Whites Ready
Start by separating your egg whites from the yolks while the eggs are still cold from the fridge—trust me, it’s way easier that way. Measure out 2/3 cup (about the whites from 5-6 large eggs). Set the whites aside for about 30 minutes so they come to room temperature; this step is crucial for getting fluffy meringue. I used to skip this and noticed my pavs just didn’t get as voluminous.
Step 2: Whip the Egg Whites and Sugar
Preheat your oven to 150°C (325°F). Using a stand mixer or electric hand beater, whip the egg whites on high speed for about a minute until foamy. Then, with the mixer still running, add your caster sugar one tablespoon at a time. Patience is key here—you’ll want to keep beating for about 8 minutes until the meringue becomes shiny, thick, and no sugar grains remain when you rub a small amount between your fingers. This took me a few tries to perfect, but it really makes a difference!
Step 3: Add Vinegar and Cornflour, Then Pipe Your Pavlova Cups
Mix in the white vinegar and cornflour, then beat for another 30 seconds to combine. Line two baking trays with parchment paper—dab a little meringue in the corners to keep the paper from sliding. Transfer the meringue mixture to a piping bag fitted with your favorite nozzle. Pipe out about 12-13 mounds around 6-7 cm (2.5”) wide and 5 cm (2”) tall, then use a spoon to gently flatten the tops and create a slight dip to hold the cream and fruit later. The key is that the pavs should be about 4 cm high after baking.
Step 4: Slow Bake and Cool
Pop both trays into the oven and immediately turn the temperature down to 110°C (225°F) or 100°C if using a fan oven. Bake for 1 hour and 30 minutes, until the pavlovas are dry to the touch but not browned. Ovens vary, so if they’re still sticky, give them some extra time. Once done, turn off the oven and leave the pavlovas inside to cool completely—this usually takes 4 hours or overnight. This step is my secret for cracking-free, perfectly dry shells with soft centers.
Step 5: Whip Your Cream and Assemble
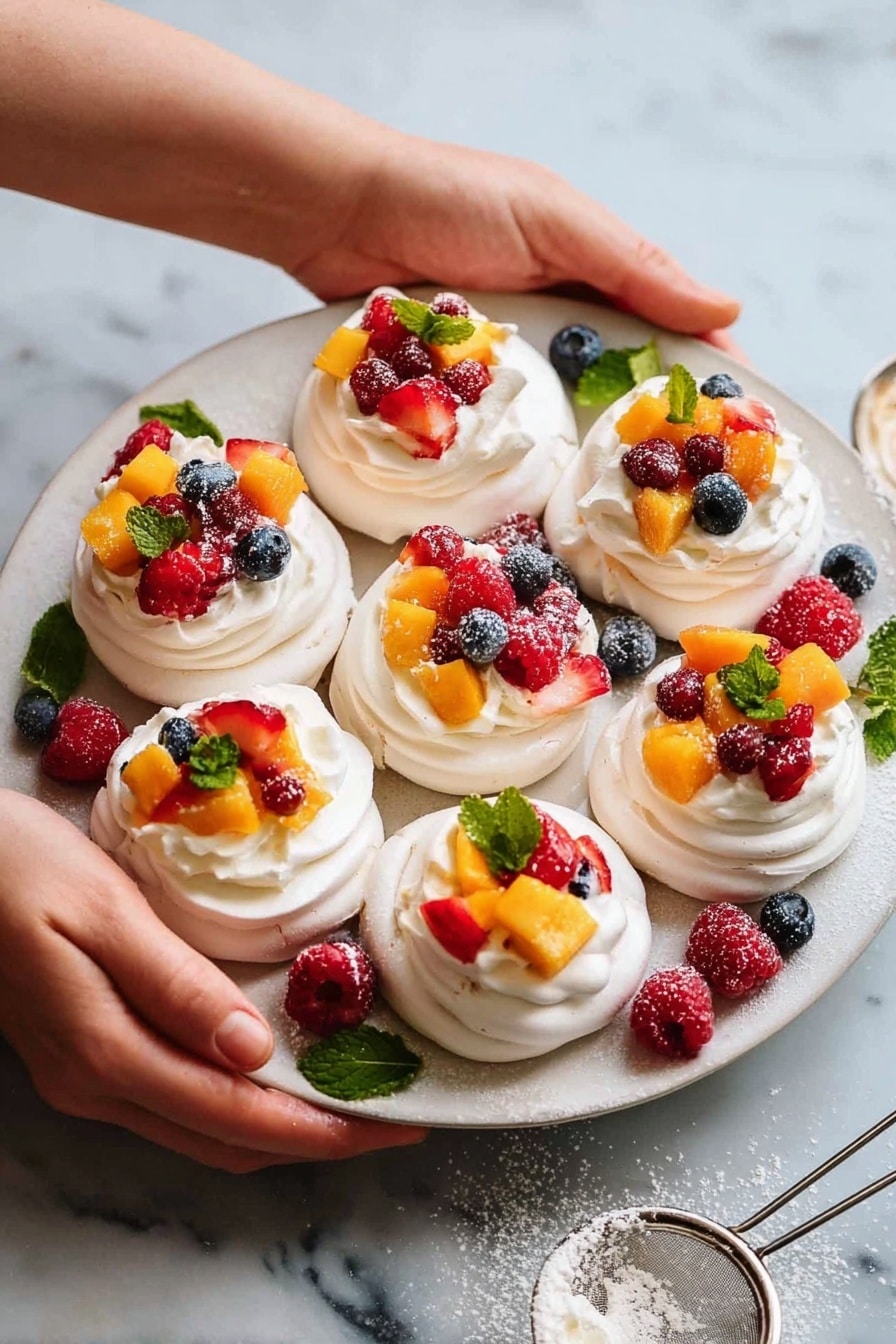
Whip the cold heavy cream along with sugar, vanilla extract, and mascarpone (if using) until soft peaks form. Mascarpone is optional but highly recommended if you want to stabilize the cream and whip it ahead of time. Just before serving, spoon a generous dollop of cream into each pavlova cup, pile on your favorite fresh fruits, and dust with a little icing sugar for that classic finish. It always impresses guests and makes my family go crazy for the pretty presentation.
Pro Tips for Making Mini Pavlova Cups with Fresh Fruit Recipe
- Room Temperature Egg Whites: Don’t rush this step! Let your egg whites sit out 30 minutes before whipping. You’ll get that perfect volume and texture.
- Add Sugar Slowly: Pour sugar gradually while beating—this prevents grainy meringue and ensures glossy peaks.
- Cool Overnight: Leaving your pavs to cool fully inside the turned off oven makes them crispier with fewer cracks.
- Assemble at The Last Minute: Cream will make the pavlova soggy, so add your toppings just before serving for the best texture.
How to Serve Mini Pavlova Cups with Fresh Fruit Recipe
Garnishes
I adore topping mine with a mix of mint sprigs and a light dusting of icing sugar. The mint adds a hint of fresh aroma that balances the sweetness, and the powdered sugar gives them a picture-perfect, snowy look. Sometimes, I also sprinkle a few edible flowers for an extra touch when entertaining.
Side Dishes
Since these mini pavlovas are already a perfect sweet treat, I like to serve them alongside a simple green tea or a crisp sparkling wine. For casual brunches, they pair wonderfully with fresh fruit salads or light sorbets for a refreshing summer vibe.
Creative Ways to Present
For special occasions, I’ve arranged these mini pavlova cups on a tiered cake stand—it immediately elevates the presentation. Another time, I piped the meringue into flower shapes and used rose petals as garnish for a romantic vibe. You could even serve them in individual glass jars for grab-and-go elegance.
Make Ahead and Storage
Storing Leftovers
Once your pavlova cups are fully cool, store them in an airtight container at room temperature in a cool, dry place. I’ve found they stay crisp and fresh for 2-3 days, but the marshmallow center starts to soften the longer they sit. If you have leftover whipped cream, keep it refrigerated and use within a day.
Freezing
I don’t recommend freezing the assembled pavlova cups because the texture suffers—cream and fruit don’t freeze well together. However, you can freeze the baked and cooled meringue shells for up to a month in an airtight container, then thaw at room temperature before filling.
Reheating
Since these are best served at room temperature and freshly topped, I don’t reheat them. If you’ve frozen the shells, just let them thaw on the counter for about an hour—they’ll regain their crispness beautifully.
FAQs
-
Can I make mini pavlova cups ahead of time?
Absolutely! The meringue cups can be baked up to a few days in advance and kept in an airtight container in a cool, dry place. Just whip your cream and add fruit right before serving to keep everything fresh and crisp.
-
Why does my pavlova crack?
Cracking usually happens when the meringue cools too quickly or is overbaked. The trick is to bake at a lower temperature (around 110°C/225°F) and let the pavlovas cool completely inside the oven with the door closed or slightly ajar overnight.
-
Can I use regular sugar instead of caster sugar for the meringue?
It’s best to use caster or superfine sugar because it dissolves better into the egg whites, giving you that smooth, shiny meringue texture. If you only have regular sugar, try pulsing it in a food processor to make it finer before using.
-
What fruits work best on mini pavlova cups?
Berries like strawberries, blueberries, and raspberries are classics, but tropical fruits like mango, kiwi, and passionfruit add a vibrant twist. Choose fruits that are fresh, not too juicy, to keep the meringue from getting soggy too fast.
-
How can I stabilize whipped cream for pavlova topping?
Adding a bit of mascarpone cheese to your cream helps stabilize it so it holds its shape longer. You can whip the mixture ahead of time and refrigerate it in a piping bag, which makes serving super easy.
Final Thoughts
This Mini Pavlova Cups with Fresh Fruit Recipe holds a special place in my kitchen because it’s one of those desserts that’s both approachable and special. I still get a little thrill every time I pull a tray of these out of the oven, knowing they’ll wow anyone at the table. Whether it’s a summertime gathering or just a sweet treat after dinner, I wholeheartedly recommend you give this one a whirl—you’ll end up with a dessert that tastes as fantastic as it looks, and you’ll feel proud having made it yourself.
Print
Mini Pavlova Cups with Fresh Fruit Recipe
- Prep Time: 25 minutes
- Cook Time: 1 hour 30 minutes
- Total Time: 10 hours 55 minutes
- Yield: 12 servings 1x
- Category: Dessert
- Method: Baking
- Cuisine: Australian
Description
Mini Pavlovas are delicate meringue-based desserts featuring a crisp outer shell with a soft, marshmallow-like center. Topped with whipped cream and fresh seasonal fruits, these individual pavlovas make an elegant and refreshing treat perfect for any occasion. This recipe guides you through making stable meringue nests baked low and slow, filled with creamy mascarpone-infused whipped cream and crowned with vibrant berries and tropical fruits.
Ingredients
Mini Pavlovas:
- 160 ml (2/3 cup) egg whites (from 5 – 6 large eggs)
- 1 1/4 cups caster sugar (superfine sugar)
- 2 1/2 tsp cornflour (cornstarch)
- 1 tsp white vinegar
Whipped Cream:
- 1 1/2 cups heavy/thickened cream (whipping cream), cold
- 1/2 cup mascarpone (optional, for stabilizing)
- 3 tbsp caster sugar (superfine sugar)
- 1 tsp vanilla extract
Toppings (choose according to preference):
- Strawberries, diced into 1cm (1/3″) cubes
- Mangoes, diced into 1cm (1/3″) cubes
- Blueberries
- Raspberries
- Kiwi, sliced
- Passionfruit pulp
- Small mint sprigs
- Icing sugar (powdered sugar), for dusting
Instructions
- Prepare Egg Whites: Separate egg yolks from egg whites while the eggs are cold from the fridge for easier separation. Measure out 160 ml (2/3 cup) of egg whites, typically from 5 to 6 eggs. Set them aside to come to room temperature for 30 minutes; this step helps the whites to fluff better when beaten.
- Preheat Oven: Set your oven to 150°C (325°F) for all oven types.
- Add Sugar Gradually: Using a stand mixer or electric beater, beat the egg whites on high speed for 1 minute. Then, while continuing to beat, add caster sugar one dessert spoon at a time to ensure proper dissolving.
- Beat Until Glossy: Beat for 8 more minutes on high until the mixture is fluffy, glossy, and no sugar grains remain when rubbed between your fingers. Then add the white vinegar and cornflour and beat for an additional 30 seconds until combined.
- Prepare Baking Trays: Dab a little meringue on the corners of two baking trays and cover them with baking paper (parchment) to keep it in place.
- Pipe Meringue Mounds: Transfer the meringue mixture into a large piping bag fitted with your preferred nozzle. Pipe 12 to 13 mounds about 6 to 7 cm (2.5 inches) wide and 5 cm (2 inches) tall. Use a spoon to flatten the top slightly and create a shallow dent in the center to hold the cream and fruit later. The pavlovas should be approximately 4 cm (1.6 inches) high after baking.
- Bake the Pavlovas: Place both trays in the oven, immediately reduce the temperature to 110°C (225°F) or 100°C fan, and bake for 1 hour and 30 minutes until dry to the touch. If they are still sticky, continue baking as needed; oven times may vary.
- Cool in Oven: Turn the oven off and leave the pavlovas inside to cool completely for about 4 hours or ideally overnight (around 10 hours). This helps set the texture without cracks.
- Store Properly: Once fully cooled, store the pavlovas in an airtight container in a cool, dry place until ready to use.
- Whip Cream: In a large bowl, beat the cold heavy cream along with mascarpone (if using), caster sugar, and vanilla extract on high speed until soft peaks form. Using a stand mixer takes about 1 minute; a hand-held beater may take 2 to 3 minutes.
- Assemble and Decorate: Just before serving, spoon a generous dollop of whipped cream into the dent of each pavlova nest. Top with your chosen fresh fruits and dust lightly with icing sugar for a final elegant touch.
Notes
- For best results, use fresh eggs rather than carton egg whites, as fresh whites whip better.
- Separating eggs while cold from the fridge is easier and ensures cleaner separation.
- Let egg whites sit 30 minutes at room temperature to improve volume and fluffiness when whipped.
- The vinegar and cornflour help stabilize the pavlova and prevent cracking during baking.
- Adding mascarpone to the whipped cream stabilizes it, allowing you to prepare it a day ahead and keep it fluffy; store whipped cream in a piping bag or airtight container without stirring before use to prevent deflation.
- Check pavlova readiness by ensuring a dry, lightly crispy shell with a marshmallow soft interior. Baking times may vary based on oven.
- For fully crisp meringue nests, pipe a spiral base followed by two layers around the edge and bake 2 to 2.5 hours until firm all the way through.
- Store cooled pavlovas in an airtight container to maintain crispness. They keep well for 3 to 5 days but are best served the day they are cooled out of the oven.
- Assemble pavlovas just before serving to prevent cream from soaking into the meringue and making it soggy.
Nutrition
- Serving Size: 1 mini pavlova
- Calories: 220
- Sugar: 22g
- Sodium: 10mg
- Fat: 12g
- Saturated Fat: 7g
- Unsaturated Fat: 4g
- Trans Fat: 0g
- Carbohydrates: 24g
- Fiber: 1g
- Protein: 3g
- Cholesterol: 35mg


