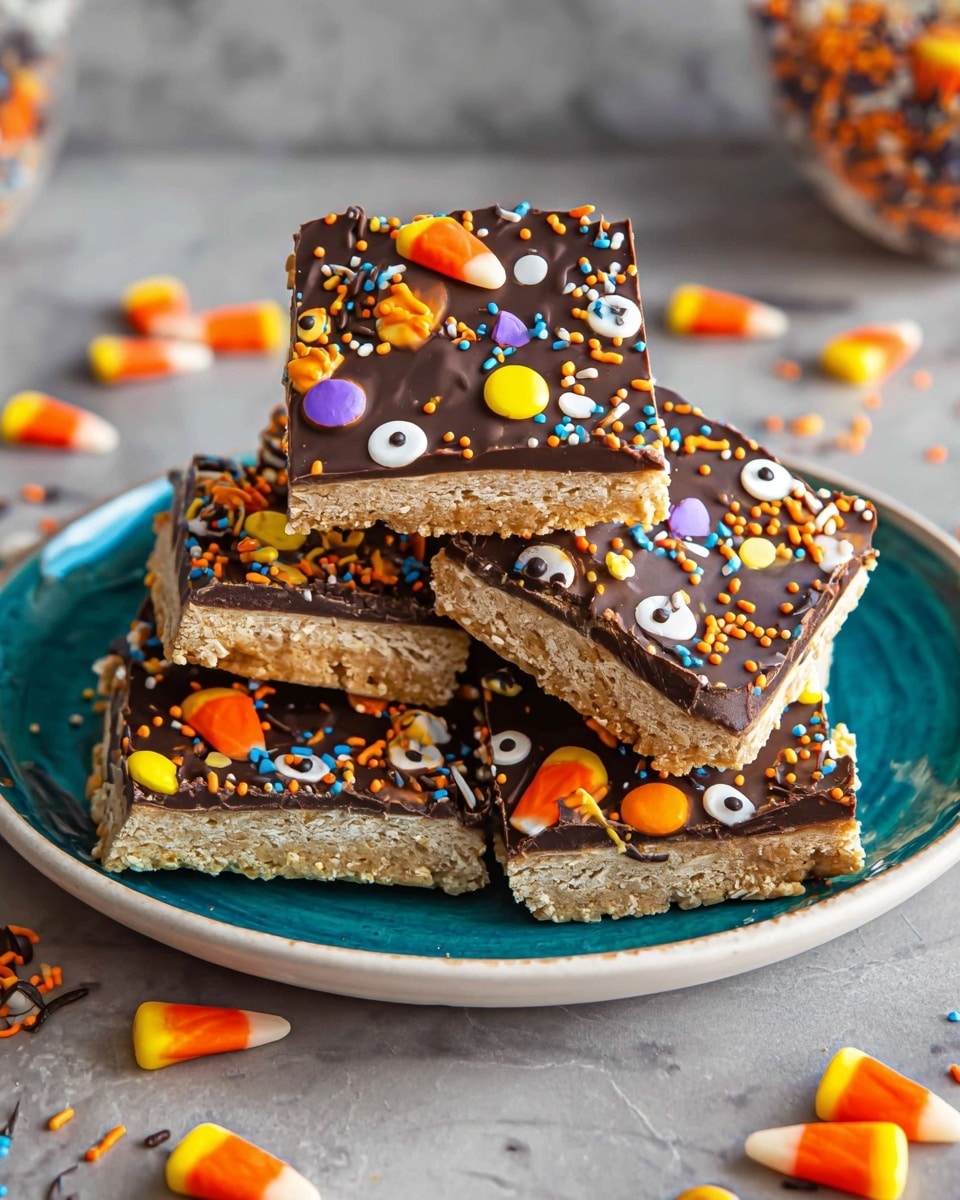
If you’re looking for a fun, easy, and utterly delicious treat to wow your friends this spooky season, you absolutely need to try this Halloween Bark Recipe. It’s one of those no-bake wonders that looks impressive but comes together so quickly — I love this because it combines the crisp crunch of graham crackers with gooey marshmallows, luscious melted chocolate, and your favorite Halloween candies all in one festive bark. Trust me, once you try it, this will become your go-to Halloween party snack or last-minute treat idea!
Why You’ll Love This Recipe
- Super Simple: No baking needed, so even the kids can help out without a fuss.
- Customizable: Mix and match your favorite Halloween candies to make it truly your own creation.
- Crowd Pleaser: Everyone raves about the mix of textures and sweet flavors.
- Perfect for Parties: Easy to break into pieces and serve, fitting spooky themes beautifully.
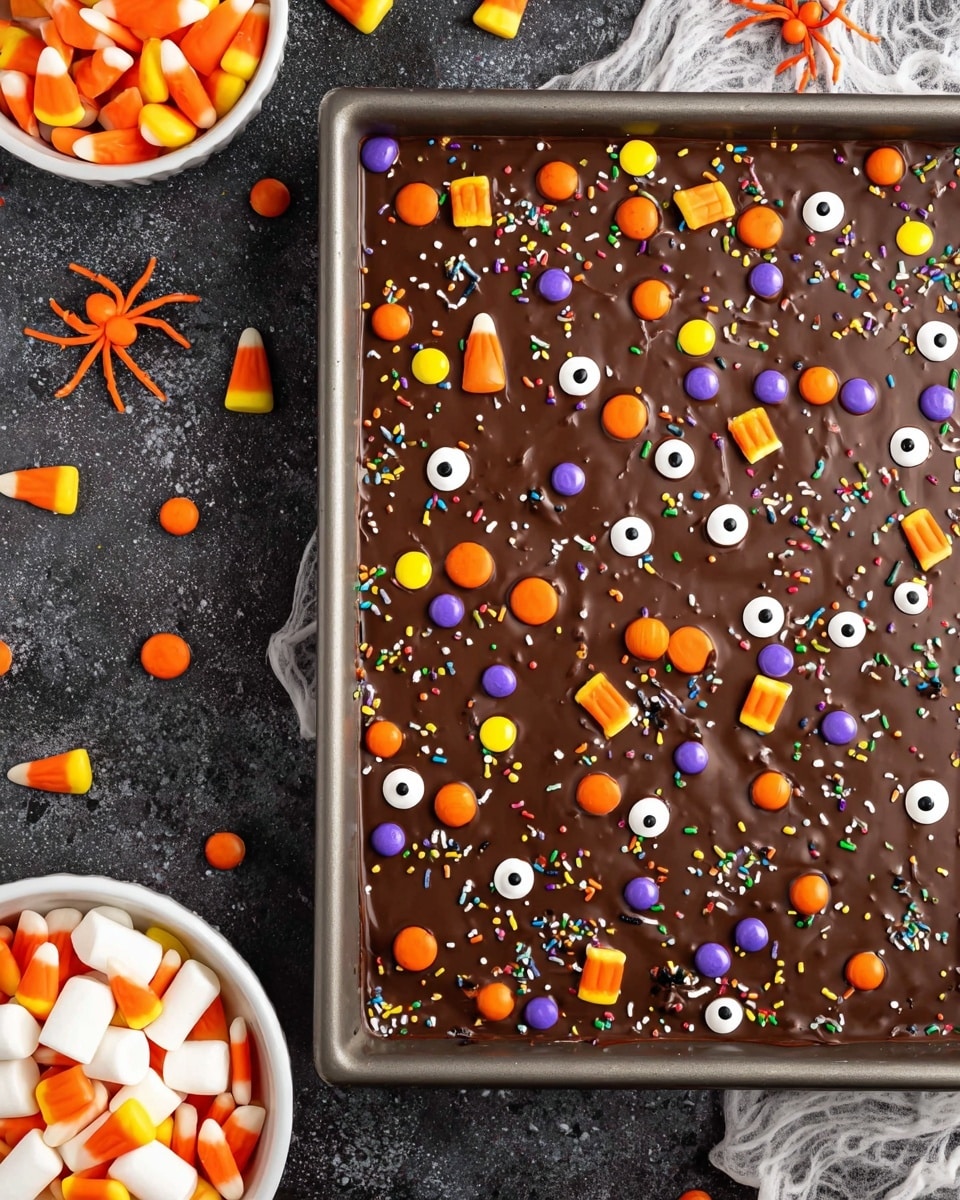
Ingredients You’ll Need
The magic of this Halloween Bark Recipe starts with simple ingredients that come together in the tastiest way. I always recommend grabbing quality chocolate and fresh marshmallows because those two really set the tone for how rich and gooey your bark will be.
- Graham crackers: I prefer classic graham crackers for the perfect crunchy base that balances sweetness.
- Marshmallows: Large marshmallows work great to get that melty, chewy texture; mini marshmallows can be a fun alternative for more evenly melted goo.
- Unsalted butter: Melted butter helps melt the marshmallows smoothly and gives a rich flavor without overpowering the sweetness.
- Semi-sweet chocolate: Baker’s chocolate squares melt beautifully and give that perfect bittersweet edge to balance out the sugary layers.
- Variety of Halloween candy: Use everything from candy corn and mini chocolate bars to gummy eyeballs — whatever spooky treats you love for a visually thrilling and tasty topping!
Variations
One of the best things about this Halloween Bark Recipe is how easy it is to make it your own. I like experimenting with different candies or even alternative chocolates to cater to dietary needs or just to mix up flavors.
- White Chocolate Twist: I once doubled the fun by swirling melted white chocolate with the semi-sweet – it not only looks stunning but adds a creamy contrast that my family adored.
- Nutty Addition: Adding chopped roasted almonds or pecans gives a nice crunch and a layer of flavor that’s unexpected but really addictive.
- Vegan Version: Swap out butter for coconut oil and use dairy-free chocolate to make this recipe vegan-friendly without losing any deliciousness.
- Spooky Colors: Use colored candy melts or sprinkle festive edible glitter for a more eye-catching Halloween bark presentation.
How to Make Halloween Bark Recipe
Step 1: Prep Your Base
First things first, line a 9.5″x13″ baking sheet with parchment paper — this makes cleanup a breeze and helps you lift the bark out easily later. Then, place your graham crackers in a single layer so they fully cover the bottom. Don’t worry if you have to break a few to fill the gaps; it all melts into a delicious canvas!
Step 2: Melt Marshmallows with Butter
Next, toss your marshmallows into a large microwave-safe bowl, pour the melted butter over them, and stir to coat. Microwave the mixture in 30-second bursts, stirring in between, until everything is melted and smooth. I usually keep an eye on it because marshmallows can go from melted to burnt quickly — a gentle heat is your friend here.
Step 3: Spread Marshmallow Layer
Pour your gooey marshmallow mixture over the stacked graham crackers, spreading it gently all the way to the edges. I like to use a spatula lightly greased or sprayed to keep the marshmallow from sticking, which helps you spread it nice and even without tearing the crackers underneath.
Step 4: Melt and Add Chocolate
In another microwave-safe bowl, melt your chocolate squares the same way — 30 seconds at a time, stirring well to ensure it’s silky smooth. Pour the melted chocolate over the marshmallow layer, spreading it evenly with a spatula. This is the part where the magic happens, and your bark really starts to look like a Halloween masterpiece!
Step 5: Add the Halloween Candy
While the chocolate is still warm and soft, press your assortment of Halloween candy on top. I love mixing different textures here — crunchy, chewy, and colorful candies make this bark so much fun to eat and look at. Don’t press too hard, or the chocolate could seep through, but a gentle push helps everything stick beautifully.
Step 6: Chill and Break
Lastly, pop your bark into the fridge for about 30 minutes to let everything set firmly. Once chilled, carefully lift the parchment paper to remove the bark, then break it into bite-sized pieces. This is always the hardest part because you’ll want to snack on a piece before it’s even ready!
Pro Tips for Making Halloween Bark Recipe
- Don’t Overheat Marshmallows: I learned that overheating makes the marshmallows tough or burnt, so microwave in short increments and stir often for perfect melt.
- Use Parchment Paper: This makes cleanup and removing the bark so much easier — a game changer every single time.
- Press Candy Gently: Be careful not to push candies too deep into the melted chocolate or they’ll sink and lose their shape.
- Let It Fully Chill: Patience pays off; rushing this step means your bark won’t set properly and could melt apart when broken.
How to Serve Halloween Bark Recipe
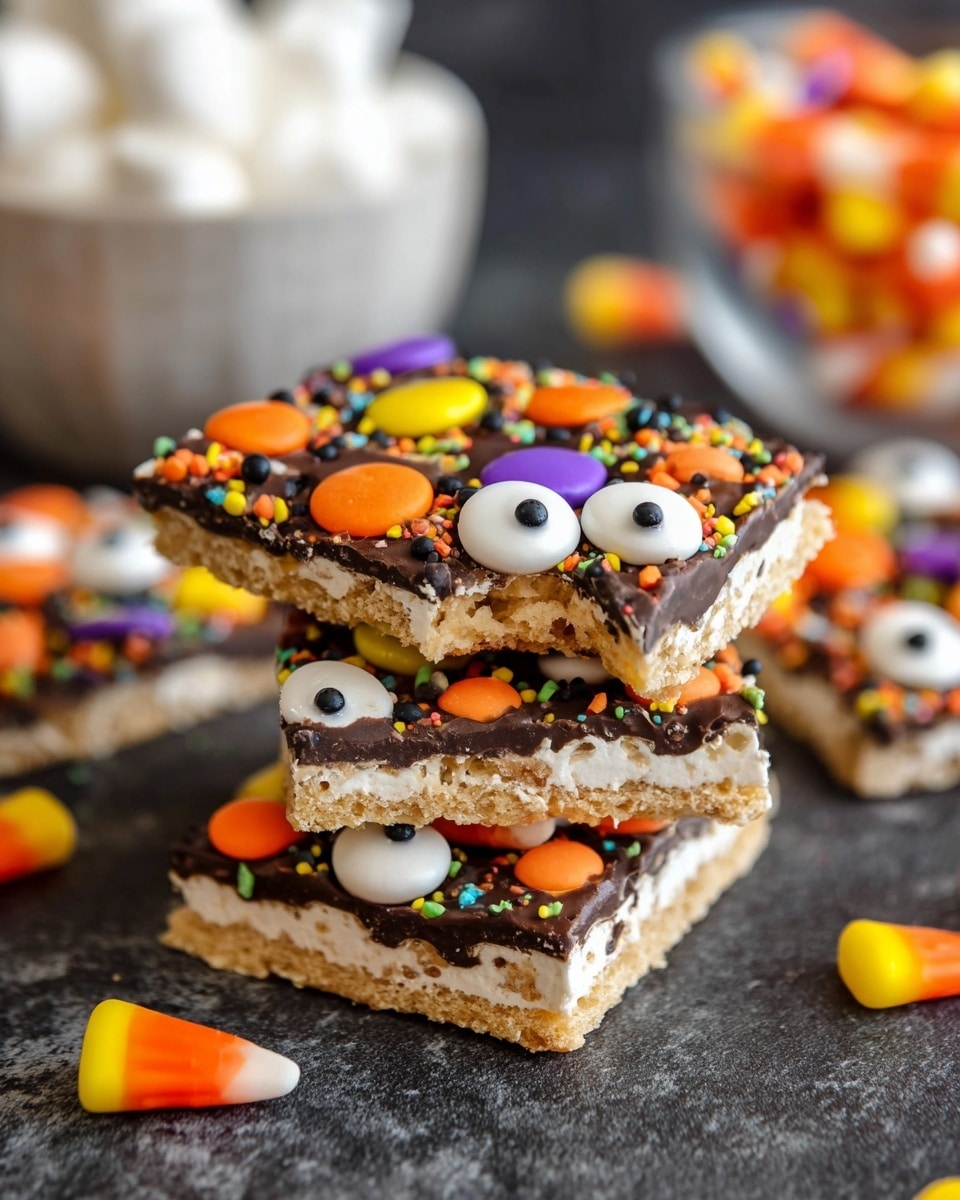
Garnishes
I like to sprinkle a little flaky sea salt or edible glitter on top right after adding the candy — it gives a fun sparkle and balances sweetness. Sometimes, a few candy eyes or pumpkin sprinkles make it extra festive without too much fuss.
Side Dishes
This bark stands out on its own, but if you’re pairing it, try serving with hot apple cider or a warm cup of spiced pumpkin latte. The warm drinks contrast the cool, crunchy bark perfectly for a cozy Halloween treat spread.
Creative Ways to Present
I’ve found that arranging the Halloween bark on a rustic wooden board or in individual cellophane bags tied with orange and black ribbons amps up the festive vibe. For parties, use themed plates or mini take-out boxes—it adds charm and makes it easy for guests to grab and go!
Make Ahead and Storage
Storing Leftovers
Once your Halloween bark is chilled and broken into pieces, store leftovers in an airtight container at room temperature or in the fridge if your home is warm. It keeps well for about 5 days, and I find the texture holds up nicely without the chocolate melting or marshmallows getting sticky.
Freezing
I’ve frozen leftover bark a few times by wrapping pieces tightly in plastic wrap and placing them in a freezer-safe bag. When thawed, they keep their texture with just a slight softening of the chocolate—great for saving extra treats from party leftovers.
Reheating
Since this is a no-bake treat, reheating isn’t really necessary, but if the bark gets too cold or hard, letting it sit at room temperature for 10-15 minutes softens it perfectly without losing that fabulous gooey charm.
FAQs
-
Can I use mini marshmallows instead of large ones?
Absolutely! Mini marshmallows melt more evenly and quickly, but you might need to adjust melting time slightly to avoid burning — just keep stirring and microwave in short bursts for best results.
-
Can I substitute chocolate types?
Yes, you can use milk, dark, or white chocolate depending on your preference. Just be aware that milk chocolate is sweeter, so adjust your candy toppings accordingly if you want a balanced bark.
-
How long does Halloween Bark last?
Stored in an airtight container at room temperature or refrigerated, it will stay fresh and delicious for up to 5 days, making it perfect for making ahead of your Halloween festivities.
-
Is this recipe kid-friendly to make?
Definitely! Kids will love helping spread the marshmallows and chocolate or adding their favorite candies on top—and since there’s no stove or oven involved, it’s a safe and fun Halloween activity.
Final Thoughts
This Halloween Bark Recipe has become one of my favorite seasonal treats because it’s just as fun to make as it is to eat. The mix of textures, the sweet marshmallow goo, and the rich chocolate all combine for a nostalgic, comforting snack perfect for sharing with family and friends on a chilly October evening. I can’t wait for you to try it and make it your own — trust me, once you’ve had a piece, you’ll be hooked just like we are!
Print
Halloween Bark Recipe
- Prep Time: 15 minutes
- Cook Time: 0 minutes
- Total Time: 45 minutes
- Yield: 20 servings 1x
- Category: Dessert
- Method: No-Cook
- Cuisine: American
Description
This Halloween Bark recipe is a fun and festive no-bake treat perfect for the spooky season. It layers graham crackers with melted marshmallows and rich semi-sweet chocolate, then decorates the top with a variety of colorful Halloween candies. Easy to make and great for parties or as a holiday snack.
Ingredients
Base Layer
- 12 large graham crackers
Marshmallow Mixture
- 40 large marshmallows (or 300 grams mini marshmallows)
- 1/4 cup unsalted butter (melted)
Chocolate Topping
- 8 ounces Baker’s semi-sweet chocolate (broken into small squares)
Decoration
- Variety of Halloween candy
Instructions
- Prepare the baking sheet: Line a 9.5″ x 13″ baking sheet with parchment paper to prevent sticking and make cleanup easier.
- Arrange graham crackers: Place 12 large graham crackers in a single layer on the prepared baking sheet, covering the entire surface evenly.
- Melt the marshmallow mixture: In a large microwave-safe bowl, add the marshmallows and pour the melted butter on top. Stir to coat the marshmallows thoroughly in butter. Microwave the mixture in 30-second increments, stirring between each, until the marshmallows have completely melted and the mixture is smooth.
- Spread marshmallows over crackers: Immediately pour the melted marshmallow mixture over the graham crackers, spreading it carefully to reach close to the edges, ensuring an even layer.
- Melt the chocolate: In another microwave-safe bowl, melt the semi-sweet chocolate by microwaving in 30-second increments, stirring well after each, until it is smooth and fully melted.
- Apply the chocolate layer: Pour the melted chocolate over the marshmallow layer. Use a spatula to spread it evenly across the surface for a uniform chocolate coating.
- Add candy decorations: While the chocolate is still soft, press your choice of Halloween candy firmly into the surface, creating a festive and colorful bark.
- Chill to set: Place the bark in the refrigerator and chill for at least 30 minutes, or until the chocolate and marshmallow layers have fully set and hardened.
- Cut and serve: Remove from the fridge, lift the bark from the baking sheet using the parchment paper, and cut into approximately 20 pieces for serving.
Notes
- Use mini marshmallows if you prefer, weighing about 300 grams for the 40 large marshmallows equivalent.
- Be careful not to overheat the marshmallows or chocolate in the microwave to avoid burning.
- Choose Halloween candy that will stick well to the chocolate without melting if the bark is stored at room temperature.
- Store leftover bark in an airtight container in the refrigerator for up to one week.
- You can customize the candy toppings based on your favorite Halloween treats for variation.
Nutrition
- Serving Size: 1 piece (approximate)
- Calories: 180
- Sugar: 22g
- Sodium: 80mg
- Fat: 7g
- Saturated Fat: 4g
- Unsaturated Fat: 2g
- Trans Fat: 0g
- Carbohydrates: 27g
- Fiber: 1g
- Protein: 2g
- Cholesterol: 10mg

