
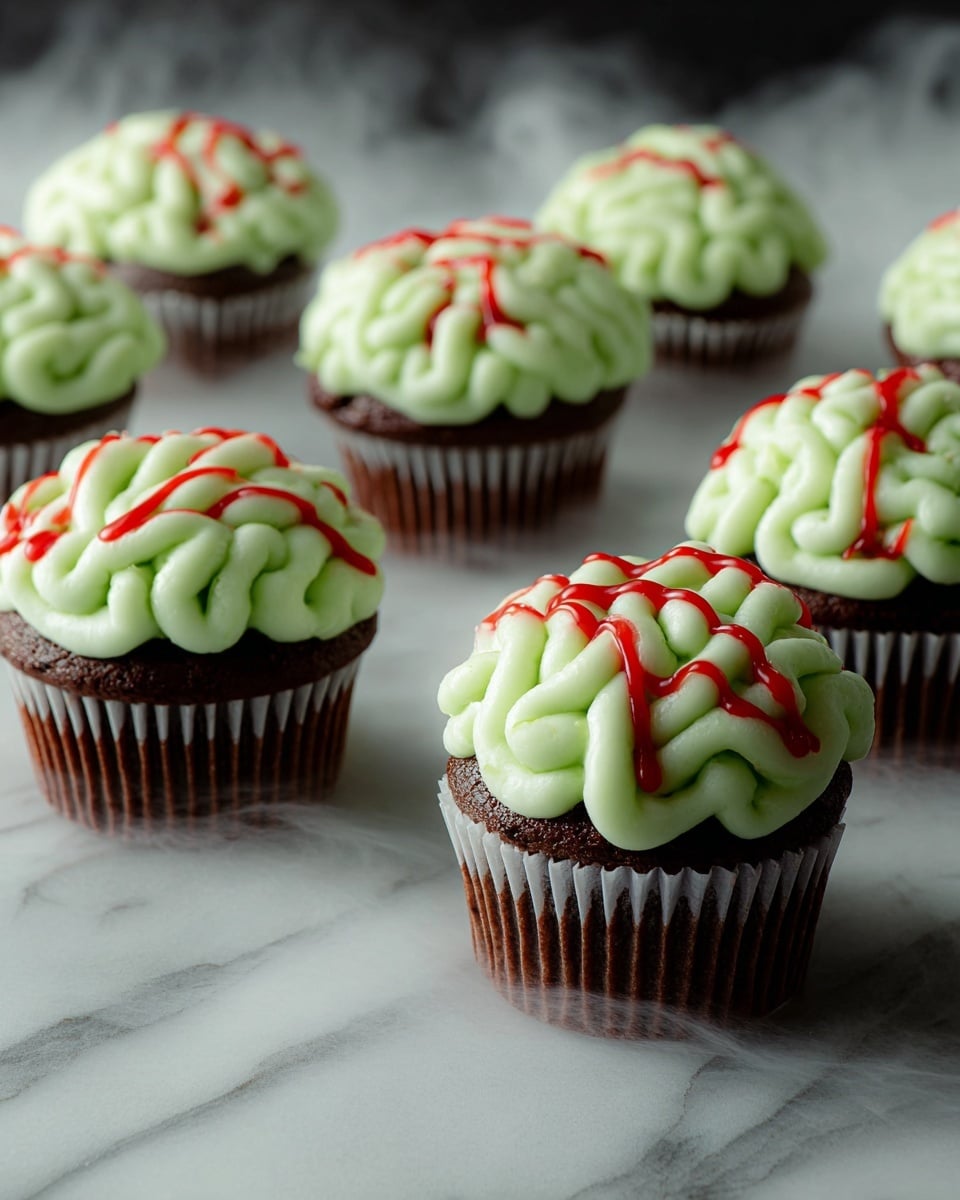
If you’re in the mood for something spooky, fun, and absolutely delicious, you’re going to want to try this Zombie Brain Cupcakes Recipe. I remember the first time I made these—they were a total hit at my Halloween party! The rich chocolate base paired with the creamy neon-green frosting makes for an unforgettable cupcake that’s as playful as it is tasty. Plus, decorating them to look like creepy zombie brains? Such a blast. Stick with me and I’ll walk you through every step so you end up with perfect creepy cupcakes everyone will rave about.
Why You’ll Love This Recipe
- Uniquely Themed & Tasty: These cupcakes look the part but taste like a rich chocolate dream with a creamy green frosting twist.
- Fun to Decorate: I love piped brain squiggles that are easier than they look—your friends will be amazed at your decorating skills.
- Simple Ingredients: You probably have most of what you need in your pantry already, making this a fuss-free festive treat.
- Perfect for Parties: These cupcakes are a conversation starter and joy for all ages at Halloween or themed get-togethers.
Ingredients You’ll Need
The magic of this Zombie Brain Cupcakes Recipe really lies in how the classic chocolate cupcake and buttery frosting come together to create something spooky yet scrumptious. Here’s a run-down of what you’ll need and why each ingredient works its charm.
- All-purpose flour: Gives the cupcakes a tender yet sturdy crumb—your base for a moist cake.
- Granulated sugar: Sweetens while helping add structure and that classic cupcake texture.
- Unsweetened cocoa powder: Delivers rich chocolate flavor with no extra sweetness.
- Baking powder & baking soda: These help your cupcakes rise perfectly, avoiding any flat or dense batches.
- Kosher salt: Enhances all the flavors, even in sweet recipes—don’t skip it!
- Buttermilk or whole milk: Buttermilk adds a subtle tang and helps tenderness; whole milk works great if you don’t have buttermilk.
- Neutral oil: Keeps cupcakes moist without overpowering flavors.
- Large egg: Binds everything and adds richness; be sure it’s at room temperature for best mixing.
- Pure vanilla extract: Magic flavor booster that rounds out the taste.
- Boiling water: This is a key trick—it blooms the cocoa for a deeper chocolate taste and thin batter that gives a tender crumb.
- Powdered sugar (for frosting): Ensures a silky smooth, sweet base for the buttercream.
- Unsalted butter (room temp): The foundation of your frosting—make sure it’s soft for easy whipping.
- Neon green liquid food coloring: The star for that eerie zombie brain color.
- Red decorating gel: Adds the perfect blood-drip finish on your brain cupcakes.
Variations
I love experimenting with this Zombie Brain Cupcakes Recipe, and you’ll find it’s incredibly versatile if you want to tweak things to your liking. It’s all about making it your own, whether that means flavor swaps or decorating styles.
- Flavor Twist: Once, I swapped half the cocoa for matcha powder to create a green earthier base—the brain green frosting popped even more against it!
- Dairy-Free Version: Replace butter with vegan margarine and use almond or oat milk; I did this for a friend’s party and no one noticed the difference.
- Different Colors: Feel free to get creative with food coloring—purple or bright orange for other monster vibes. I tried purple once and it was a hit at a witch-themed birthday.
- Alternative Frosting: You can use cream cheese frosting tinted green, but be sure to chill them well as cream cheese softens faster.
How to Make Zombie Brain Cupcakes Recipe
Step 1: Prepare Your Batter for Moist Chocolate Goodness
Start by preheating your oven to 350°F and line a 12-cup muffin tin with paper liners. Getting your oven ready early is key to avoid any grilling mishaps. In a large bowl, whisk together your dry ingredients—flour, sugar, cocoa, baking powder, baking soda, and salt—until evenly combined. Then add the buttermilk, oil, beaten egg, and vanilla. Give everything a good whisk until the batter is smooth and satiny. The final touch is pouring in the boiling water—that’s the secret to unlocking a deep chocolate flavor and a beautifully tender crumb. Mix it in carefully; your batter will be thin but that’s totally right.
Step 2: Fill, Bake, and Cool
Use a 1/4 cup measure to fill each liner about two-thirds full—that way they rise up perfectly without overflow. Slide your tray into the oven and bake for 18-20 minutes. Don’t rush the tester test; insert a toothpick in the middle—if it comes out clean or with a few moist crumbs, they’re done. Cool the cupcakes completely on a wire rack before frosting. I’ve made the mistake of frosting while warm and ended up with a frosting meltdown—trust me, patience pays off!
Step 3: Whip Up That Bright Green Brain Frosting
In a stand mixer with the whisk attachment, beat your butter, powdered sugar, vanilla, and salt on medium-high speed until the frosting turns bright white and super smooth—about 2 to 3 minutes. This step is where the magic starts! Slowly add your neon green food coloring, mixing well after each drop. Play around with the amount to get a vivid, eerie green. Transfer this luscious frosting to a piping bag fitted with a small round tip for precise decorating.
Step 4: Pipe the Zombie Brains and Add the Bloody Finish
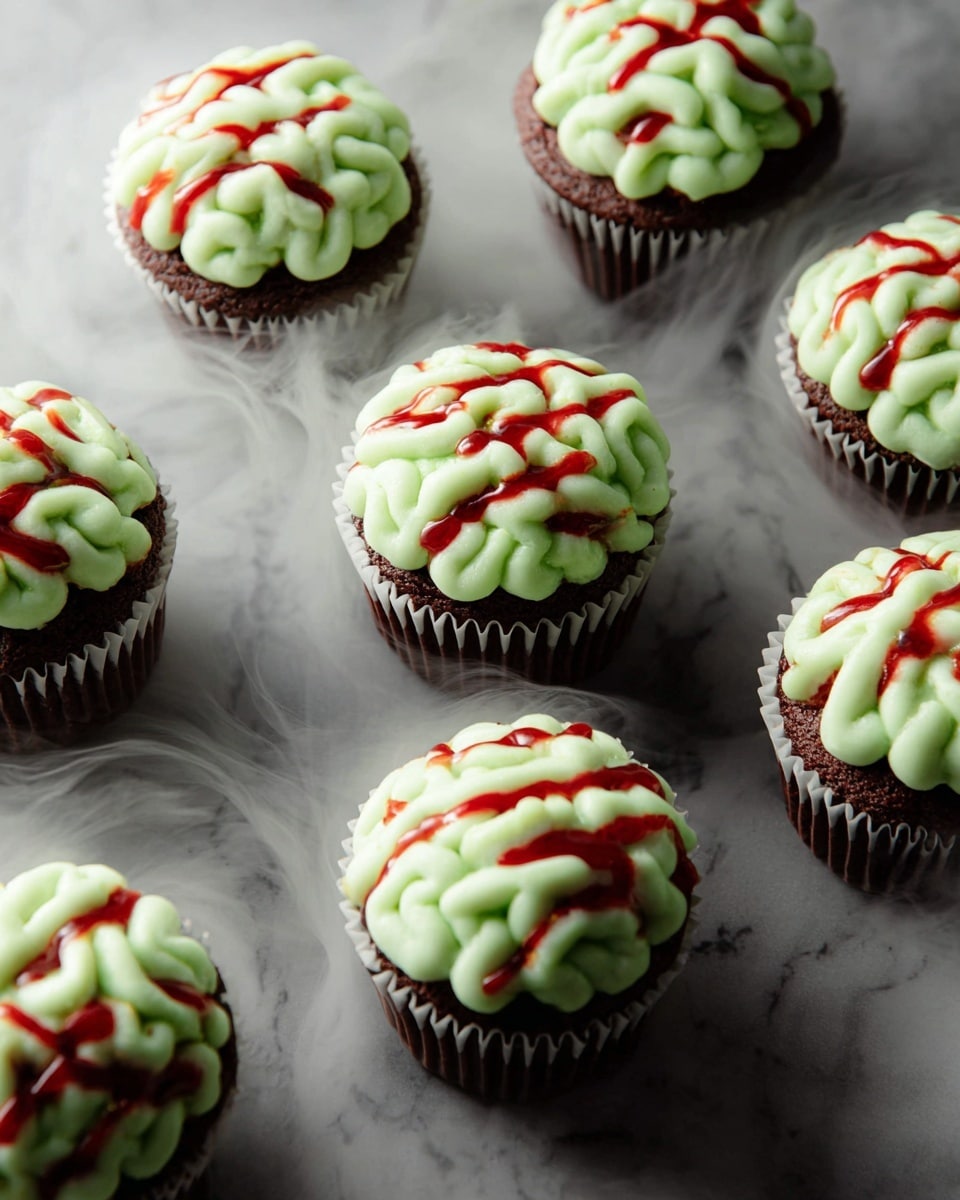
Pipe a small mound about the size of a quarter on the center of each cupcake. Then pipe two vertical lines side by side right down the middle. Next, add squiggly lines on each side of those vertical lines—this look mimics the brain’s lobes and folds. Don’t worry if your lines aren’t perfect; the beauty here is in that messy brain effect. Finally, drizzle a bit of red decorating gel over the top, letting it seep into the crevices to mimic dripping blood. If you won’t serve immediately, pop the cupcakes in the fridge to set everything nicely.
Pro Tips for Making Zombie Brain Cupcakes Recipe
- Use Boiling Water Wisely: Mixing the boiling water last and carefully ensures your batter doesn’t scramble the eggs and enhances cocoa flavor beautifully.
- Frosting Consistency: Beat frosting long enough for that bright white base—it really makes the green color pop after adding food coloring.
- Piping Technique: Practice your squiggly lines on parchment paper first; it helps you get a feel for the desired “brain texture.”
- Avoid Warm Cupcakes: Always frost when cupcakes are completely cool to stop frosting from melting and sliding off.
How to Serve Zombie Brain Cupcakes Recipe
Garnishes
I usually keep the garnishes simple to highlight the “brain” frosting effect, but the red decorating gel is my must-have to give that extra gore factor. For a little extra flair, a sprinkle of edible glitter or sugar crystals can make the brains look wet and creepy under the party lights—super fun and surprisingly elegant!
Side Dishes
Since these cupcakes are pretty rich, I like serving fresh fruit or a crisp green salad alongside to balance out the sweetness. For a Halloween bash, a bowl of fresh berries or candied apples adds nice contrast without taking attention away from these show-stoppers.
Creative Ways to Present
One year, I displayed the cupcakes in a coffin-shaped tray with plastic spiders and cobwebs around. You could also put them on skull-shaped plates or create a mini “mad scientist” lab setup with test tubes of colored drinks. The brainy piping makes these cupcakes conversation starters, so have fun with the theme!
Make Ahead and Storage
Storing Leftovers
Any leftover Zombie Brain Cupcakes store beautifully covered in an airtight container in the fridge for up to 3 days. I’ve found that letting them come to room temperature about 30 minutes before serving helps the frosting soften and tasting experience improve.
Freezing
These freeze really well—wrap each cupcake individually in plastic wrap, then place them in a freezer-safe container. When I’ve done this, I usually freeze them un-frosted and then frost after thawing for the freshest look and taste. Frozen cupcakes can last up to 2 months.
Reheating
If you freeze cupcakes fully decorated, just thaw in the fridge overnight. To freshen them up, bring them to room temperature and serve without reheating—the frosting texture changes if warmed. If you like your frosting softer, a gentle 10-second zap in the microwave can help, but watch closely!
FAQs
-
Can I make the Zombie Brain Cupcakes recipe vegan?
Absolutely! Swap the egg for a flax egg (1 tbsp flaxseed meal + 3 tbsp water), use plant-based milk like almond or oat, and substitute vegan butter for the frosting. The texture might be slightly different, but the spooky look and overall flavor remain delightful.
-
What if I don’t have neon green food coloring?
You can mix yellow and blue gel food colors to make bright green if you don’t have neon green. Gel colors are recommended to avoid thinning the frosting. Also, experimenting with the quantity helps you get that perfect eerie glow.
-
How do I pipe the brain squiggles if I’m new to decorating?
Start by practicing the squiggly lines on parchment paper—imagine drawing interlocking “S” shapes or waves. Keeping pressure steady and moving your hand fluidly helps. Remember, a slightly messy look actually makes the brains look more realistic!
-
Can I make these cupcakes ahead for a party?
Definitely! You can bake the cupcakes a day or two ahead and store them un-frosted in an airtight container at room temperature. Frost and decorate on the day of your event for the freshest presentation, or frost in advance and refrigerate carefully.
Final Thoughts
I absolutely love how this Zombie Brain Cupcakes Recipe blends fun, flavor, and creativity into a single treat. It’s not every day you can have a party dessert that doubles as a conversation piece and satisfies chocolate cravings so well. Whether you’re baking for a Halloween gathering or just want to surprise your family with something delightfully weird and delicious, this recipe won’t disappoint you. Give it a go—I promise you’ll be glad you did, and your friends will keep asking for your secret brain-making skills!
Print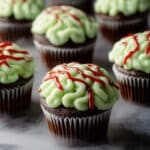
Zombie Brain Cupcakes Recipe
- Prep Time: 30 mins
- Cook Time: 20 mins
- Total Time: 2 hrs
- Yield: 12 cupcakes 1x
- Category: Dessert
- Method: Baking
- Cuisine: American
- Diet: Vegetarian
Description
These Zombie Brain Cupcakes are a spooky and delicious treat perfect for Halloween or any themed party. Moist chocolate cupcakes are topped with a vibrant green buttercream frosting, piped to resemble creepy zombie brains, and finished with a drizzle of red decorating gel for a gory effect.
Ingredients
Cupcakes
- 1 1/4 cups (150 g) all-purpose flour
- 1 cup (200 g) granulated sugar
- 1/2 cup (40 g) unsweetened cocoa powder
- 1 tsp baking powder
- 1/2 tsp baking soda
- 1/2 tsp kosher salt
- 1/2 cup (120 ml) buttermilk or whole milk
- 1/4 cup neutral oil
- 1 large egg, beaten
- 1/2 tsp pure vanilla extract
- 1/4 cup boiling water
Frosting & Assembly
- 4 cups (455 g) powdered sugar, sifted
- 1 1/2 cups (3 sticks) unsalted butter, room temperature
- 1 tsp pure vanilla extract
- 1/4 tsp kosher salt
- 2 to 3 drops neon green liquid food coloring
- Red decorating gel, for drizzling
Instructions
- Prepare the Oven and Pan: Preheat the oven to 350°F (175°C). Line a standard 12-cup muffin tin with cupcake liners to ensure easy removal and cleanup.
- Mix Dry Ingredients: In a large bowl, whisk together the all-purpose flour, granulated sugar, unsweetened cocoa powder, baking powder, baking soda, and kosher salt until evenly combined.
- Add Wet Ingredients: Pour in the buttermilk (or whole milk), neutral oil, beaten egg, and vanilla extract. Whisk together until the batter is smooth and homogeneous.
- Incorporate Boiling Water: Carefully add the boiling water to the batter and whisk until fully combined. This step helps to create a moist, tender cupcake texture.
- Fill the Liners: Using a 1/4 cup (60 ml) measure, fill each cupcake liner about two-thirds full with batter, distributing evenly among the 12 cups.
- Bake the Cupcakes: Place the muffin tin in the preheated oven and bake for 18 to 20 minutes, or until the cupcakes have risen and a toothpick inserted into the center comes out clean.
- Cool the Cupcakes: Remove the cupcakes from the oven and let them cool completely in the muffin tin for about 10 minutes, then transfer to a wire rack to cool fully, approximately 1 hour.
- Make the Frosting: In a large bowl, using a stand mixer fitted with the whisk attachment or an electric mixer, beat the sifted powdered sugar, room temperature unsalted butter, vanilla extract, and kosher salt on medium-high speed. Beat for 2 to 3 minutes until the frosting is bright white, smooth, and fluffy.
- Tint the Frosting: Add 2 to 3 drops of neon green liquid food coloring to the frosting and continue beating until the color is fully incorporated and vibrant. Adjust with more drops if a deeper green color is desired.
- Pipe the Brain Design: Transfer the green frosting to a large piping bag fitted with a small round tip. Pipe a small mound (about the size of a quarter) on top of each cooled cupcake. Next, pipe two straight vertical lines side by side down the middle of each cupcake, then add squiggly lines on either side to create a brain-like appearance.
- Apply the Red Gel: Using red decorating gel, drizzle a small amount onto each cupcake, allowing it to settle into the creases of the piped brain to mimic blood and add a gory effect.
- Chill if Needed: Refrigerate cupcakes if they will not be served immediately to keep the frosting firm and fresh.
Notes
- For best results, ensure all ingredients are at room temperature before mixing.
- Use a neutral oil like vegetable or canola oil for a clean taste.
- Boiling water helps intensify the chocolate flavor; do not skip this step.
- Adjust the amount of green food coloring according to your desired intensity.
- Keep cupcakes refrigerated if not served within 2 hours to maintain frosting texture.
- These cupcakes can be made a day ahead and stored in an airtight container in the refrigerator.
Nutrition
- Serving Size: 1 cupcake
- Calories: 350
- Sugar: 33g
- Sodium: 140mg
- Fat: 18g
- Saturated Fat: 11g
- Unsaturated Fat: 6g
- Trans Fat: 0g
- Carbohydrates: 45g
- Fiber: 2g
- Protein: 3g
- Cholesterol: 40mg


