
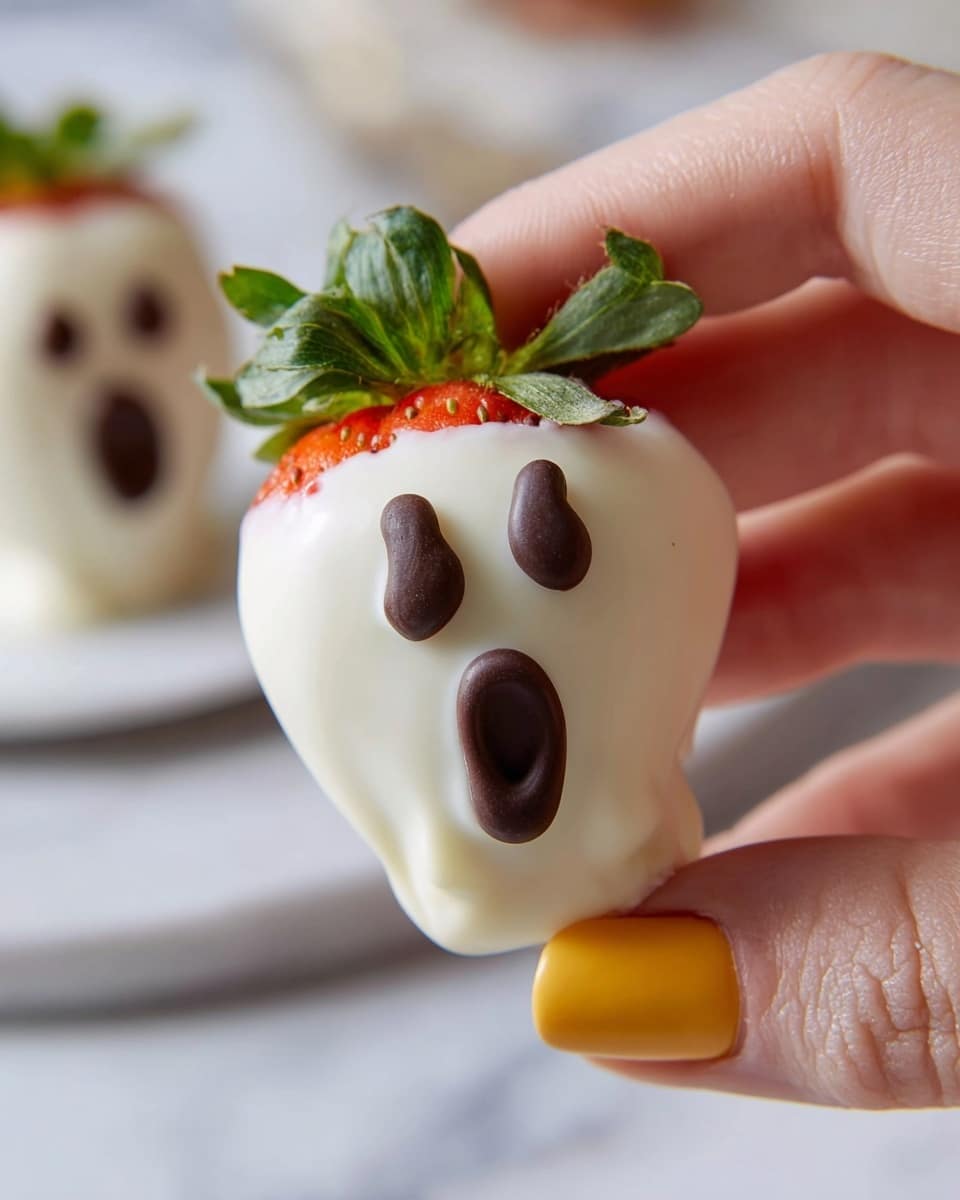
If you’re looking for a fun and spooky treat that’s quick to make and sure to be a hit, you’ve got to try my Strawberry Ghosts Recipe. These adorable little desserts are not only super simple but also downright delicious—perfect for Halloween or any time you want to add a little whimsy to your day. Stick around, and I’ll walk you through my favorite way to bring these sweet strawberry ghosts to life in your kitchen!
Why You’ll Love This Recipe
- Super Easy: You only need a handful of ingredients and about 20 minutes total, making it perfect for last-minute treats.
- Kid-Friendly Fun: Decorating these strawberry ghosts is a blast for kids and adults alike.
- Fresh & Sweet: The fresh strawberries balance out the rich white and dark chocolate beautifully.
- Versatile Treat: Great for parties, snacks, or even a charming dessert centerpiece.
Ingredients You’ll Need
The ingredients here are super straightforward, and each plays an essential role in making your strawberry ghosts look adorable without compromising on flavor. When I shop for strawberries, I always choose firm, bright red ones—they hold up better when dipped and look more ghostly crisp.
- Strawberries: Fresh, ripe strawberries are your ghost’s “body.” Choose medium to large-sized so they hold a good shape after dipping.
- White chocolate: This coats the strawberries in a smooth, creamy layer that gives them that classic ghostly white look.
- Coconut oil: A tiny bit added to the white chocolate helps it melt perfectly and gives a shiny finish on the ghosts.
- Mini chocolate chips: These form the eyes, adding a cute yet spooky contrast to the white chocolate.
- Chocolate chips (regular size): Melted and used for piping the ghostly mouths — trust me, a little piping bag magic makes all the difference.
Variations
I love how flexible this Strawberry Ghosts Recipe is. Over the years, I’ve experimented with a few tweaks—adding a little flavor twist here and there or adapting it to sweeter or dietary preferences. Feel free to make this recipe your own!
- Dark chocolate coating: If you find white chocolate too sweet, swapping it for dark chocolate adds depth and a spooky vibe to your ghosts.
- Almond or peanut butter chips: Great for a nutty ghost twist that tastes out-of-this-world delicious.
- Decorative sprinkles: Add Halloween-themed sprinkles after dipping, for an extra festive touch that kids adore.
- Vegan version: Use dairy-free white chocolate and dark chocolate chips and you’re good to go for a plant-based treat!
How to Make Strawberry Ghosts Recipe
Step 1: Prep your workspace and strawberries
Start by lining a small baking sheet with parchment paper—this keeps the ghosts from sticking and makes cleanup a breeze. Wash your strawberries gently and thoroughly, then dry them well. Trust me, if the berries are even a bit wet, the chocolate won’t stick properly!
Step 2: Melt your white chocolate with coconut oil
In a large bowl, combine the white chocolate with the coconut oil. I usually melt them in the microwave in 20-second bursts, stirring each time until silky smooth—this keeps the chocolate from burning. The coconut oil gives a gorgeous glossy finish and makes dipping easier.
Step 3: Dip strawberries and add your eyes
Hold each strawberry by the stem and dip it into the white chocolate, turning to coat as much as you like. Then, before the coating sets, carefully press two mini chocolate chips near the top for eyes. I find pressing them gently with a toothpick makes placement precise and keeps them stuck nicely.
Step 4: Chill the ghosts
Place your dipped strawberries on the parchment-lined tray and pop it into the refrigerator for about 10 minutes. This step helps the chocolate harden just enough so the next decorating step won’t smear.
Step 5: Pipe on the mouths
Melt your regular size chocolate chips the same way as before and transfer the melted chocolate into a ziplock bag. Snip a tiny corner and carefully pipe little mouths on each strawberry ghost. This is where your creative flair shines—whether it’s a spooky “O” shape or a quirky smile.
Step 6: Final chill and serve
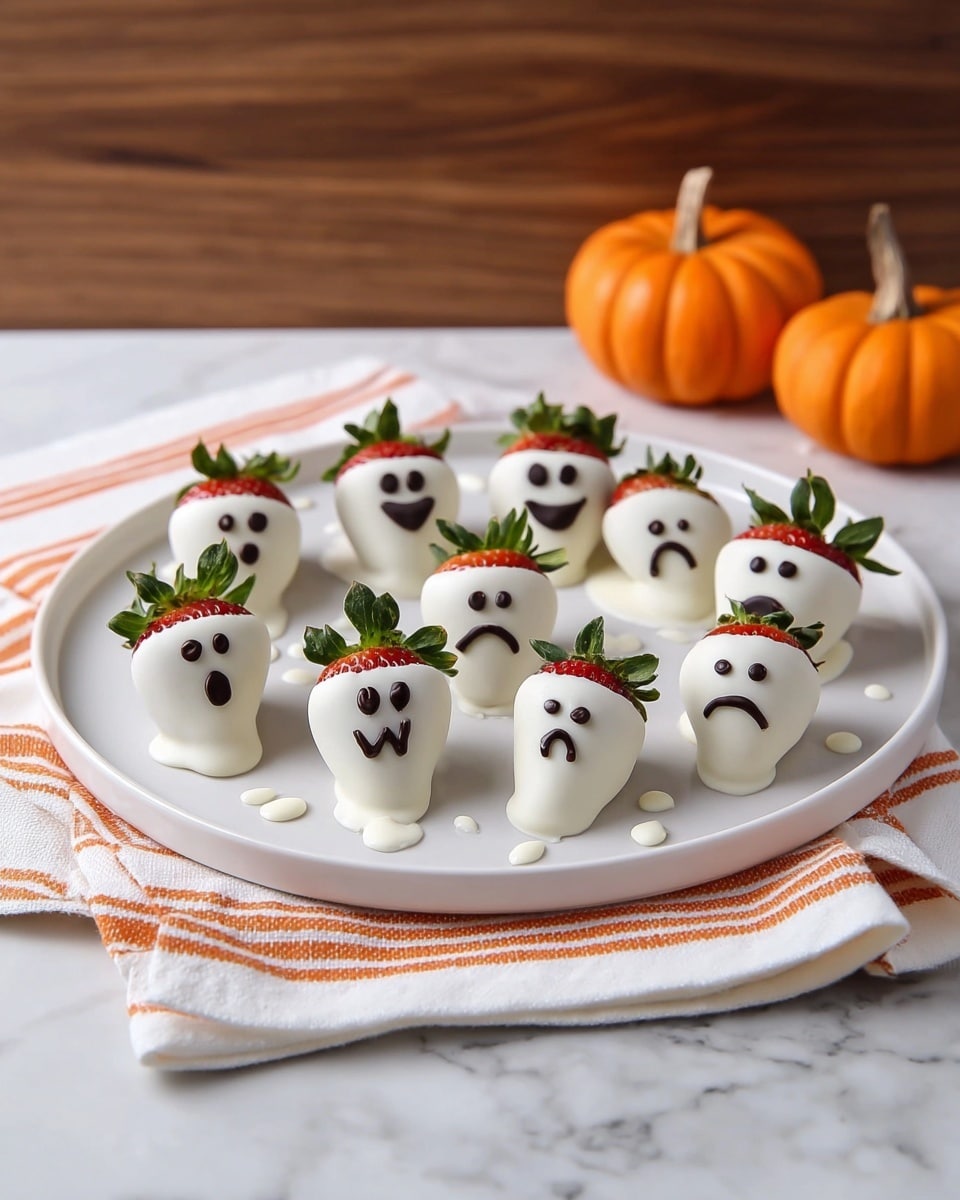
Pop the tray back in the fridge for about 5 minutes to let the mouths set. Once firm, your strawberry ghosts are ready to haunt your dessert table! Serve chilled for the best texture and freshness.
Pro Tips for Making Strawberry Ghosts Recipe
- Room Temperature Chocolate: Always use white and dark chocolate at room temperature before melting to avoid lumps and graininess.
- Dry Strawberries Are Key: I learned the hard way that any moisture ruins the chocolate coating, so drying berries thoroughly is a must.
- Use Parchment Paper: It’s a game changer for easy removal and cleanup; wax paper tends to stick and get messy.
- Control Your Piping Bag: I squeeze gently and rotate the strawberry to get the perfect ghostly mouth without a mess.
How to Serve Strawberry Ghosts Recipe
Garnishes
I love to sprinkle a little edible glitter on these strawberry ghosts to add shimmer—makes them look magical under party lights. Sometimes, a dusting of cocoa powder around the edges can add a little Halloween “spookiness” without overpowering the sweetness.
Side Dishes
These ghosts pair wonderfully with a simple bowl of whipped cream or a scoop of vanilla ice cream. For a fall-themed spread, serve alongside pumpkin muffins or spiced nuts for contrast. Trust me, this combo is always a crowd-pleaser!
Creative Ways to Present
For a party, I arrange the strawberry ghosts upright in a shallow bowl of crushed ice or coconut flakes to resemble a snowy ghostly graveyard. Another fun idea is to skewer them on sticks and serve as ghostly strawberry pops—perfect for little hands!
Make Ahead and Storage
Storing Leftovers
If you have any leftovers (they’re rare, but it happens), store your strawberry ghosts in an airtight container in the fridge. I line the container with parchment paper and place a layer of parchment between layers of strawberries to avoid sticking.
Freezing
Freezing is a bit tricky because strawberries release moisture and can get mushy. However, if you want to freeze your strawberry ghosts, do so for up to a month, wrapped well in parchment and foil. When thawed, they’re best used quickly and might lose some crispness but still taste great.
Reheating
Since this is a chilled dessert, reheating isn’t really part of the game plan. If chocolate softens, just pop them back in the fridge until firm. Best enjoyed cold, straight from the fridge for that perfect crisp bite.
FAQs
-
Can I use frozen strawberries for this Strawberry Ghosts Recipe?
It’s best to use fresh strawberries because frozen ones release too much moisture when thawed, which can cause the chocolate not to stick well and make the coating soggy.
-
What if I don’t have mini chocolate chips for eyes?
You can use small dots of melted chocolate piped on with a toothpick or tiny edible chocolate pearls to create the eyes. Another fun option is to use small bits of raisins or currants if you prefer a natural ingredient.
-
How long do Strawberry Ghosts stay fresh?
Stored properly in the fridge, your strawberry ghosts stay fresh and delicious for up to 2 days. After that, the strawberries may soften, so they’re definitely best enjoyed fresh and chilled.
-
Can I make these without coconut oil?
You can skip coconut oil, but the chocolate may be thicker and less glossy. If you don’t have it, adding a small splash of vegetable oil or shortening works as a substitute to keep the chocolate smooth.
Final Thoughts
Honestly, I absolutely love how this Strawberry Ghosts Recipe turns out every single time. It’s one of those simple joy recipes that gets everyone in the kitchen involved—and I always get compliments on the adorable spooky faces! Whether you’re making them for a party, a festive snack, or just because you want to brighten up your day, these sweet little ghosts won’t disappoint. Give it a try, and I promise you’ll be hooked on this charming and tasty treat.
Print
Strawberry Ghosts Recipe
- Prep Time: 10 mins
- Cook Time: 0 mins
- Total Time: 20 mins
- Yield: 4 servings 1x
- Category: Dessert
- Method: No-Cook
- Cuisine: American
Description
Strawberry Ghosts are a fun and festive treat perfect for Halloween or spooky-themed parties. Fresh strawberries are dipped in creamy white chocolate, topped with mini chocolate chip eyes, and finished with piped dark chocolate mouths to create adorable ghost faces. This no-bake recipe is quick, easy, and sure to delight kids and adults alike.
Ingredients
Ingredients
- 2 cups strawberries
- 1 1/2 cups white chocolate, melted
- 1 tsp coconut oil
- 1/4 cup mini chocolate chips
- 1 cup chocolate chips, melted
Instructions
- Prepare the baking sheet: Line a small baking sheet with parchment paper to prevent the strawberries from sticking during chilling.
- Dip strawberries in white chocolate: In a large bowl, combine the melted white chocolate and coconut oil, stirring until smooth and well mixed. Dip each strawberry into the white chocolate mixture, ensuring it is fully coated except for the leafy top. Place two mini chocolate chips near the top of each dipped strawberry to form eyes. Arrange the strawberries on the prepared baking sheet.
- Harden the coating: Place the baking sheet with coated strawberries in the refrigerator for about 10 minutes to allow the white chocolate to set and harden.
- Pipe the mouths: Put the melted chocolate chips into a Ziplock bag and snip a small corner to use as a piping bag. Pipe small mouth shapes onto each strawberry below the eyes to complete the ghost faces.
- Final chilling: Return the strawberries to the refrigerator for an additional 5 minutes to let the piped chocolate mouths set. Once firm, serve immediately or keep refrigerated until ready to serve.
Notes
- Use fresh, ripe strawberries for the best flavor and appearance.
- Ensure the white and dark chocolates are melted and slightly cooled before dipping and piping to avoid melting the strawberries.
- You can substitute mini chocolate chips with small candy eyes if desired.
- Store the strawberry ghosts in the refrigerator and consume within one day for optimal freshness.
Nutrition
- Serving Size: 1 serving (approx. 4 strawberries)
- Calories: 180
- Sugar: 22g
- Sodium: 15mg
- Fat: 9g
- Saturated Fat: 6g
- Unsaturated Fat: 2g
- Trans Fat: 0g
- Carbohydrates: 25g
- Fiber: 2g
- Protein: 2g
- Cholesterol: 5mg


