
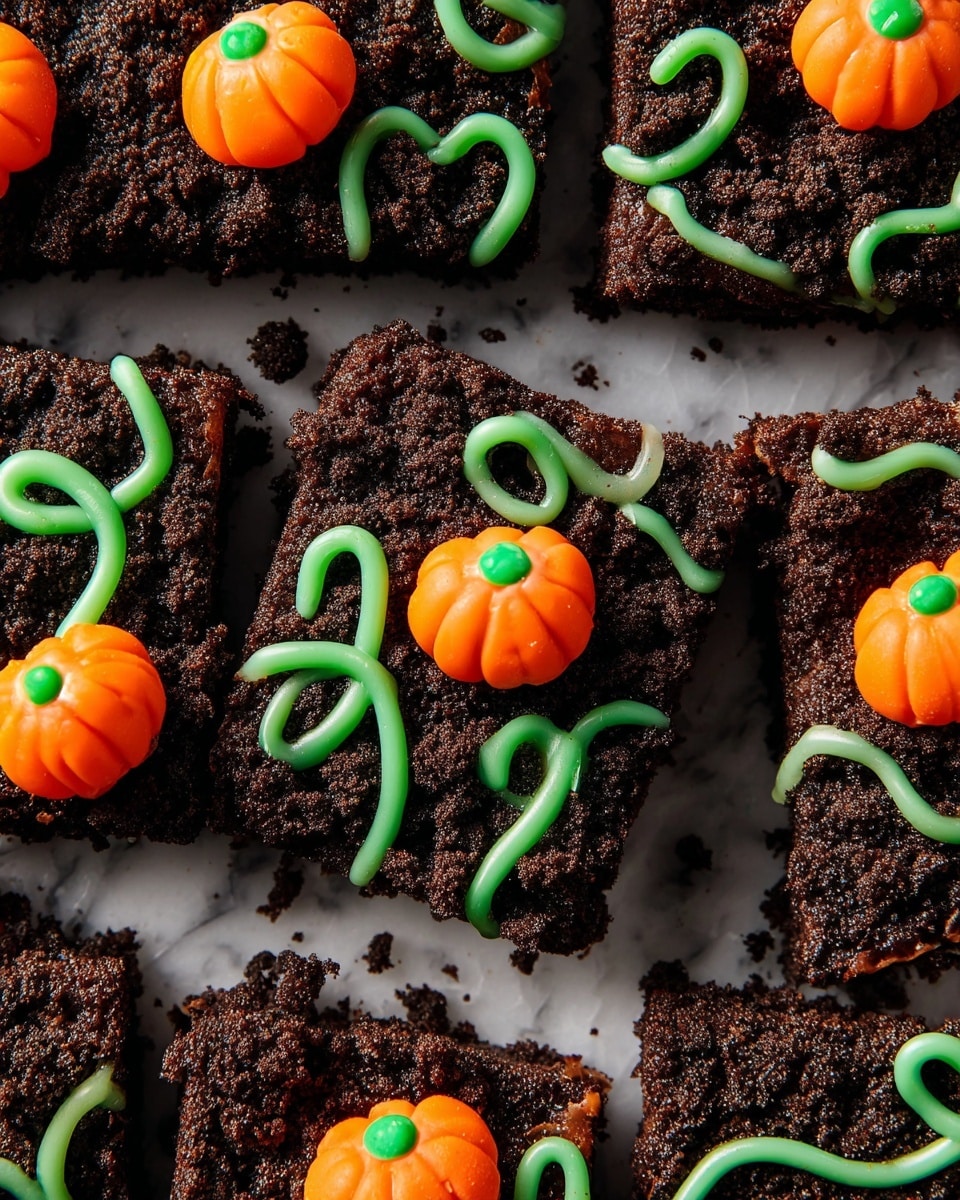
If you’re looking to wow your friends and family with a festive fall treat, you’re in for a real treat with this Pumpkin Patch Brownies Recipe. I absolutely love how these brownies combine rich, fudgy chocolate with fun, colorful decorations that remind me of a lively pumpkin patch. Whether you’re baking for Halloween or just craving a delicious seasonal dessert, this recipe hits all the right notes and is surprisingly simple to pull off. Stick around—I’m going to guide you through everything so your brownies come out perfect every single time.
Why You’ll Love This Recipe
- Easy & Fun to Make: Even if you’re not a baker, you’ll find this recipe straightforward and playful, making it perfect for all skill levels.
- Perfect Fall Vibes: The green “vines” and pumpkin candies make these brownies just as festive as they are delicious.
- Crowd-Pleaser: My family goes crazy for these brownies every time I bring them to gatherings or potlucks.
- Customizable Toppings: You can easily swap out candies or frosting flavors to suit your taste or dietary needs.
Ingredients You’ll Need
Each ingredient in this Pumpkin Patch Brownies Recipe plays an important role – from the fudgy brownies base to the creamy frosting and decorative toppings. I recommend grabbing a high-quality brownie mix for the best texture and flavor. Also, the white chocolate chips combined with food coloring are a neat trick to get those bright green vines, which really make these stand out!
- Brownie mix: Pick your favorite boxed brownie mix—this keeps things quick and foolproof.
- White chocolate chips: These melt smoothly and take on the green food coloring beautifully, perfect for piping vines.
- Vegetable oil: Helps the white chocolate melt evenly and stay pipeable without hardening too fast.
- Green food coloring: Use gel-based for a vibrant color without thinning the chocolate.
- Chocolate frosting: Creamy frosting adds a luscious layer to hold the toppings.
- Crushed Oreos: They add texture and a touch of crunch that contrasts nicely with the soft brownie.
- Pumpkin candies: Choose your favorite candy pumpkins for decorating – they bring the whole pumpkin patch theme to life.
Variations
One of the things I love most about the Pumpkin Patch Brownies Recipe is how easy it is to customize. I’ve experimented with adding different toppings and adjusting flavors to suit any occasion. Feel free to play around with it and make it yours!
- Nutty Twist: I once added chopped pecans to the brownie batter for a little crunch, and it was a hit with my nut-loving friends.
- Spiced Up: Adding a pinch of cinnamon or pumpkin pie spice to the brownie batter gives the whole dessert cozy fall warmth.
- Frosting swap: Try cream cheese frosting instead of chocolate for a tangy contrast that pairs wonderfully with the sweet brownie.
- Vegan version: Use a dairy-free brownie mix and vegan frosting to make this recipe accessible for everyone at your table.
How to Make Pumpkin Patch Brownies Recipe
Step 1: Prep and Bake the Brownies
First things first, preheat your oven to 350°F and line a 9×13-inch baking pan with parchment paper. I always grease the parchment lightly with cooking spray, so the brownies come out cleanly without sticking—trust me, this little step saves a lot of frustration! Then, mix the brownie batter according to the package instructions. Pour it evenly into your prepared pan and bake for about 28 to 30 minutes. You’ll want to check with a toothpick around 28 minutes; it should come out with just a few moist crumbs attached, not wet batter. Once baked, let your brownies cool completely before moving on — this really helps the frosting go on smoothly.
Step 2: Create the Green Vines
Here’s a fun technique I discovered when I first tackled this recipe: combine white chocolate chips with a tablespoon of vegetable oil and green food coloring in a small bowl. The oil keeps the white chocolate silky and perfect for piping without hardening too quickly. Pop the mixture into the microwave in 30-second intervals, stirring between each until everything’s smooth and melted. Transfer the green chocolate to a small ziplock bag, snip off a tiny corner, and you’re ready to pipe your leafy vines all over the brownie surface.
Step 3: Frost, Sprinkle, and Decorate
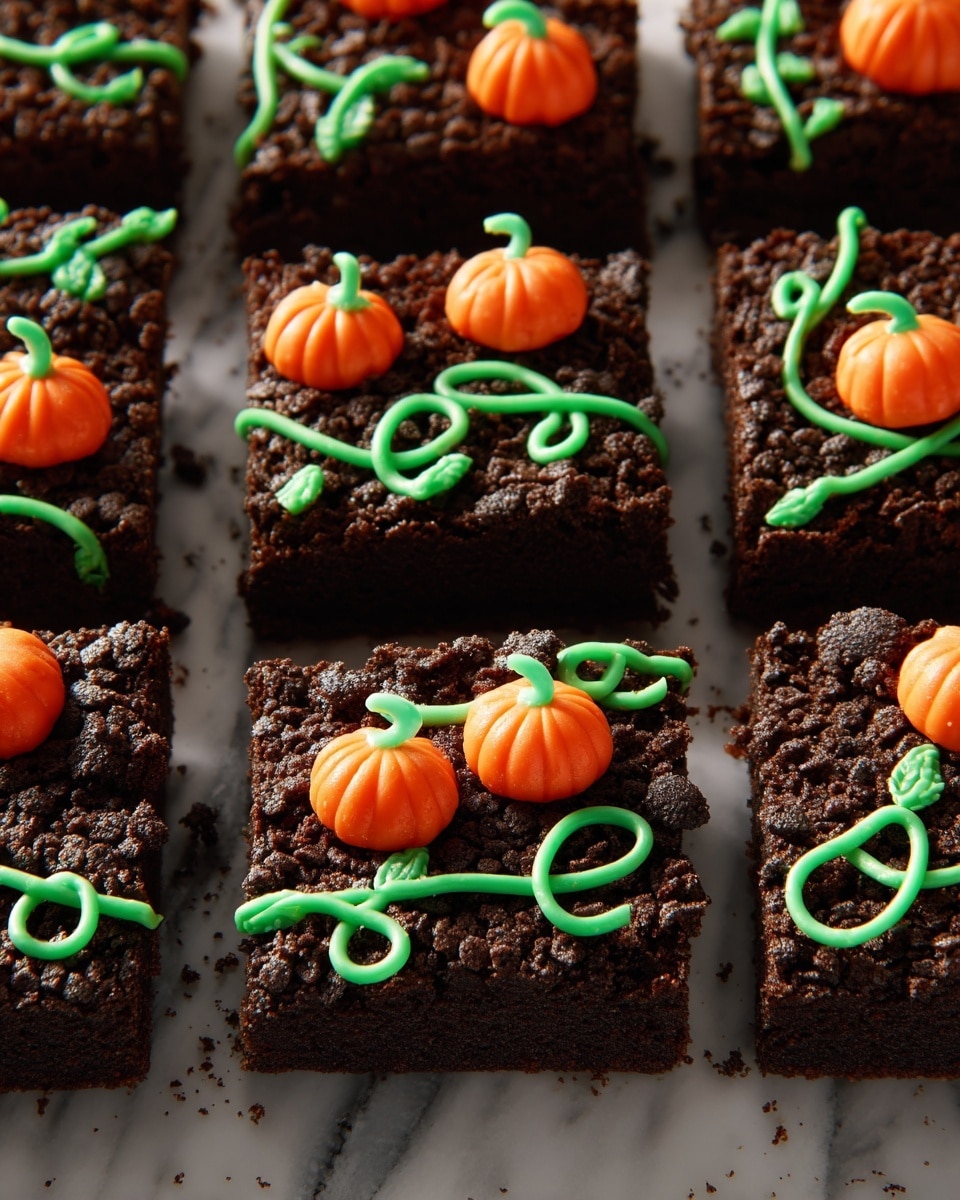
Spread a generous layer of chocolate frosting over your cooled brownies. This gives the crushed Oreos a sticky, delicious base to cling to, adding that delightful crunch. Next, pipe your green chocolate “vines” artistically across the top — I like to swirl them in natural, meandering lines to mimic real pumpkin vines. Lastly, scatter your pumpkin candies over the entire surface like little gourds nestled in a field. This decorative step always delights my family and guests, making it feel like a real festive pumpkin patch.
Pro Tips for Making Pumpkin Patch Brownies Recipe
- Perfect Bake Timing: I’ve learned that pulling the brownies out right when a toothpick has moist crumbs keeps them fudgy without being undercooked.
- Smooth Green Chocolate: Adding vegetable oil to the white chocolate helps it pipe smoothly and stay flexible longer.
- Decorate While Cool: Make sure your brownies are completely cooled before frosting or decorating to prevent melting and sliding toppings.
- Control Your Pipelines: Cut a very small hole in your ziplock bag for fine “vines” and better control of designs.
How to Serve Pumpkin Patch Brownies Recipe
Garnishes
For garnishes, I usually stick with the pumpkin candies—they look adorable and taste great. But if I’m feeling fancy, a light dusting of powdered sugar over the edges and a few mini edible pumpkins or candy corn pieces make the brownies look even more festive and inviting.
Side Dishes
These brownies are pretty indulgent on their own, but I love pairing them with a scoop of vanilla ice cream or a cup of warm apple cider. They balance the rich chocolate beautifully and add that perfect seasonal touch.
Creative Ways to Present
When hosting a fall party, I’ve put together mini dessert trays with these brownies cut into bite-sized squares, surrounded by a few additional pumpkin candies and green-colored chocolate chips to mimic a mini pumpkin patch garden. It’s always a hit and makes the table look so festive!
Make Ahead and Storage
Storing Leftovers
These brownies keep beautifully for up to 3 days stored in an airtight container at room temperature. I always recommend keeping them away from heat or direct sunlight to maintain the frosting’s texture.
Freezing
I’ve frozen leftovers wrapped tightly in plastic wrap and then placed in a freezer-safe container. They thaw well in the fridge overnight and still taste fantastic—perfect for making batches ahead of time for a party.
Reheating
Since these are brownies, I usually don’t reheat them. But if you want a warm bite, I pop a single square in the microwave for about 10 seconds. Just be careful not to melt your decorations!
FAQs
-
Can I make Pumpkin Patch Brownies from scratch instead of using a mix?
Absolutely! While this recipe uses a boxed mix for ease, you can use your favorite scratch brownie recipe and follow the same frosting and decorating steps to create your pumpkin patch masterpiece.
-
Will green food coloring affect the taste of the white chocolate?
Not really. Using gel food coloring, which is concentrated, adds vibrant color without making the chocolate runny or altering its flavor noticeably.
-
Can I use homemade frosting instead of chocolate frosting?
Yes! Homemade chocolate or even cream cheese frosting works wonderfully. Just make sure it spreads easily and isn’t too runny for the best results with your crushed Oreos and candies.
-
How do I keep the green chocolate vines from hardening too quickly?
Adding vegetable oil is the key I discovered to keep the chocolate smooth and pipeable. Also, work quickly and at room temperature for best results.
Final Thoughts
This Pumpkin Patch Brownies Recipe has become one of my absolute favorites to bake every fall because it’s as much about the fun as it is about the flavor. I love bringing it out at parties and watching people light up at the sight of those playful green vines and festive pumpkins. If you give this recipe a try, I bet you’ll enjoy not just the taste but the joyful experience of decorating them too. Trust me, it’s a feel-good dessert you’ll want to revisit year after year.
Print
Pumpkin Patch Brownies Recipe
- Prep Time: 20 mins
- Cook Time: 30 mins
- Total Time: 50 mins
- Yield: 8 – 10 servings 1x
- Category: Dessert
- Method: Baking
- Cuisine: American
Description
Delight in these festive Pumpkin Patch Brownies, featuring rich chocolate brownies topped with creamy chocolate frosting, crunchy crushed Oreos, and decorated with green white chocolate vines and colorful pumpkin candies. Perfect for a fall-themed dessert or Halloween party treat.
Ingredients
Brownie Base
- 1 box brownie mix, plus ingredients called for on box (usually eggs, oil, and water)
Decoration
- 1 cup white chocolate chips
- 1 Tbsp. vegetable oil
- Green food coloring, a few drops
- 1 can chocolate frosting
- 1 cup crushed Oreos
- Pumpkin candies, for garnish
Instructions
- Prepare and Bake Brownies: Preheat your oven to 350°F (175°C). Line a 9×13 inch baking pan with parchment paper and grease it with cooking spray. Prepare the brownie batter according to the package instructions, then pour the batter into the prepared pan. Bake for 28 to 30 minutes, or until a toothpick inserted comes out with moist crumbs. Allow the brownies to cool completely before proceeding.
- Melt and Color White Chocolate: In a small microwave-safe bowl, combine the white chocolate chips, vegetable oil, and green food coloring. Microwave in 30-second intervals, stirring in between, until the chocolate is fully melted and smooth. Transfer the melted chocolate mixture to a small ziplock bag, then cut a small tip off one corner to use as a piping bag for decorating.
- Decorate Brownies: Spread the chocolate frosting evenly over the cooled brownies. Sprinkle the crushed Oreos over the frosted surface. Using the green melted white chocolate in the piping bag, pipe vine designs across the brownies. Finally, scatter pumpkin candies on top to complete the festive pumpkin patch look.
Notes
- Ensure brownies are fully cooled before frosting to prevent melting.
- Adjust the amount of green food coloring to achieve your preferred vine color intensity.
- For extra texture, add chopped nuts to the brownie batter if desired.
- Store decorated brownies in an airtight container at room temperature for up to 3 days.
Nutrition
- Serving Size: 1 serving
- Calories: 320
- Sugar: 28g
- Sodium: 230mg
- Fat: 15g
- Saturated Fat: 8g
- Unsaturated Fat: 6g
- Trans Fat: 0g
- Carbohydrates: 42g
- Fiber: 2g
- Protein: 3g
- Cholesterol: 30mg

