
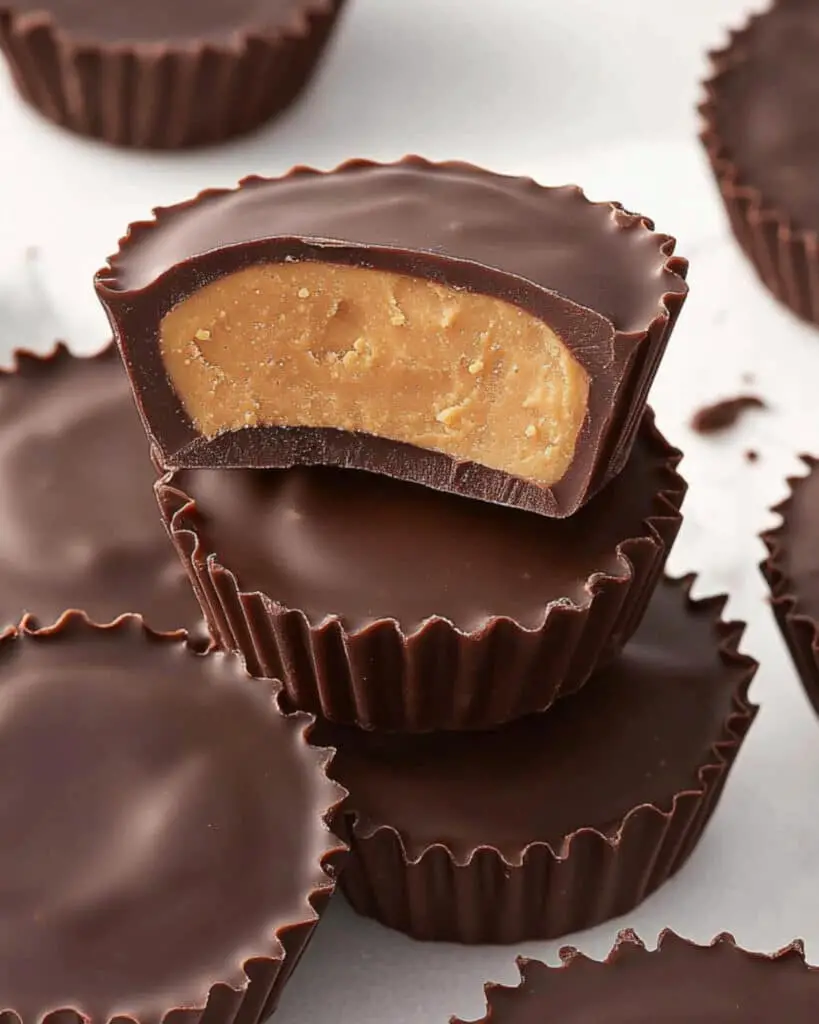
Get ready to meet the chocolate-peanut butter treat you’ll want stashed in your fridge at all times! These Protein Peanut Butter Cups bring all the nostalgic magic of classic peanut butter cups—creamy, salty peanut butter nestled inside a rich chocolate shell—with the bonus of a protein boost that lets you satisfy cravings and fuel up, all in one irresistible bite. Perfect for busy weeknights or midday snacks, they’re so easy to make that you’ll find yourself making batch after batch. There’s no fancy equipment, no special skills—just simple, straightforward steps, and a treat that tastes like pure, homemade happiness.
Why You’ll Love This Recipe
- Quick and Effortless: You only need about 20 minutes of prep—most of the “cook time” is just letting your fridge do the work.
- Guilt-Free Indulgence: Thanks to the addition of vanilla protein powder, you get a sweet treat that’s actually satisfying and filling.
- Customizable: The recipe leaves plenty of room for you to make it your own, whether you love it extra salty, super chocolatey, or want to swap in your favorite nut butter.
- Perfect for Prep: Great for stashing in the fridge or freezer, these are your grab-and-go snack solution for any time of day.
- Crowd-Pleaser: Kids and grown-ups alike will find these impossible to resist. They disappear quickly—so consider doubling the recipe!
Ingredients You’ll Need
Here’s what you’ll need, plus some quick notes for the best results:
- Semi-sweet chocolate chips: For a perfectly rich, meltable chocolate shell. Milk or dark chocolate also work if you prefer.
Tip: Choose good-quality chocolate for the deepest flavor! - Coconut oil: This helps the chocolate melt smoothly and set with a glossy snap.
Note: Use solid coconut oil for best texture. - Vanilla extract: Adds depth and warmth to the chocolate—don’t skip it!
- Natural creamy peanut butter: Get the kind with just peanuts and salt for the purest, smoothest filling.
Tip: Stir well so it’s nice and runny before using. - Pure maple syrup: Naturally sweetens the filling while keeping things gooey.
- Vanilla protein powder: The secret to extra creaminess, body, and that protein punch.
Note: Use a flavored powder you genuinely like; plant-based or whey both work. - Salt: Just a pinch in the filling to bring out all the flavors (especially important with peanut butter desserts!).
Note: You’ll find the complete list of ingredients, along with their exact measurements, in the printable recipe card at the bottom of this post.
Variations
This recipe is incredibly adaptable—here’s how you can change it up:
- Switch the Nut Butter: Almond, cashew, or sunflower seed butter all work beautifully if you’re avoiding peanuts.
- Chocolate Choices: Use milk chocolate for extra sweetness or dark chocolate for a more intense cocoa flavor.
- Crunch Factor: Stir chopped nuts or crispy quinoa into the filling for texture.
- Vegan Version: Use dairy-free chocolate chips and plant-based protein powder.
- Flavor Add-Ins: Mix a bit of cinnamon, espresso powder, or even a dash of cayenne into the chocolate for a fun spin.
How to Make Protein Peanut Butter Cups
Step 1: Prep Your Muffin Tin
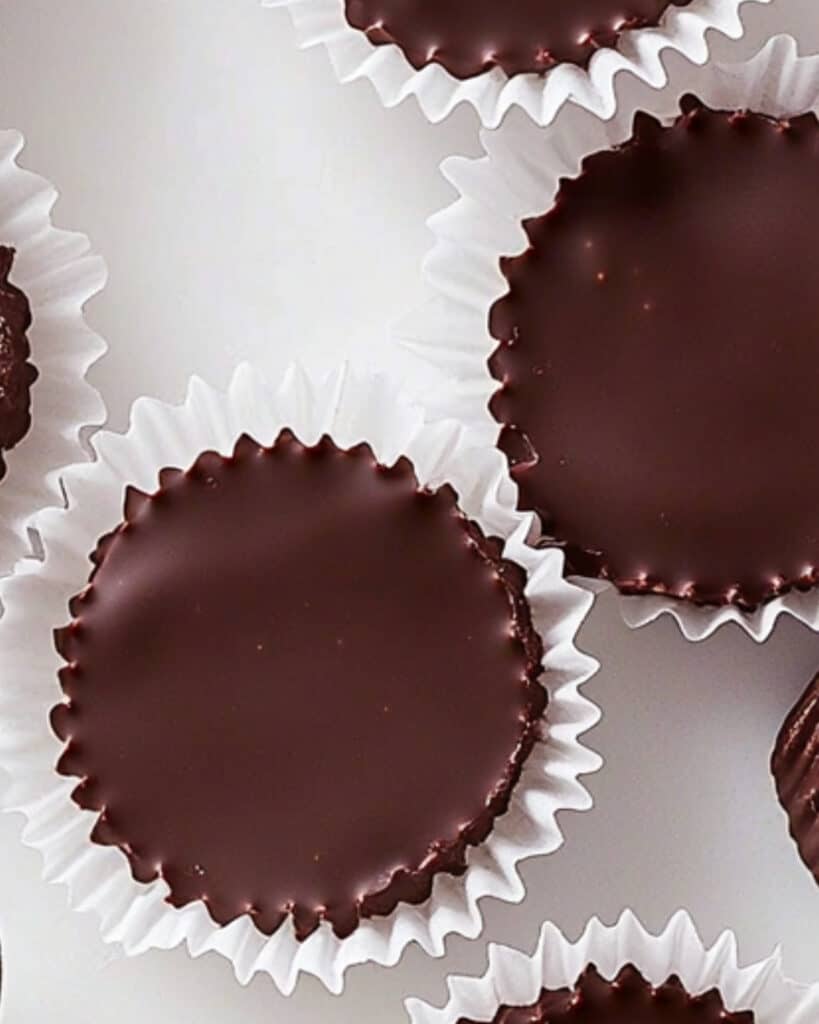
Line a 12-cup muffin tin with parchment (or silicone) liners. Silicone is great because you’ll get super clean edges every time.
Tip: Don’t skip the liners—these cups can be sticky!
Step 2: Melt the Chocolate
In a microwave-safe bowl, combine the chocolate chips and coconut oil. Microwave in 30-second bursts, stirring each time, until smooth and glossy. Once melted, stir in the vanilla extract for that irresistible aroma.
Step 3: Form the Chocolate Base
Spoon a generous teaspoon of the melted chocolate into each muffin liner, spreading it to the edges so you get a complete bottom layer. Pop the tin in the fridge while you prepare the peanut butter filling, which lets the chocolate set up perfectly.
Step 4: Make the Peanut Butter Filling
Place the peanut butter in a small bowl and microwave for about 15–20 seconds, just until it’s runny and easy to mix. Stir in the maple syrup, protein powder, and salt until everything melds together. It’ll look thick, creamy, and just slightly sticky.
Step 5: Assemble the Cups
Divide the peanut butter mixture into 12 small discs—aim for slightly smaller than the liners so the chocolate encases them. Remove the muffin tin from the fridge and gently press one peanut butter disc onto the center of each chocolate base.
Step 6: Top with Chocolate
If your chocolate has thickened, give it another quick microwave to loosen it. Drizzle the rest of the chocolate over each cup, smoothing it out so it covers the filling completely and reaches the liners.
Step 7: Set and Enjoy
Chill the muffin tin in the fridge for at least one hour, or until everything is completely set and you can easily peel away the liners. Store in a sealed container in the fridge—or the freezer if you like your treats extra cold!
Pro Tips for Making the Recipe
- Don’t rush the chilling: Give the chocolate enough time to fully harden for those beautiful, biteable layers.
- Room temp is best: Let the cups sit for a few minutes after removing from the fridge—the filling softens up and the flavors bloom.
- Use runny peanut butter: A creamy, pourable peanut butter ensures the filling won’t turn grainy or dry.
- Double the chocolate: If you love a thicker shell, use a bit more chocolate per layer.
- Customize the protein: Use your favorite protein powder, but sample the filling mixture—adjust to taste and texture.
How to Serve
These peanut butter cups shine all on their own, but here are some favorite ways to enjoy them and what they pair well with:
- Snack Plate Star: Add to a plate with fresh strawberries, apple slices, or banana for an energy-boosting snack break.
- Dessert Platter: Serve with a scoop of vanilla Greek yogurt or a glass of ice-cold milk.
- On the Go: Wrap in parchment for lunch boxes or work snacks.
- Crumble on Oatmeal or Smoothie Bowls: For a sweet-and-salty crunch.
Make Ahead and Storage
Storing Leftovers
Store your peanut butter cups in an airtight container in the refrigerator for up to a week. They keep their texture and flavor beautifully and are always ready for when a craving hits.
Freezing
If you want to make a big batch, freeze the cups on a tray and then transfer them to a freezer-safe container. They’ll keep well for up to three months. They’re delicious eaten straight from the freezer (they’re extra snappy and firm).
Reheating
No need to heat these up! Just let frozen cups sit at room temperature for a few minutes if you prefer a softer bite.
FAQs
-
Can I make these nut-free?
Absolutely! Sunflower seed butter is a fantastic replacement for peanut butter, and you can use it in exactly the same way. Be sure to check your protein powder for allergens if you’re making this for someone with nut allergies.
-
What type of protein powder works best?
Both plant-based and whey protein powders work well, but the flavor matters a lot. Pick a vanilla protein powder you already love, since it shapes the whole taste of the filling.
-
Can I use other sweeteners besides maple syrup?
Definitely. Honey, agave, or even a sugar-free syrup will work. Just keep in mind that natural sweeteners like maple and honey add a special depth and a little extra stickiness, which helps the filling hold together.
-
Why is my chocolate not setting properly?
Make sure your chocolate mixture isn’t too thin from excess coconut oil, and that you chill the cups long enough for the chocolate to firm up. Good-quality chocolate always helps with a crisp, satisfying snap.
Final Thoughts
Protein Peanut Butter Cups turn a beloved classic into a modern, protein-packed delight that truly delivers on both flavor and satisfaction. They’re the easiest way to bring a little indulgence (and a secret boost of nutrition) into busy days and sweet cravings. Dive in, make them your own, and enjoy the magic of homemade peanut butter cups—no special occasion required. Give them a try—you may never go back to the store-bought kind!
Print
Protein Peanut Butter Cups Recipe
- Prep Time: 20 minutes
- Cook Time: 0 minutes
- Total Time: 1 hour 20 minutes
- Yield: 12 peanut butter cups 1x
- Category: Desserts
- Method: No-cook
- Cuisine: American
- Diet: Vegetarian
Description
These Protein Peanut Butter Cups are a delicious, healthier twist on the classic treat, featuring creamy peanut butter, vanilla protein powder, and rich semi-sweet chocolate. Packed with protein, naturally sweetened with maple syrup, and easy to make, this recipe is perfect for a satisfying snack or dessert that’s both nutritious and indulgent.
Ingredients
For the Chocolate
- 12 oz semi-sweet chocolate chips
- 1 teaspoon coconut oil (solid)
- 1/4 teaspoon vanilla extract
For the Peanut Butter Filling
- 1/4 cup natural creamy peanut butter (ingredients: peanuts + salt only)
- 2 tablespoons pure maple syrup
- 1/3 cup vanilla protein powder
- 1/4 teaspoon salt
Instructions
- Prepare the Muffin Tin: Line a muffin tin with parchment paper muffin liners. This will prevent sticking and make it easy to remove your peanut butter cups later.
- Melt the Chocolate: Add the chocolate chips and coconut oil to a microwave-safe bowl. Microwave in 30-second intervals, stirring after each interval, until the chocolate is completely melted and smooth. Stir in the vanilla extract once melted.
- Create Chocolate Base Layers: Pour 1 heaping teaspoon of melted chocolate into each muffin liner and spread it to the edges to form a flat layer. Repeat for all 12 muffin cups.
- Chill the Chocolate: Place the muffin tin in the refrigerator to set the chocolate base while you prepare the peanut butter filling. This helps solidify the layer.
- Make the Peanut Butter Filling: Place the peanut butter in a microwave-safe bowl and microwave for 15–20 seconds until runny. Stir in the vanilla protein powder, salt, and maple syrup until fully combined and creamy.
- Assemble Peanut Butter Discs: Divide the peanut butter mixture into 12 discs, each slightly smaller than the muffin liner. Shape them by hand for best results.
- Add Filling to Cups: Remove the muffin tin from the refrigerator. Place a peanut butter disc into each cup, on top of the chocolate layer.
- Add Remaining Chocolate: If the remaining melted chocolate has thickened, microwave for another 15–20 seconds to loosen it. Drizzle the rest of the chocolate over each cup, smoothing it out evenly to the edges to seal in the peanut butter filling.
- Chill Until Set: Place the muffin tin back in the refrigerator for at least one hour, or until the peanut butter cups are completely set and firm.
- Serve and Store: Enjoy immediately, or store leftover peanut butter cups in an airtight container in the refrigerator or freezer for later snacking.
Notes
- Use high-quality chocolate chips for the best taste and texture.
- Ensure the peanut butter is natural and contains only peanuts and salt for optimal results.
- You can substitute other nut butters if desired, though flavor and texture may vary.
- For a vegan version, ensure your chocolate and protein powder are plant-based.
- Store in the refrigerator for up to 2 weeks or in the freezer for up to 2 months.
Nutrition
- Serving Size: 1 peanut butter cup
- Calories: 210
- Sugar: 13g
- Sodium: 75mg
- Fat: 13g
- Saturated Fat: 6g
- Unsaturated Fat: 6g
- Trans Fat: 0g
- Carbohydrates: 20g
- Fiber: 2g
- Protein: 5g
- Cholesterol: 0mg

