
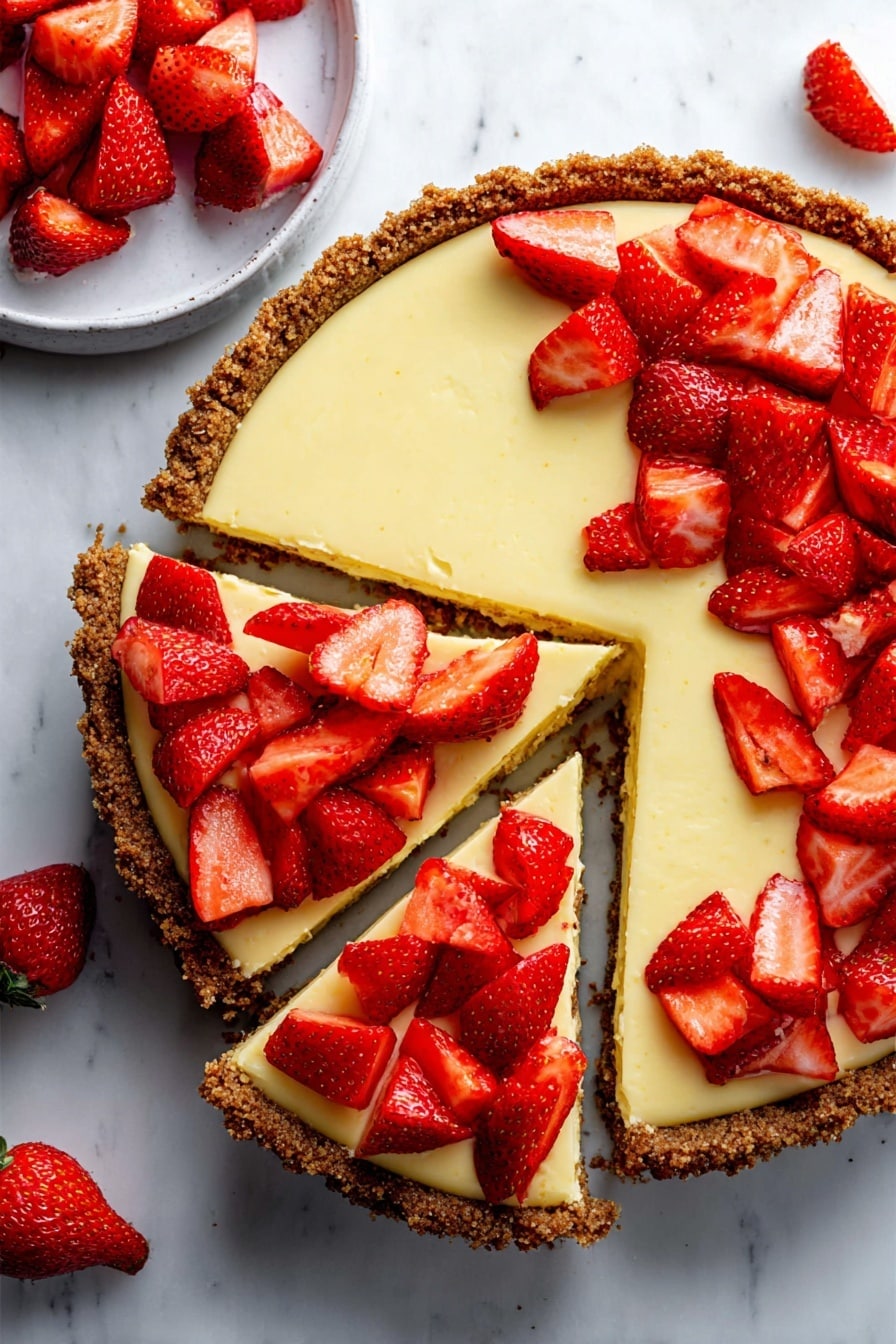
If you’ve ever wanted a dessert that feels indulgent yet fitting for a gluten-free lifestyle, you’re going to adore this No-Bake Gluten Free Cheesecake Recipe. It’s creamy, smooth, and seriously easy to put together — no oven baking required! Whether you’re naturally gluten-free or cooking for friends who are, this cheesecake delivers that classic rich flavor without hassle or compromise. Trust me, once you try this, it’ll become your go-to dessert for celebrations or when you just want a sweet treat that’s fuss-free.
Why You’ll Love This Recipe
- No-Bake Delight: You can skip the oven and still serve a silky smooth cheesecake that feels like a special occasion dessert.
- Gluten-Free Guarantee: Made with gluten-free graham crackers, it’s perfect for anyone avoiding gluten without sacrificing flavor.
- Simple Ingredients: Easy-to-find pantry staples make this recipe approachable and perfect for last-minute treats.
- Crowd-Pleaser: My family goes crazy for this cheesecake — it’s creamy, not too sweet, and pairs well with fresh fruit or toppings of your choice.
Ingredients You’ll Need
All the ingredients in this No-Bake Gluten Free Cheesecake Recipe work together beautifully to create a perfectly balanced crust and luscious filling. When shopping, I recommend choosing a high-quality gluten-free graham cracker and making sure your dairy is at room temperature for the best texture.
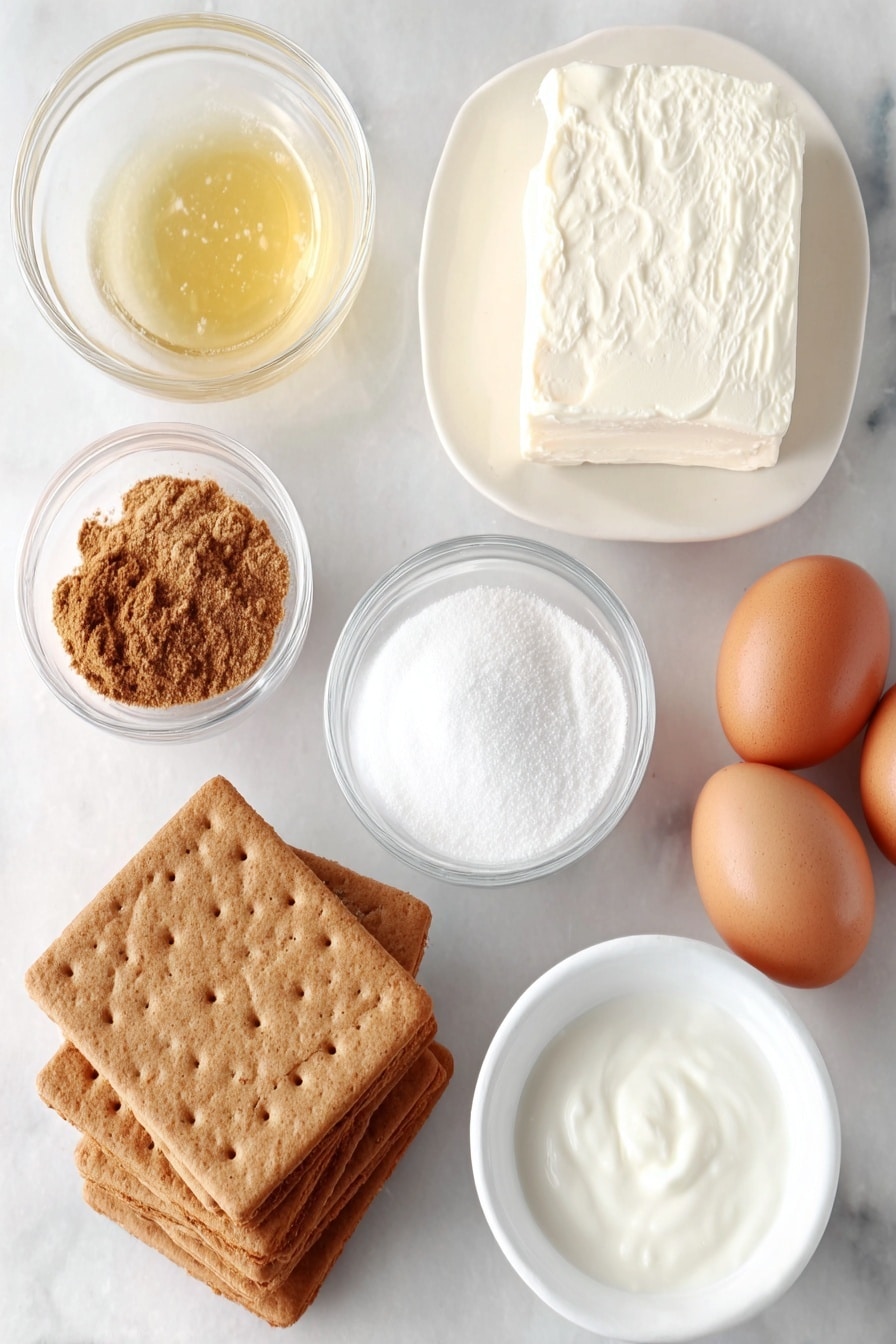
- Gluten-free graham crackers: I love using Kinnikinnick brand for a consistently crumbly crust without gluten worries.
- Brown sugar: Adds a subtle molasses flavor to the crust, giving it a warm, rich taste.
- Ground cinnamon: Just a pinch adds a cozy spice note that pairs wonderfully with the graham crackers.
- Unsalted butter: Melted to bind the crust perfectly — be sure it’s unsalted so you can control the saltiness in the final dessert.
- Cream cheese: Full-fat and room temperature to ensure a creamy, smooth filling without lumps.
- Granulated sugar: Sweetens without overpowering, balancing the cream cheese’s tanginess.
- Sour cream: Adds a subtle tartness and silkiness to the cheesecake texture.
- Heavy cream: Helps lighten the filling and provide richness.
- Pure vanilla extract: For that classic, comforting flavor note that elevates the whole cheesecake.
- Large eggs and one egg yolk: Room temperature to bind and set the cheesecake perfectly when chilled.
- Fresh fruit (optional): I usually top mine with berries for a pop of color and freshness.
Variations
One of the things I love about this No-Bake Gluten Free Cheesecake Recipe is how easy it is to customize. Whether you want to play with flavors or adapt for special diets, you’ll find that small tweaks can make a big difference.
- Berry Swirl: I’ve swirled in homemade raspberry puree before chilling — it adds a beautiful color and a tart contrast that everyone raves about.
- Chocolate Layer: For a richer spin, add a layer of melted dark chocolate over the crust before pouring your filling.
- Dairy-Free Version: I once experimented using vegan cream cheese and coconut cream for a dairy-free option — it worked well but changes the texture slightly, so chill it longer.
- Nut Crust: Swap gluten-free graham crackers with ground almonds or pecans mixed with a little coconut oil for a nutty crust alternative I sometimes make.
How to Make No-Bake Gluten Free Cheesecake Recipe
Step 1: Prepare the Gluten-Free Crust
Start by crushing your gluten-free graham crackers into fine crumbs. I use a food processor because it makes this step quick and consistent, but placing them in a sealed bag and rolling with a rolling pin works fine too! Mix your crumbs with brown sugar, cinnamon, and melted butter until it feels like damp sand — not too dry, not too wet. Press this crumb mixture firmly into your springform pan, going a little way up the sides because, trust me, those edges add a beautiful touch. Pop the crust in the oven for 12 minutes to set it — don’t skip this, as it helps prevent a soggy bottom when you add the filling.
Step 2: Whip Up the Creamy Filling
While the crust is baking, get your cream cheese and other dairy out to warm up — this really makes for a smoother cheesecake. Beat the cream cheese with sugar at high speed for about 2 minutes, stopping halfway to scrape down the bowl so everything blends evenly with no lumps. Then mix in the sour cream, heavy cream, and vanilla on medium speed. Once smooth, add the eggs and egg yolk one at a time on low speed, just until combined. Overmixing eggs can cause cracks later, so keep it gentle here. Pour the filling over your slightly cooled crust and get ready for the magic next step.
Step 3: Set Up Your Water Bath and Bake
Here’s a trick I’ve learned — baking cheesecake in a water bath keeps the texture silky and prevents cracking. You have two options for setting this up: either place your springform pan inside another pan and fill the outer pan with hot water halfway up, or wrap the springform pan tightly in two layers of foil and place it directly in a roasting pan filled halfway with hot water. The foil method can sometimes leak, so I tend to use the first way when I’m nervous about soggy crusts. Bake your cheesecake at 325°F for 70-80 minutes until the edges are set but the center still jiggles slightly. Once done, turn off the oven, crack the door open and let it cool inside for 30 minutes — slowly cooling helps prevent cracks.
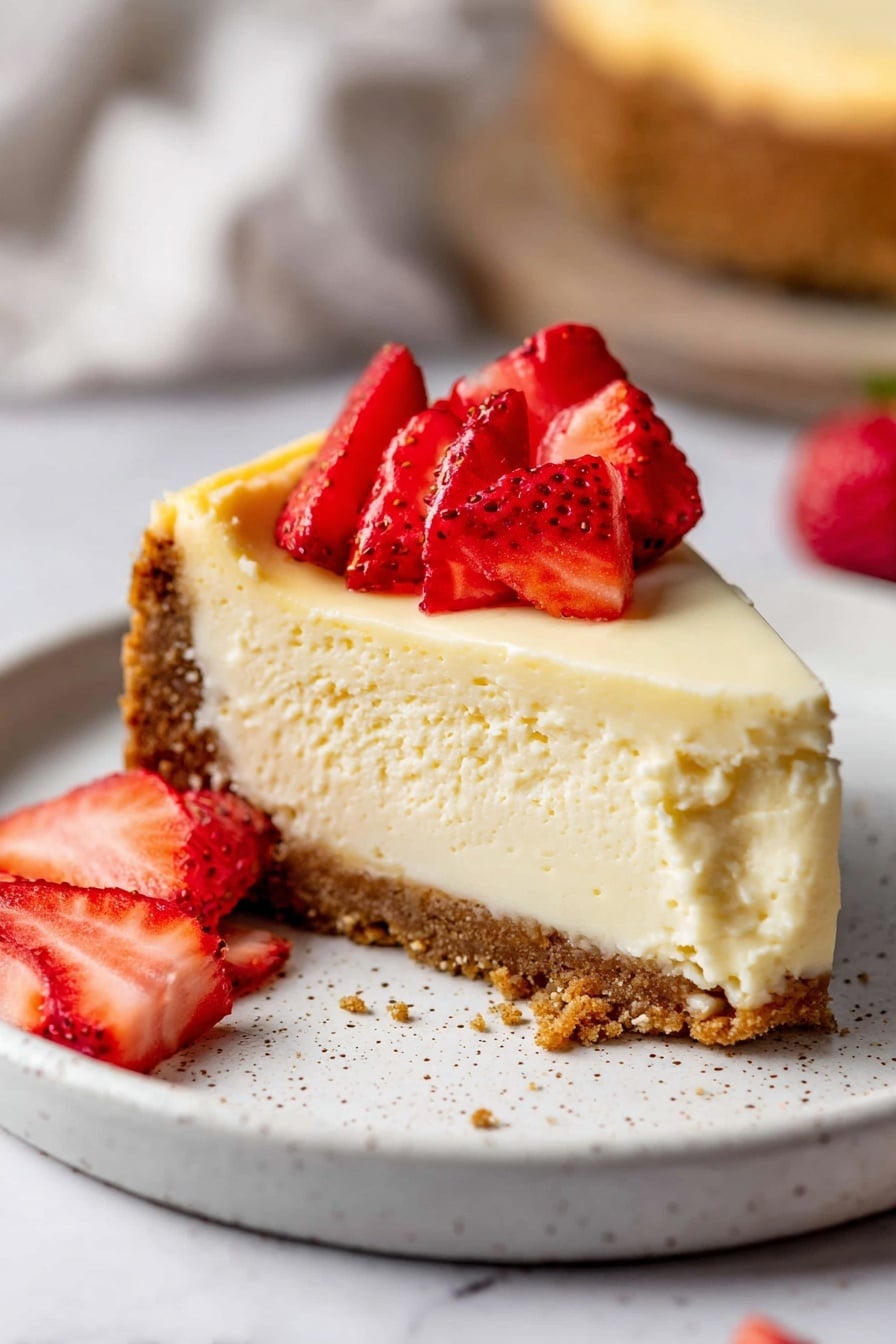
Step 4: Chill and Finish
After the oven cooling, transfer your cheesecake to a wire rack and let it come to room temperature. Then, wrap it tightly with foil and chill for at least 6 hours or overnight — this is when it truly sets to that creamy, sliceable perfection. When you’re ready to serve, carefully remove from the pan, peel off the parchment paper, and top as you like — fresh berries are my favorite fresh and colorful finishing touch.
Pro Tips for Making No-Bake Gluten Free Cheesecake Recipe
- Room Temperature Dairy: Pulling your cream cheese, sour cream, heavy cream, and eggs out 2 hours before mixing makes the batter lump-free and silky.
- Don’t Rush the Cooling: Letting the cheesecake cool gradually in the oven with the door cracked prevents cracks and maintains a smooth top.
- Crust Pressing Technique: Use the bottom of a measuring cup to press your crust firmly and evenly — it helps prevent it from falling apart after slicing.
- Water Bath Wrap: If you use the foil method for the water bath, wrap your pan liberally and twice to avoid leaks that could mess up your crust.
How to Serve No-Bake Gluten Free Cheesecake Recipe
Garnishes
I usually stick to fresh berries like blueberries, raspberries, or strawberries to add brightness and a bit of tartness, which balances the rich cheesecake beautifully. A light dusting of powdered sugar or a drizzle of honey or chocolate sauce can make it extra special for guests. Toasted nuts or a spoonful of fruit compote are also fabulous if you want an extra textural boost.
Side Dishes
Pairing this cheesecake with a hot cup of coffee or a refreshing herbal tea elevates the experience for me. For more festive occasions, I love serving it alongside a citrus salad or a glass of sparkling wine — the acidity cuts through the creaminess wonderfully.
Creative Ways to Present
One time, I made mini cheesecakes in individual jars topped with layered fruit purées for a picnic — they were a hit! You can also serve slices with edible flowers or place on a decorative cake stand surrounded by seasonal fruit for celebrations. These little presentation touches really make your No-Bake Gluten Free Cheesecake Recipe feel like a showstopper.
Make Ahead and Storage
Storing Leftovers
I like to keep leftover cheesecake tightly wrapped in plastic wrap inside an airtight container in the fridge. This keeps it fresh and preserves its creamy texture for up to 4 days — although, in my house, it rarely lasts that long!
Freezing
Freezing cheesecake works surprisingly well here. I slice it first, wrap each piece individually in plastic wrap and foil, then place the slices in a freezer bag. When I want a slice, I thaw it overnight in the fridge — it maintains its texture and flavor perfectly.
Reheating
I usually serve this cheesecake chilled, but if you want to reheat a slice slightly, I pop it in the microwave for about 10-15 seconds just to take the chill off. Don’t overheat it though, or it might soften too much and lose that lovely firmness.
FAQs
-
Is this cheesecake really no-bake?
This No-Bake Gluten Free Cheesecake Recipe does require baking the crust briefly and baking the filling in a water bath, which is minimal and helps with texture — but there’s no need for a long, traditional cheesecake bake, and no complicated tricks like water baths with steam or multiple phases. The method is straightforward and perfect for those who shy away from full-on oven baking.
-
Can I make this cheesecake vegan?
I’ve tried dairy-free cream cheeses and coconut cream as substitutes, and while it’s possible, keep in mind the texture and flavor will differ. It may be softer and less tangy but can still be delicious with the right substitutes.
-
How do I prevent cracks on my cheesecake?
Allow the cheesecake to cool slowly by turning off the oven and letting it rest with the door slightly opened before chilling. Also, avoid overbeating the eggs and use the water bath method to maintain moisture during baking.
-
Can I make this ahead of time?
Absolutely! This cheesecake actually tastes better after chilling overnight. It’s perfect for making a day in advance for events or family dinners.
Final Thoughts
Honestly, this No-Bake Gluten Free Cheesecake Recipe has become a favorite I keep coming back to. It’s one of those recipes that feels comforting and impressive all at once, without any fuss or weird ingredients. I love how it brings people together around the table, and it’s always met with “Wow, this is amazing!” comments. If you make just one gluten-free dessert, let it be this cheesecake — I promise, you’ll love it as much as I do! Go ahead and give it a try, and let me know how it turns out in your kitchen.
Print
No-Bake Gluten Free Cheesecake Recipe
- Prep Time: 30 minutes
- Cook Time: 80 minutes
- Total Time: 110 minutes
- Yield: 16 servings 1x
- Category: Dessert
- Method: Baking
- Cuisine: American
- Diet: Gluten Free
Description
This Gluten Free Cheesecake recipe offers a creamy, rich dessert perfect for those with gluten sensitivities. Featuring a buttery gluten free graham cracker crust and a silky smooth cream cheese filling, this cheesecake is baked in a water bath to ensure a perfectly set texture with a slight jiggle in the middle. Topped optionally with fresh fruit, it’s a delicious, crowd-pleasing treat for any occasion.
Ingredients
Gluten Free Crust
- 2 1/2 cups Gluten free graham crackers (about 2 boxes Kinnikinnick crackers)
- 1/3 cup Brown sugar, packed (light or dark)
- 1/2 tsp Ground cinnamon
- 10 TBSP Unsalted butter, melted
Cheesecake Filling
- 24 oz Cream cheese, room temperature
- 3/4 cup White granulated sugar
- 1/2 cup Sour cream, room temperature
- 1/4 cup Heavy cream, room temperature
- 1 tsp Pure vanilla extract
- 4 Large eggs, room temperature
- 1 Egg yolk, room temperature
Topping (Optional)
- Fresh fruit or fresh berries
Instructions
- Prepare the Gluten Free Crust: Preheat your oven to 325℉ (163℃). Spray a 9-inch springform pan with baking spray and line the bottom with a 9-inch parchment paper circle; spray the parchment again to prevent sticking.
- Make Crust Mixture: Using a food processor, pulse the gluten free graham crackers into fine crumbs. Add the brown sugar, ground cinnamon, and melted butter to the crumbs. Mix until the mixture has the texture of wet sand.
- Form the Crust: Pour the crumb mixture into the prepared springform pan. Using your hands, press the crumbs evenly to form the crust halfway up the sides of the pan. Use the bottom of a measuring cup to firmly compact the crust for an even base.
- Bake the Crust: Bake the crust in the oven for 12 minutes. While it bakes, you can start preparing the cheesecake batter so it’s ready as the crust cools slightly.
- Beat Cream Cheese and Sugar: In a stand mixer fitted with the paddle attachment, beat the cream cheese and granulated sugar on high speed for 2 minutes, stopping halfway to scrape down the sides of the bowl with a rubber spatula to ensure smoothness.
- Add Creams and Vanilla: Reduce mixer speed to medium and add the sour cream, heavy cream, and vanilla extract. Mix until fully combined, scraping the bowl to remove any lumps and achieve a smooth batter.
- Incorporate Eggs: Lower the mixer speed to low and add the eggs and egg yolk one at a time, mixing just until combined after each addition. Avoid overmixing to prevent air incorporation.
- Prepare Water Bath: To prevent cracking and ensure even baking, prepare a water bath using one of the following methods: (1) Place the springform pan in a 10-inch cake pan, then place the cake pan inside a large roasting pan. Pour hot steaming water into the roasting pan until it reaches halfway up the sides of the cake pan. This prevents water from seeping into the crust. (2) Alternatively, wrap the springform pan tightly twice in aluminum foil, place it inside the roasting pan, and fill halfway with hot water. This method is effective but may occasionally allow water leakage into the crust.
- Bake the Cheesecake: Pour the batter over the cooled crust in the springform pan. Place the assembled pans with the water bath into the preheated oven. Bake for 70 to 80 minutes, until the edges are set and the center has a slight jiggle.
- Cool Gradually: Turn off the oven and crack the door open. Let the cheesecake cool inside the oven for 30 minutes to prevent sudden temperature changes that can cause cracking.
- Finish Cooling: Remove the cheesecake from the oven and transfer to a cooling rack. Allow it to cool completely at room temperature while remaining in the pan.
- Chill Overnight: Wrap the cheesecake tightly with foil and refrigerate for at least 6 hours or preferably overnight for best texture and flavor development.
- Serve: Remove the cheesecake from the pan, peel away the parchment paper from the bottom, and top with your choice of fresh fruits or berries for a delightful finishing touch.
Notes
- For the best texture, remove dairy ingredients (cream cheese, sour cream, heavy cream, and eggs) from the refrigerator at least 2 hours before starting to bake to bring them to room temperature.
- Be careful not to overmix the batter once the eggs are added to avoid incorporating excess air, which can cause cracking during baking.
- Using a water bath is crucial to prevent cracks and ensure even baking in this cheesecake recipe.
- Allowing the cheesecake to cool gradually in the oven and then chilling it overnight helps it set perfectly and enhances flavor.
- If using the aluminum foil water bath method, check carefully for leaks to avoid water entering the crust.
- Fresh fruit toppings add natural sweetness and a lovely color contrast, but are optional based on preference.
Nutrition
- Serving Size: 1 slice (1/16th of cheesecake)
- Calories: 360 kcal
- Sugar: 18 g
- Sodium: 170 mg
- Fat: 28 g
- Saturated Fat: 17 g
- Unsaturated Fat: 9 g
- Trans Fat: 0 g
- Carbohydrates: 22 g
- Fiber: 1 g
- Protein: 6 g
- Cholesterol: 110 mg


