
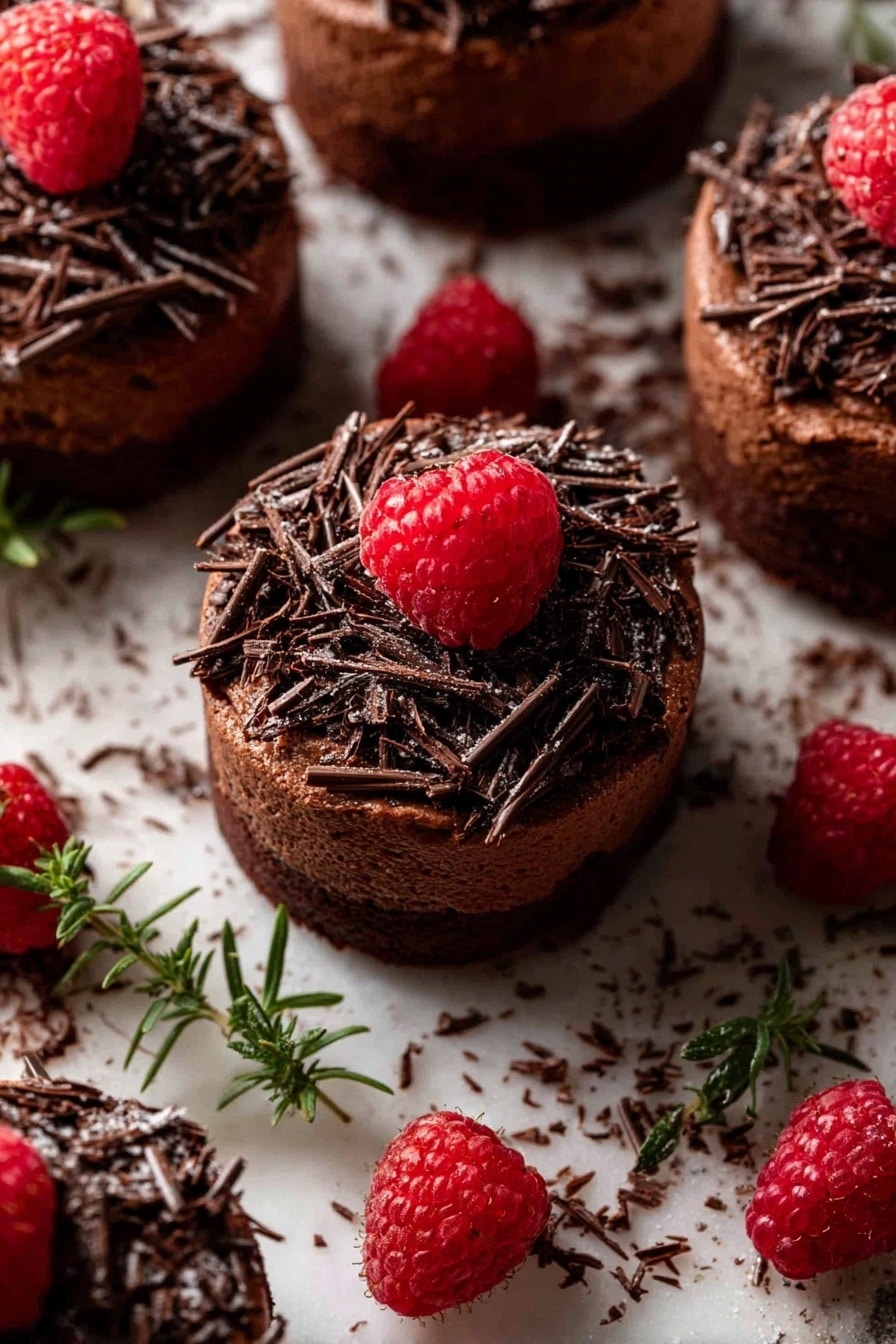
If you’re craving a bite-sized chocolate treat that’s as delicious as it is adorable, then you’ll absolutely want to try this Mini Chocolate Cake Bites with Fluffy Buttercream Recipe. I promise, once you take your first bite of these little cakes, you’ll be hooked! They’re perfectly moist, deeply chocolatey, and topped with the creamiest, fluffiest buttercream — absolutely fan-freaking-tastic for any occasion.
Why You’ll Love This Recipe
- Perfectly Moist Mini Cakes: The batter is super thin but bakes into the most tender and moist chocolate layers you’ll ever try.
- Fluffy, Rich Buttercream: The cocoa buttercream is light as air yet deeply chocolatey — a perfect contrast to the cake.
- Fun & Versatile Presentation: You can make these mini cakes round, square, or any shape you like for any celebration.
- Easy to Store & Make Ahead: These keep beautifully in the fridge or freezer, making them ideal for stress-free entertaining.
Ingredients You’ll Need
Each ingredient in this Mini Chocolate Cake Bites with Fluffy Buttercream Recipe is chosen to work together to balance flavor and texture — from the cocoa to the coffee-enhanced batter, to the rich butter in the frosting. I recommend using full-fat milk and room temperature eggs for the best results.
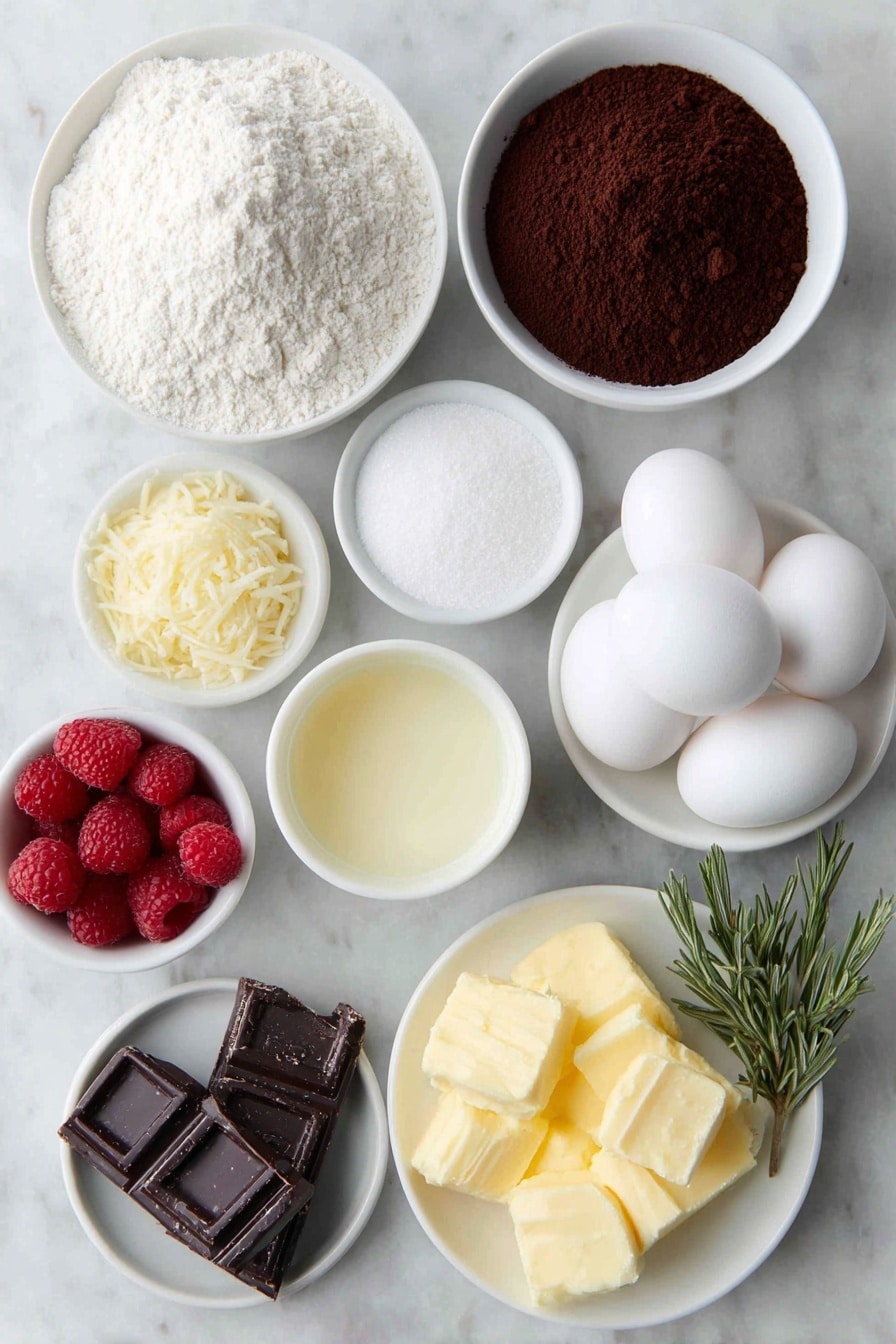
- Plain flour: The base of the cake, sifted for lightness and even mixing.
- Unsweetened cocoa powder: Gives it that deep chocolate flavor — I use natural, not Dutch processed.
- Baking powder and baking soda: Together they ensure a perfect rise and tender crumb.
- White sugar: The right amount for sweetness without overpowering the chocolate.
- Kosher salt: Enhances the chocolate flavor and balances sweetness.
- Large egg: Binds everything and adds richness, best at room temp.
- Full-fat milk: Moisturizes and tenderizes the cake layers.
- Vegetable oil: Keeps the cakes tender — I like using neutral oils like canola or peanut.
- Vanilla extract: Adds warmth and depth of flavor.
- Boiling water: Helps dissolve the coffee and intensifies the cocoa flavor.
- Instant coffee powder (optional): Just a hint to boost the chocolate’s richness — trust me, you won’t taste coffee!
- Unsalted butter (for buttercream): Make sure it’s softened to room temperature for the fluffiest texture.
- Soft icing sugar (powdered sugar): Sifted to avoid lumps and ensure smooth frosting.
- Additional cocoa powder (for buttercream): Adds chocolate in the frosting without overwhelming sweetness.
- Milk (for buttercream): Keeps the buttercream light and spreadable.
- Decorations like dark chocolate shards, raspberries, and rosemary sprigs: Add visual flair and contrasting flavors.
Variations
I love experimenting with this Mini Chocolate Cake Bites with Fluffy Buttercream Recipe, and it really lends itself to personal tweaks. Whether you’re avoiding dairy or just want a fun twist, it’s easy to adjust and still get amazing results.
- Dairy-Free Variation: I’ve swapped the butter and milk in the buttercream for coconut cream and dairy-free margarine with great success.
- Flavor Boosts: Try adding a teaspoon of orange zest to the cake batter for a fresh citrus twist — my family was pleasantly surprised!
- Shape and Size: Instead of rounds, I once made these as mini squares for a neat party platter — less waste and just as delicious.
- Extra Texture: I’ve added finely chopped nuts between layers before frosting for a delightful crunch.
How to Make Mini Chocolate Cake Bites with Fluffy Buttercream Recipe
Step 1: Prepare Your Pan and Oven
Preheat your oven to 180°C (350°F), or 160°C if you’re using a fan-forced oven. I like to butter my jelly roll pan and then line it with parchment paper — this makes removing the cake layers a breeze. Be generous with the butter to prevent sticking, but the paper lining is your best friend here for a clean lift.
Step 2: Whisk Together the Dry Ingredients
Sift the plain flour, cocoa, baking powder, and baking soda into a large bowl. Add in the sugar and kosher salt, then whisk everything together until evenly combined. This step is key because it ensures your dry ingredients are well distributed and avoids those little flour clumps — I’ve learned this the hard way!
Step 3: Mix in the Wet Ingredients
Next, add the egg, milk, oil, and vanilla extract to the dry mix. Whisk gently to combine. Now, here’s a trick I discovered — dissolve the instant coffee powder in the boiling water and stir that into the batter. This sounds unusual, but it really amplifies the chocolate flavor without making it taste like coffee. Your batter will look very thin at this point; that’s exactly how it should be!
Step 4: Bake the Cake Layers
Pour the batter evenly into your prepared pan and slide it into the oven. Bake for just about 13 minutes — this might seem short, but the thinness of the batter means it cooks quickly. Keep an eye out for that gentle spring-back and a toothpick that comes out mostly clean.
Step 5: Cool and Chill Before Cutting
After baking, let the cake cool for 10 minutes in the pan, then lift it out using the parchment paper overhang and transfer it to a wire rack, still on the paper. Let it cool completely, at least 30 minutes. Then pop it into the fridge uncovered for at least an hour — this chilling step firms up the cake so it doesn’t crumble when you cut out your mini rounds.
Step 6: Cut the Cake Bites
Place a clean piece of parchment paper over the cake’s sticky surface, flip the cake over onto a cutting board so the sticky side is down, and then carefully peel away the base paper. Using a 6cm (2.4″) round cutter, press out 21 perfect little cake circles. Flipping the cake helps you get clean edges without the batter sticking to the cutter — a little tip I learned after some messy trial runs!
Step 7: Make the Fluffy Chocolate Buttercream
Beat 250g of softened unsalted butter on high speed for 3 minutes until it’s nice and fluffy. Add your sifted icing sugar in three parts, starting on low speed to avoid a sugar dust cloud, then increasing the speed to blend well each time. Once all the sugar is in, add your cocoa powder, milk, and vanilla, and beat again at high speed for 3 minutes until the buttercream is light, smooth, and fluffy.
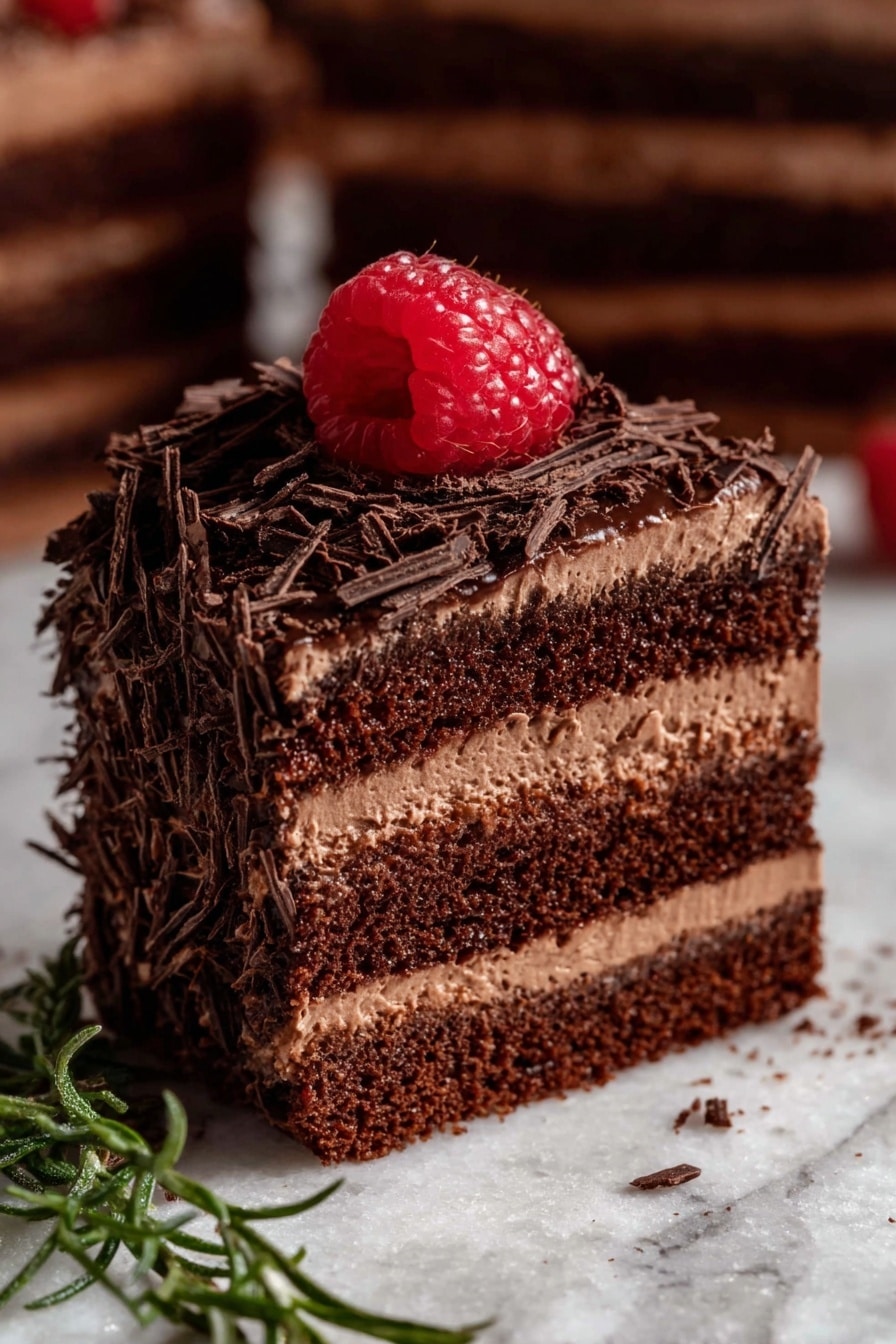
Step 8: Assemble & Frost Your Mini Cakes
Place one cake round on a small square of parchment paper — I use a tiny dab of buttercream underneath so it stays put. Pipe generous coils of buttercream between the layers to build three layers tall. Once stacked, pipe frosting all around the sides and on top for a smooth, luscious finish. I usually use a small offset spatula to gently smooth the frosting, careful not to touch the cake directly to avoid crumbs in the buttercream.
Step 9: Decorate Your Cake Bites
Top with piles of delicate dark chocolate shards — they add an elegant crunch. For a fresh twist, I love adding a few raspberries and a sprig of rosemary. Not only do they look fantastic, but they add a lovely contrast of flavors that make these mini bites even more memorable.
Pro Tips for Making Mini Chocolate Cake Bites with Fluffy Buttercream Recipe
- Thin Batter is Normal: Don’t worry if the batter looks runny – this creates an incredibly moist and tender cake after baking.
- Coffee Boosts Chocolate: Adding instant coffee powder enhances the depth of flavor; it’s subtle but makes a big difference.
- Chill Before Cutting: Always refrigerate the cake layers before cutting to prevent crumbling and get neat, clean shapes.
- Pipe Buttercream with Confidence: Use a piping bag or even a ziplock bag for neat frosting; a turntable helps but isn’t necessary.
How to Serve Mini Chocolate Cake Bites with Fluffy Buttercream Recipe
Garnishes
I adore garnishing these mini cake bites with dark chocolate shards because they add an elegant crunch and look so fancy — and they’re dead simple to make with just a sharp knife. Fresh raspberries and rosemary sprigs bring a pop of color and a subtle herbal brightness, making the presentation pop especially for special occasions.
Side Dishes
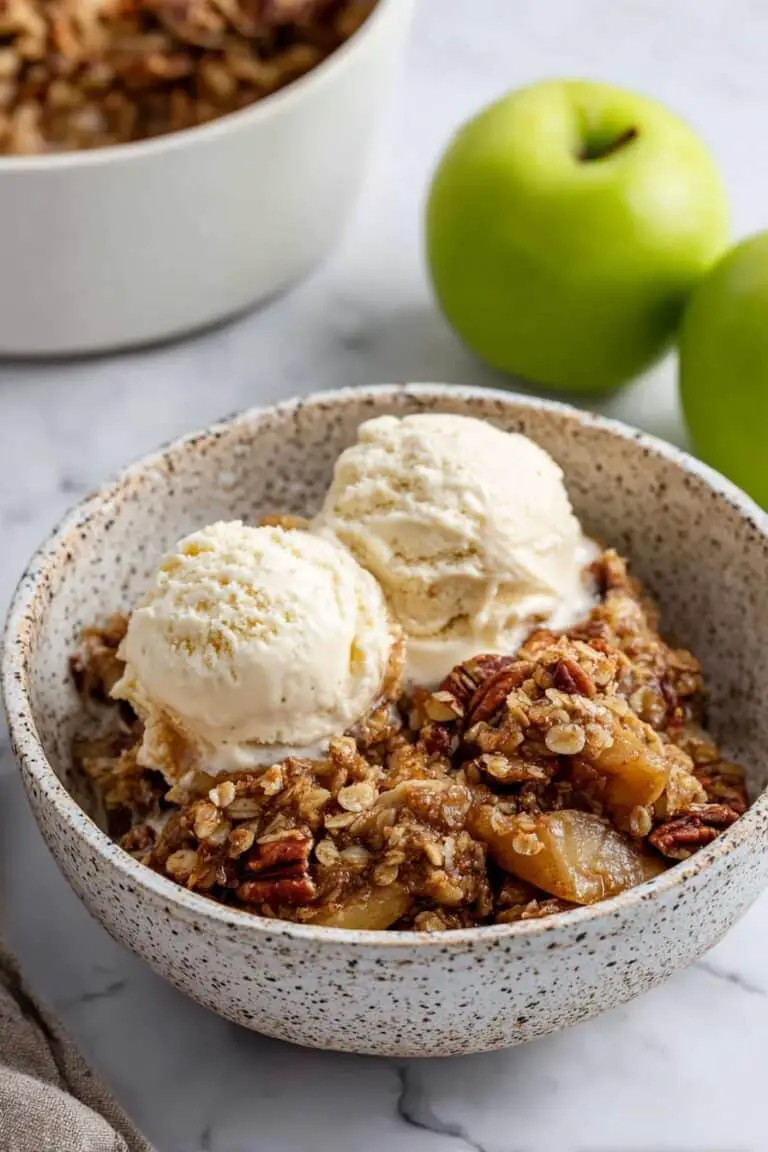
If you’re serving these at a party, I like pairing them with fresh fruit platters or a simple scoop of vanilla ice cream. A light cup of coffee or creamy milk complements these cake bites beautifully, too — you’ll find they are the perfect petite sweet finish to any meal.
Creative Ways to Present
For birthdays and celebrations, I’ve strung these bites on skewers alternating with berries for a whimsical dessert “lollipop” display. Another fun idea is to place each cake bite in mini cupcake liners on a tiered stand — it looks professional but is so easy. These little cakes are the perfect bite-sized treat to impress without stress.
Make Ahead and Storage
Storing Leftovers
I store leftover mini cake bites in an airtight container in the fridge, where they stay perfectly moist for up to 5 days. Make sure the cakes and frosting are completely cool before covering to avoid condensation, which can mess up the frosting texture.
Freezing
I’ve found that you can freeze these mini cake bites either assembled or just the cake layers. Wrap each piece tightly in plastic wrap and again in foil or an airtight container. They freeze well for up to 3 months, just thaw overnight in the fridge before enjoying.
Reheating
For best results, reheat cake layers separately at room temperature, then assemble and frost fresh. If you’ve frozen already assembled bites, just let them thaw in the fridge and serve cold — the buttercream tastes amazing that way too!
FAQs
-
Can I use Dutch-processed cocoa instead of natural cocoa in this recipe?
Absolutely! While this recipe calls for natural unsweetened cocoa powder, you can substitute Dutch-processed cocoa. Just know that Dutch-processed cocoa is less acidic and has a more mellow flavor and darker color, which will slightly change the flavor and appearance but still yield delicious results.
-
Why do you add coffee powder to the batter?
The coffee powder enhances the chocolate flavor by intensifying its richness without imparting a coffee taste. If you don’t have coffee on hand or prefer to skip it, the recipe still works wonderfully.
- How do I keep the buttercream from getting grainy?
Be sure to sift your icing sugar before adding and beat the butter well to a soft fluffy consistency before adding sugar. Adding sugar gradually and beating thoroughly between additions helps maintain a smooth texture.
- Can I make this recipe gluten-free?
You can substitute the plain flour with a gluten-free baking mix that works 1:1 for all-purpose flour. Just be aware that texture may vary slightly, so chill the cake well before cutting and consider adding a bit of xanthan gum if your mix doesn’t include it for structure.
- Can I assemble the mini cake bites a day ahead?
Definitely! These mini cake bites actually taste better after resting overnight in the fridge as the buttercream sets nicely, making them easier to handle and cutting down on crumbs.
Final Thoughts
I absolutely love how these Mini Chocolate Cake Bites with Fluffy Buttercream turn out every time — they’re a real crowd-pleaser that look impressive but are surprisingly easy to make. When I first tried this recipe, I was amazed at how the thin batter baked up into rich, tender layers, and the buttercream is so light it feels like a cloud on your tongue. Honestly, whether it’s a party or just a quiet night in, these bites bring a bit of joy to every moment. I hope you enjoy making (and eating) them as much as I do!
Print
Mini Chocolate Cake Bites with Fluffy Buttercream Recipe
- Prep Time: 45 minutes
- Cook Time: 13 minutes
- Total Time: 1 hour 58 minutes
- Yield: 7 mini cakes (21 rounds) 1x
- Category: Dessert
- Method: Baking
- Cuisine: Western
Description
Delight in these moist and fluffy mini chocolate cakes layered with rich chocolate buttercream and garnished with dark chocolate shards, raspberries, and rosemary. Perfectly sized for individual servings, these cakes combine the deep flavor of cocoa with a touch of coffee to enhance the chocolate taste, baked to perfection in a jelly roll pan.
Ingredients
Cake Layers
- 1 cup plain flour / all-purpose flour
- 1/3 cup cocoa powder, sifted (unsweetened, not Dutch processed)
- 3/4 tsp baking powder
- 3/4 tsp baking soda / bi-carb
- 1 cup white sugar
- 1/2 tsp cooking salt / kosher salt
- 1 large egg, at room temperature
- 1/2 cup milk, preferably full fat, at room temperature
- 1/4 cup plain oil (vegetable, canola, peanut oil)
- 1 tsp vanilla extract
- 1/2 cup boiling water
- 1 tsp instant coffee powder (optional)
Chocolate Buttercream
- 250g / 1 cup unsalted butter, softened
- 4 cups soft icing sugar / powdered sugar, sifted
- 1/2 cup cocoa powder, unsweetened
- 5 tbsp milk, preferably full fat
Decorations
- Dark chocolate, finely shaved using a knife (white chocolate also acceptable)
- Raspberries
- Rosemary sprigs
Instructions
- Preheat Oven: Preheat your oven to 180°C (350°F) or 160°C fan-forced to ensure an even bake.
- Prepare Baking Pan: Butter a 40 x 28.5 x 2.5 cm (15.8 x 11.3 x 1 inch) jelly roll pan, then line it with parchment paper for easy removal.
- Whisk Dry Ingredients: Sift together flour, cocoa powder, baking powder, and baking soda into a bowl. Add sugar and salt, then whisk thoroughly to combine all dry ingredients evenly.
- Mix Wet Ingredients: Add the egg, milk, oil, and vanilla extract to the dry mix. Whisk to combine until smooth. Dissolve coffee powder in boiling water, then whisk it into the batter; note the batter will be very thin.
- Bake Cake Layer: Pour the thin batter into the prepared pan and bake in the preheated oven for 13 minutes until set.
- Cool and Chill: Let the cake cool for 10 minutes in the pan, then lift using paper overhang onto a rack and cool completely for 30 minutes. Refrigerate uncovered for at least 1 hour to firm up for cutting.
- Cut Cake Rounds: Place a piece of paper over the sticky surface, flip the cake upside down onto a cutting board (sticky side down), peel off the base paper, then cut 21 rounds of 6 cm (2.4 inches) diameter using a cutter.
- Pipe Frosting: Place a cake round on a small piece of paper with a dab of frosting to stabilize. Use a piping bag to pipe coils of frosting between layers, stacking three rounds per mini cake. Pipe additional frosting around sides and on top.
- Smooth Frosting: Using a small offset spatula or knife, carefully smooth the frosting surface without touching the cake directly to avoid crumb incorporation.
- Decorate Cakes: Garnish with piles of finely shaved dark chocolate shards, raspberries, and rosemary sprigs for an elegant finish.
- Make Chocolate Buttercream: Beat softened butter for 3 minutes on high speed until fluffy. Gradually beat in icing sugar in three additions, starting on low speed to avoid dust clouds, then raise speed as incorporated.
- Incorporate Cocoa and Milk: Add cocoa powder, milk, and vanilla extract to the buttercream. Beat starting on low speed, gradually increasing, then beat on high for 3 minutes until light and airy.
- Prepare for Piping: Transfer the buttercream to a piping bag (even a ziplock bag works) for easy application to the cakes.
Notes
- Cocoa: Use standard unsweetened cocoa powder; Dutch processed cocoa can be used for deeper color and flavor.
- Baking Soda: Can be replaced with 2 1/4 teaspoons extra baking powder if baking soda is unavailable.
- Coffee: Enhances chocolate flavor subtly; optional and not detected in the final taste.
- Flipping Cake: Flipping the cake upside down before cutting ensures neat rounds since the surface is sticky.
- Square or Rectangle Cakes: For easier assembly, cut cake into rectangles, layer with frosting, chill to set, then cut into squares or rectangles.
- Storage: Cakes keep fresh for 5 days refrigerated, or freeze up to 3 months. Always cool completely before covering and refrigerating.
Nutrition
- Serving Size: 1 mini cake
- Calories: 320 kcal
- Sugar: 30 g
- Sodium: 180 mg
- Fat: 18 g
- Saturated Fat: 8 g
- Unsaturated Fat: 9 g
- Trans Fat: 0 g
- Carbohydrates: 38 g
- Fiber: 3 g
- Protein: 4 g
- Cholesterol: 45 mg


