
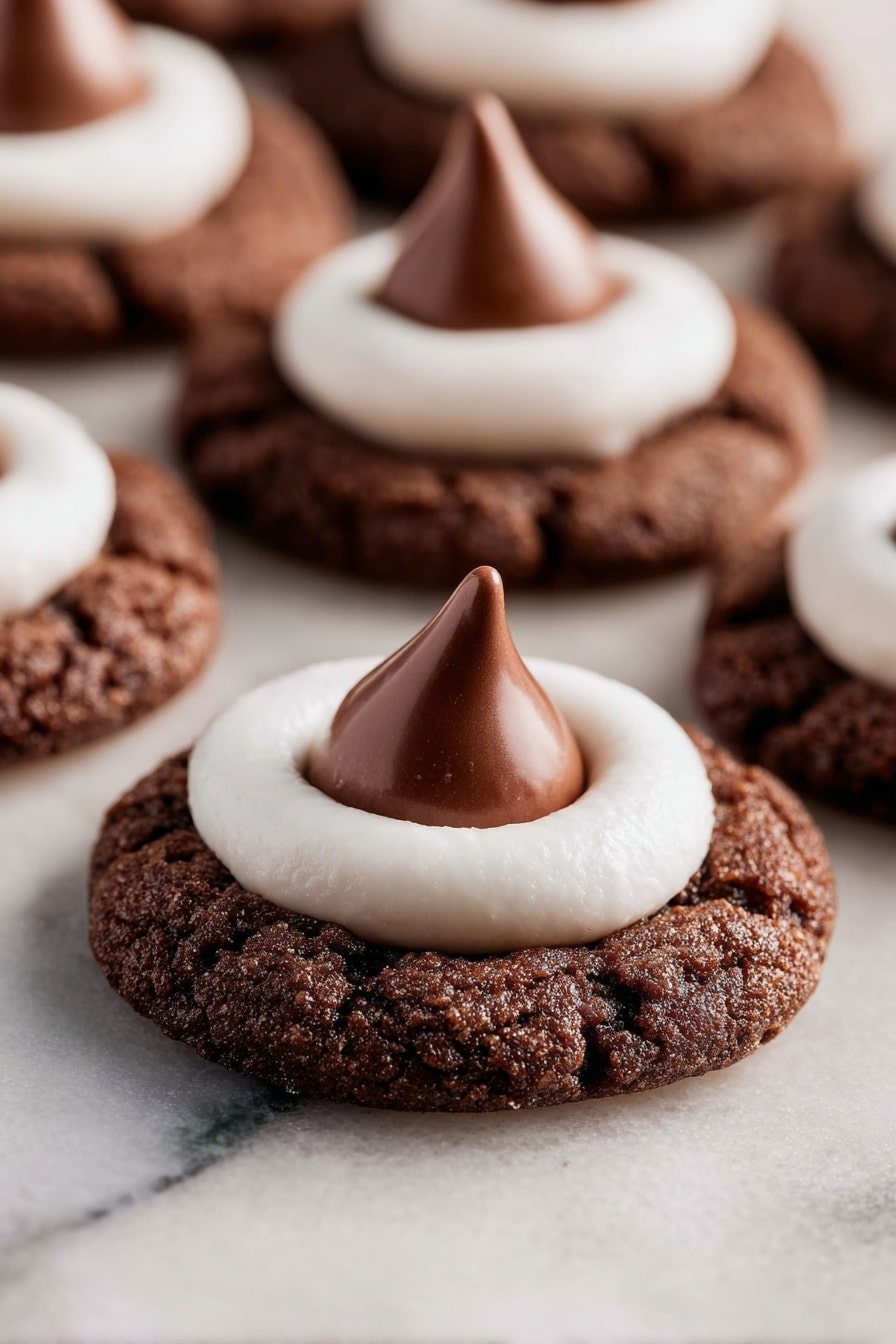
If you’re looking for a cozy treat that combines all the warmth and nostalgia of hot cocoa into a delightful cookie, you have to try my Hot Cocoa Cookie Blossoms Recipe. Seriously, this recipe is fan-freaking-tastic—every bite is like a little hug on a chilly day. Whether you’re baking for a crowd or just want a sweet pick-me-up, these cookies have the perfect balance of rich cocoa, melty marshmallow, and that irresistible chocolate kiss on top. Stick around because I’ll walk you through everything you need to make them perfectly every time!
Why You’ll Love This Recipe
- Warm and Comforting Flavor: These cookies capture the nostalgic flavor of hot cocoa with cocoa powder, marshmallows, and a chocolate kiss for the ultimate cozy treat.
- Quick and Easy to Make: You’ll have a batch ready in under 30 minutes—perfect for last-minute cravings or special occasions.
- Fun and Festive Presentation: The marshmallow topping with the Hershey’s Kiss creates a cute “blossom” effect everyone raves about.
- Great for Sharing: They make fantastic gifts or party treats that have won me compliments every single time.
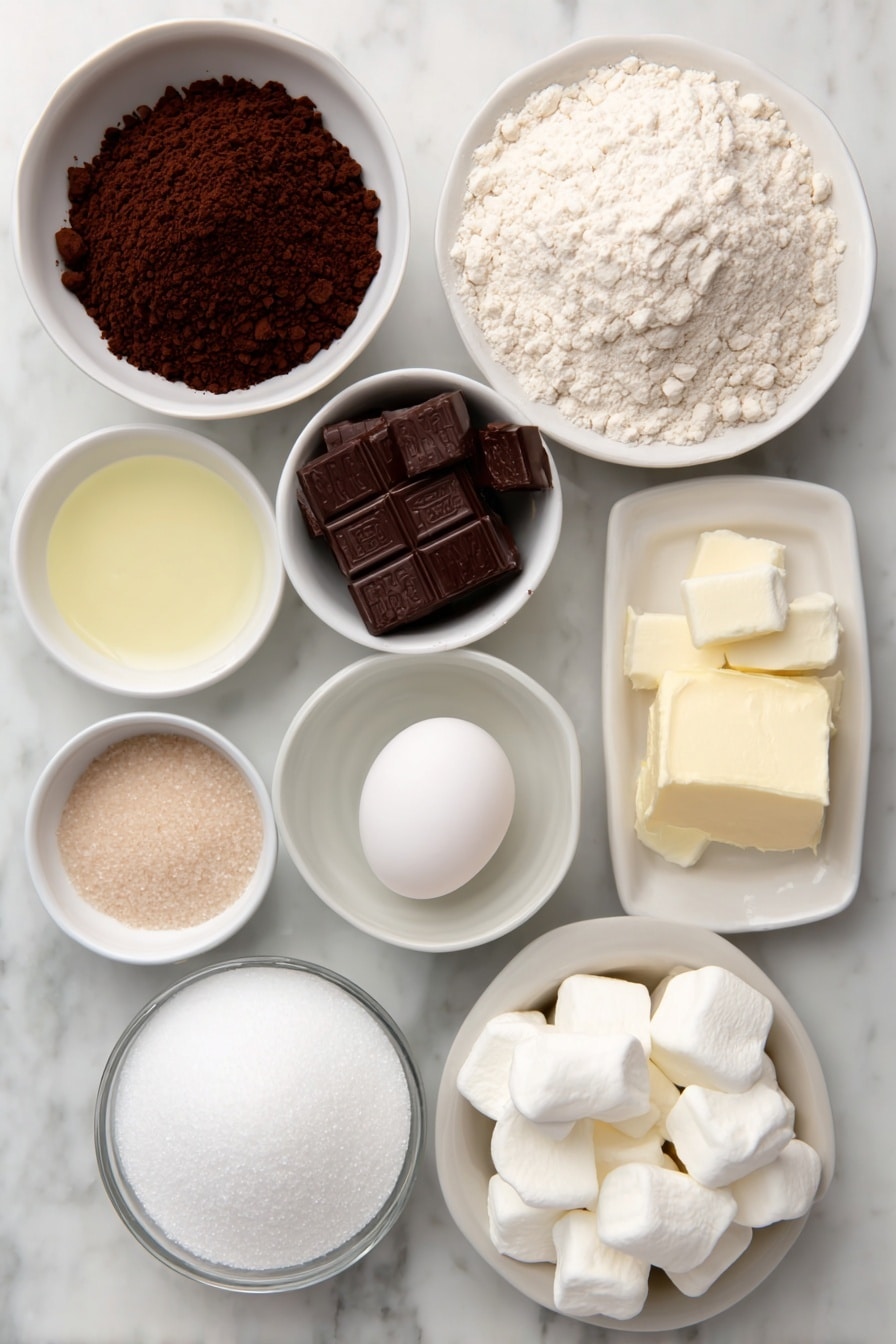
Ingredients You’ll Need
The ingredients in this Hot Cocoa Cookie Blossoms Recipe come together in such a way that you get a fudgy, chewy cookie with the right hint of sweetness and just enough fluff from the marshmallow. If you pick quality chocolate kisses and fresh marshmallows, you’ll really elevate the final treat.
- All-purpose flour: Use spooned and leveled flour or weigh it to avoid dry cookies; I’ve learned this the hard way!
- Baking soda & baking powder: These leavening agents give the cookies just the right lift so they’re not flat but still chewy.
- Unsweetened cocoa powder: Choose a good quality cocoa for that rich, chocolatey taste.
- Salt: Balances out the sweetness and enhances the cocoa flavor.
- Unsalted butter: Melted and cooled to integrate well and keep the cookies soft.
- Brown sugar (light or dark): Adds moisture and a slight caramel flavor that I absolutely adore.
- White granulated sugar: Helps to get that slight crisp edge on each cookie.
- Pure vanilla extract: Your flavor secret weapon for extra warmth.
- Large egg and egg yolk: Make sure these are at room temperature for a smooth dough.
- Extra granulated sugar: For rolling the dough balls so they get that pretty sugar-coated crunch.
- Marshmallows: Regular-sized marshmallows cut in half create that fluffy cloud topping.
- Hershey’s Kisses Hot Cocoa Chocolates: These go right on top to add a melty, chocolate finish—you’ll love how they look and taste.
Variations
I love that this Hot Cocoa Cookie Blossoms Recipe is flexible enough for you to make it your own. Over time, I’ve played around with flavors and adaptations that really bring out different moods depending on the season or who I’m baking for.
- Mint Variation: Adding a few drops of peppermint extract turns these cookies into a festive holiday delight that my family gobbles up faster than I can chill the dough.
- Gluten-Free Version: Swapping all-purpose flour for a gluten-free blend works beautifully—just be sure to check for mix ratios and adjust baking times slightly.
- Dairy-Free Swap: Use melted coconut oil or dairy-free butter to keep these kosher for dairy-sensitive friends without losing that moisture and richness.
- Fun Size Marshmallows: Sometimes I swap in mini marshmallows for a more delicate topping and a different texture contrast.
How to Make Hot Cocoa Cookie Blossoms Recipe
Step 1: Prep your dry ingredients
This is where the magic starts. I sift together the all-purpose flour and unsweetened cocoa powder into a medium bowl—this keeps the cocoa nice and airy and avoids lumps. Then I add baking soda, baking powder, and salt, giving it a light whisk. Setting this mixture aside is key because you don’t want to overmix later, which leads to tough cookies.
Step 2: Mix your wet ingredients
In a large bowl, mix melted and cooled butter (make sure it’s not hot!), brown sugar, granulated sugar, vanilla extract, the whole egg, and egg yolk. I like using a whisk or sturdy spatula here until everything looks smooth and shiny. This step is where all your rich flavors form, so take your time and don’t rush.
Step 3: Combine dry and wet ingredients
Carefully fold the dry ingredients into the wet mixture using a rubber spatula. I always remind myself not to over-mix here—the dough should just come together. Overworking it can mean your cookies end up tough instead of tender with a slight chew.
Step 4: Chill and preheat
Once your dough is mixed, I let it rest for 10 minutes while preheating the oven to 350°F. This rest lets the flour hydrate and the ingredients come together, which somehow makes the texture better—my secret weapon! Meanwhile, unwrap your Hershey’s Kisses and pop them in the freezer; cooler chocolates top the cookies better without melting too quickly.
Step 5: Shape and sugar-coat the dough balls
I use a small cookie scoop to make perfectly sized balls, then roll each one in granulated sugar. This sugar coating gives a pretty sparkly finish and a little crunch on the outside, which plays so well against the soft center.
Step 6: Bake with marshmallows topping
Bake a single cookie sheet for 6 minutes first. Then, carefully press half a marshmallow onto the center of each cookie and return to the oven for 2-3 more minutes. This step creates that signature “blossom” look because the marshmallow puffs up and gets golden around the edges, making it so inviting.
Step 7: Cool and add the finishing touch
Allow the cookies to sit on the hot baking sheet for about 2 minutes so they firm up slightly, then transfer them to a wire rack. While still warm, press a chilled Hershey’s Kiss right into the marshmallow center. Once cooled, the cookie blossoms are ready for you to enjoy—or package up to delight a friend.
Pro Tips for Making Hot Cocoa Cookie Blossoms Recipe
- Use Room Temperature Eggs: I learned that cold eggs can toughen the dough and cause uneven mixing—room temp gives you smoother batter.
- Don’t Skip the Sugar Roll: Rolling each dough ball in sugar creates a subtle crackle and pretty sparkle I can’t get enough of.
- Freeze Kisses Before Baking: Pop your Hershey’s Kisses in the freezer so they don’t lose shape when you press them into warm marshmallows.
- Timing is Everything: Watch the bake time closely—too long and the marshmallows brown too much or get marshmallow burnout; too short, and they won’t puff just right.
How to Serve Hot Cocoa Cookie Blossoms Recipe
Garnishes
When I serve these, I keep the garnishes simple—sometimes a light dusting of powdered sugar or a sprinkle of mini chocolate chips adds a little extra flair. Fresh mint leaves also make a lovely contrast in photos and add a pop of color if you’re giving them as a gift.
Side Dishes
These cookies pair beautifully with a cold glass of milk or a mug of warm tea or coffee. For a truly indulgent treat, serve alongside homemade whipped cream or a scoop of vanilla ice cream—your guests will think you spent hours in the kitchen.
Creative Ways to Present
For special occasions, I like arranging these cookies on a tiered serving tray next to mini hot cocoa mugs. Wrapping them individually in clear cellophane tied with a festive ribbon makes a charming gift, especially during the holiday season. You could even place the cookies in mason jars layered with a pinch of cocoa powder for a “hot cocoa in cookie form” gift!
Make Ahead and Storage
Storing Leftovers
Leftover Hot Cocoa Cookie Blossoms keep best in an airtight container at room temperature for up to 3 days. I like to separate layers with parchment paper to prevent sticking, and they stay soft and tasty without losing their charm.
Freezing
I’ve frozen the dough balls before baking with great success! Just scoop and roll them in sugar, place on a tray to freeze individually, then transfer to a freezer-safe bag. When you’re ready, bake straight from frozen, just add a minute or two to the baking time.
Reheating
To enjoy leftovers warm, I pop cookies into a microwave for 10–15 seconds or a quick 3-minute warm-up in a 300°F oven to bring back that melty marshmallow goodness without drying them out.
FAQs
-
Can I substitute regular Hershey’s Kisses for the Hot Cocoa variety?
Absolutely! Regular Hershey’s Kisses will work just fine if you can’t find the Hot Cocoa chocolates. You might miss that subtle cocoa twist they add, but the classic milk chocolate version still tastes amazing.
-
Why do the marshmallows need to be cut in half?
Cutting marshmallows in half ensures they don’t overwhelm the cookie and puff up just right to create a fluffy, blossoming top rather than a giant blob. It’s the key to that iconic look and texture.
-
Can I make these cookies dairy-free or vegan?
Yes! For dairy-free, swap butter with a plant-based alternative and ensure your chocolates are dairy-free. For vegan, substitute eggs with flax eggs or another egg replacer, though texture may differ slightly.
-
What’s the best way to avoid flat cookies?
Don’t overmix your dough, measure your flour carefully, and make sure your butter is cooled but not cold. Also, resting the dough before baking really helps keep the cookies from spreading too thin.
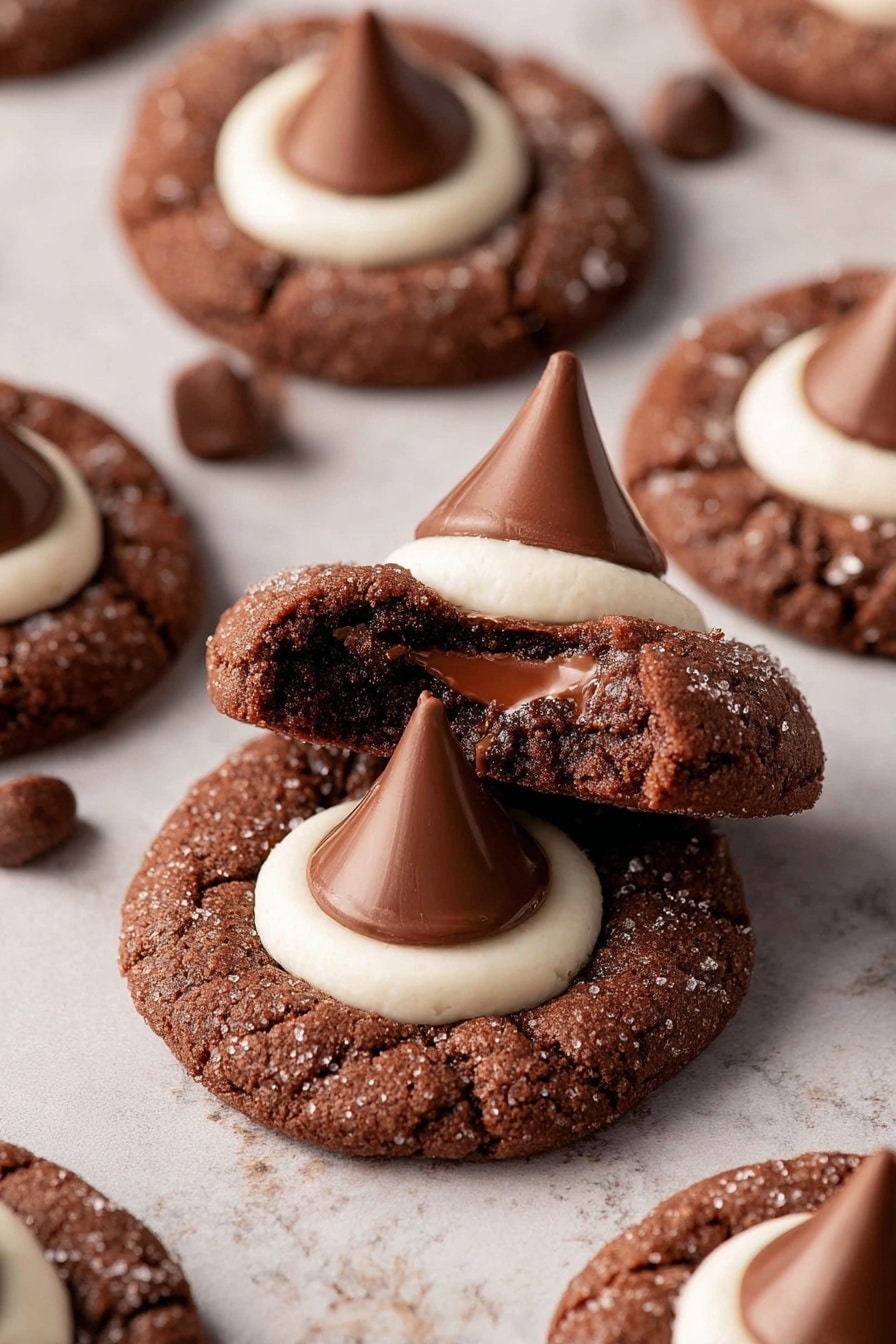
Final Thoughts
I absolutely love how these Hot Cocoa Cookie Blossoms turn out every single time—they’re my go-to “feel good” cookie that never disappoints. They remind me of cozy nights by the fire with my family, and I hope when you make them, they bring that same warmth and joy to your kitchen. Give this recipe a try—you might just find it becoming a holiday staple or your favorite comfort treat!
Print
Hot Cocoa Cookie Blossoms Recipe
- Prep Time: 15 minutes
- Cook Time: 8 minutes
- Total Time: 23 minutes
- Yield: 20 cookies 1x
- Category: Dessert
- Method: Baking
- Cuisine: American
Description
Enjoy these delightful Hot Cocoa Cookie Blossoms, combining rich cocoa-infused cookies with gooey marshmallows and creamy Hershey’s Kisses on top. Perfect for cozy evenings, these cookies are a nostalgic treat that bring the warmth of hot cocoa in every bite.
Ingredients
Dry Ingredients
- 1 1/3 cup All-purpose flour
- 1/4 tsp Baking soda
- 1/4 tsp Baking powder
- 1/4 cup Unsweetened cocoa powder
- 1/2 tsp Salt
Wet Ingredients
- 1/2 cup Unsalted butter, melted and cooled
- 3/4 cup Brown sugar, packed light or dark
- 1/4 cup White granulated sugar
- 2 tsp Pure vanilla extract
- 1 Large egg, room temperature
- 1 Egg yolk, room temperature
For Rolling and Topping
- 1/3 cup White granulated sugar, for rolling
- 10 Marshmallows, regular sized
- 20 Hershey’s Kisses Hot Cocoa Chocolates
Instructions
- Combine Dry Ingredients: In a medium bowl, sift together the all-purpose flour and unsweetened cocoa powder. Add baking soda, baking powder, and salt to the mixture and set aside.
- Mix Wet Ingredients: In a large bowl, combine the cooled melted butter with brown sugar, white granulated sugar, pure vanilla extract, room temperature egg, and egg yolk. Mix until smooth.
- Combine Wet and Dry Mixtures: Add the dry ingredients to the wet ingredients and fold gently with a rubber spatula until just combined, taking care not to overmix the dough.
- Preheat Oven and Prepare Chocolate: Preheat your oven to 350°F (177°C). Line two cookie sheets with parchment paper. Let the dough rest for 10 minutes to allow gluten to absorb moisture. Meanwhile, unwrap the Hershey’s Kisses and place them in the freezer to keep firm.
- Shape and Roll Dough Balls: Use a small cookie scoop to portion out the dough. Pour the 1/3 cup white sugar into a bowl and roll each dough ball in the sugar to coat. Arrange 12 dough balls per cookie sheet. Then, slice each marshmallow horizontally with kitchen scissors and set them aside.
- Bake Cookies: Bake one sheet of cookies at a time for 6 minutes. After 6 minutes, quickly top each cookie with a half marshmallow and bake for an additional 2-3 minutes until marshmallows are soft and cookies are set.
- Cool and Top with Chocolates: Let the cookies cool on the hot pan for 2 minutes before transferring them to a cooling rack. Once slightly cooled, top each cookie with a Hershey’s Kiss. Serve once fully cool.
Notes
- Ensure flour is spooned and leveled or weighed using a kitchen scale to avoid compacted flour which can dry out cookies and prevent spreading.
- For high altitude baking, add an extra 1 tablespoon of flour to improve texture.
- Take dairy ingredients out 2 hours before baking to reach room temperature for best mixing results.
Nutrition
- Serving Size: 1 cookie
- Calories: 140
- Sugar: 12g
- Sodium: 90mg
- Fat: 7g
- Saturated Fat: 4g
- Unsaturated Fat: 3g
- Trans Fat: 0g
- Carbohydrates: 18g
- Fiber: 1g
- Protein: 2g
- Cholesterol: 25mg


