
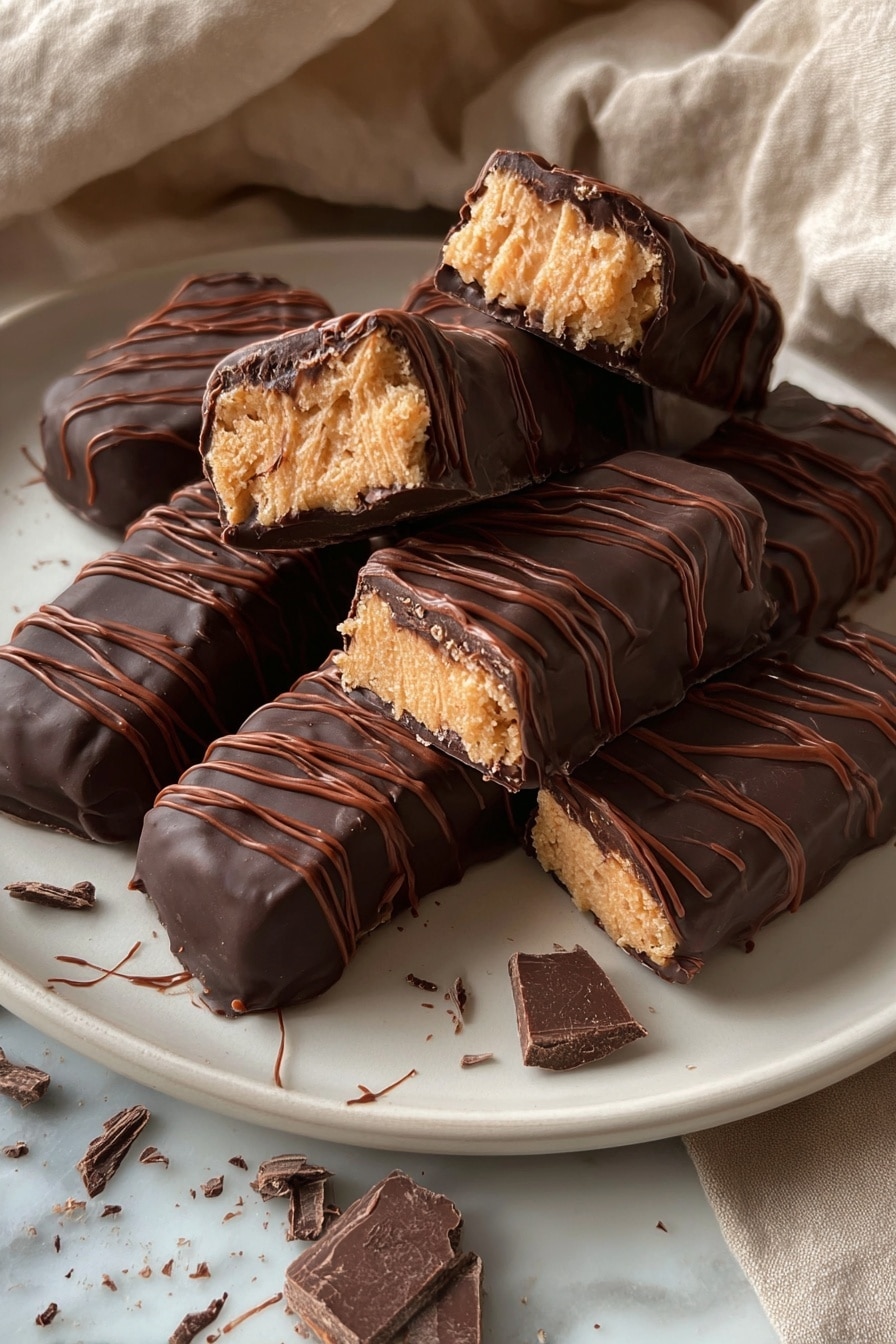
If you’re anything like me and have always loved Butterfingers but wish there was a healthier option without all the artificial junk, then you’re going to flip for this Healthy Homemade Butterfingers Recipe. It’s got that perfect crispy peanutty crunch, coated in rich chocolate, but uses wholesome ingredients you can actually feel good about. Trust me, once you try this version, you won’t miss the store-bought bars at all!
Why You’ll Love This Recipe
- Wholesome Ingredients: Made with simple pantry staples and natural sweeteners, so you know exactly what’s in your treat.
- No Baking Required: You can whip these up in no time and skip the oven, which is perfect for hot days or quick fixes.
- Customizable Crunch: Using cornflakes gives it that satisfyingly crispy texture that mimics the original bar perfectly.
- Freezer-Friendly: Easy to store and grab later, these keep their deliciousness in the fridge or freezer for whenever that chocolate craving hits.
Ingredients You’ll Need
I love how simple yet effective these ingredients are. They work beautifully to create that sweet, crunchy, and chocolatey combo, and you can easily grab them during your next grocery run.
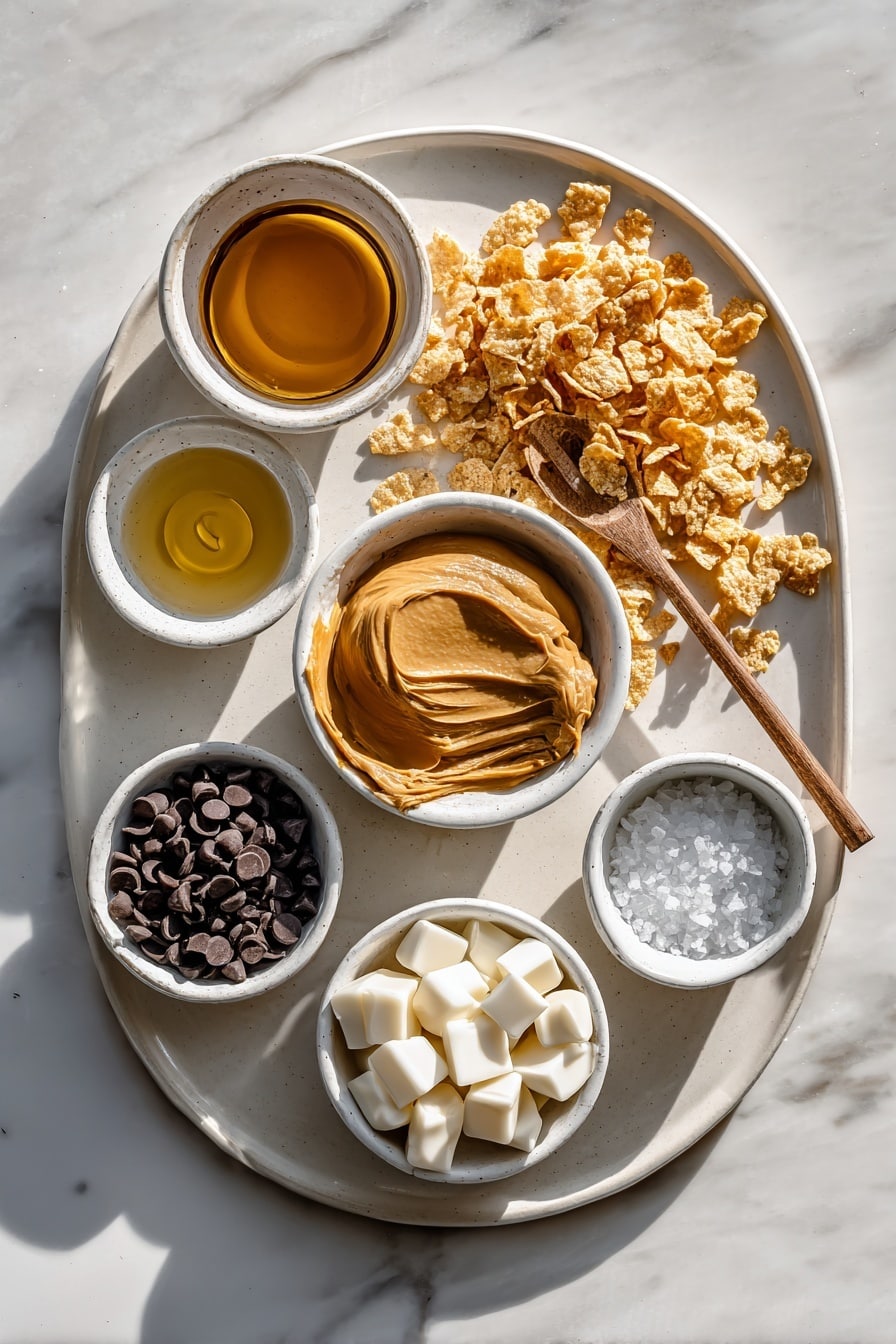
- Peanut Butter: Go for natural or unsweetened for the healthiest option and a rich, nutty flavor.
- Honey: A natural sweetener that adds just the right amount of sweetness and helps bind everything together.
- Vanilla Extract: Adds warmth and depth—don’t skip it, it really elevates the flavor.
- Sea Salt: Balances the sweetness and enhances the overall flavor beautifully.
- Cornflake Cereal: Provides the iconic crunch that makes Butterfingers so irresistible.
- Chocolate Chips: Choose dairy-free if needed; melting these will give your bars that silky chocolate coating.
- Coconut Oil: Helps melt the chocolate smoothly and adds a hint of tropical richness.
Variations
One of the best things about this Healthy Homemade Butterfingers Recipe is how easy it is to tweak. I love experimenting with small changes to tailor the bars exactly to what my family enjoys.
- Nut-Free Version: I’ve replaced peanut butter with sunbutter when friends with allergies come over, and the bars still turn out fantastic.
- Crunch Swap: Try crushed crispy rice cereal instead of cornflakes for a different yet just-as-crunchy texture I occasionally like.
- Darker Chocolate: For a richer taste, swap semisweet chips for dark chocolate—just be ready for a more intense flavor.
- Added Crunch: Toss in some chopped roasted peanuts to amp up the nuttiness and add an extra layer of texture.
How to Make Healthy Homemade Butterfingers Recipe
Step 1: Warm and Blend the Peanut Butter Mixture
Start by warming the peanut butter, honey, vanilla extract, and sea salt in a saucepan over medium-low heat. Stir gently for about 2 to 4 minutes until the mixture is smooth and well combined. Watch closely so it doesn’t scorch—this step is key to having that silky coating for your cereal.
Step 2: Fold in the Cornflakes
Now, pour the warm peanut butter mixture into a large bowl with the cornflakes. Stir everything together gently but thoroughly, crushing some of the cereal to make sure every piece gets coated. This part is so satisfying—you’ll see all those crunchy flakes embrace that sticky peanut butter goodness!
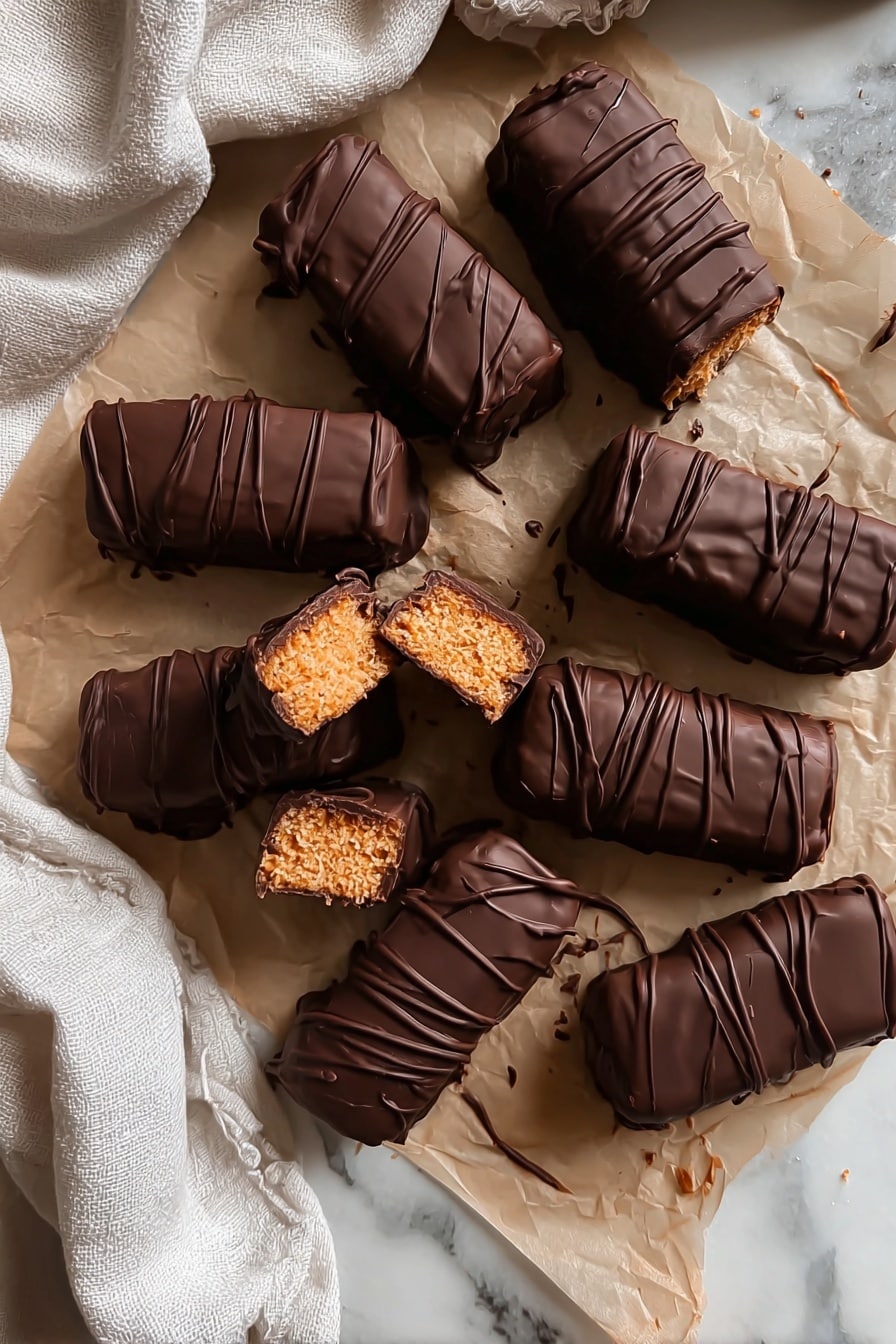
Step 3: Shape and Freeze Your Butterfingers
Form the mixture into 12-14 log shapes—think finger-sized bars. Place them on a baking sheet lined with parchment paper for easy cleanup, and pop them in the freezer for about an hour. Freezing firms them up so they hold their shape when you dip them in chocolate.
Step 4: Melt the Chocolate and Coat Your Bars
Melt the chocolate chips and coconut oil together, either in the microwave in short bursts or gently over a double boiler. Be patient and careful here—burnt chocolate is no good! Once melted, dip each frozen butterfinger into the chocolate, letting the excess drip off before returning to the parchment-lined tray.
Step 5: Set and Store
Pop your chocolate-coated butterfingers back into the freezer for about 10 minutes until the chocolate sets nicely. Then, you can store them in the fridge or freezer depending on how soon you want to enjoy them. They keep their shape and freshness beautifully either way.
Pro Tips for Making Healthy Homemade Butterfingers Recipe
- Don’t Overheat the Peanut Butter Mix: Gentle warming keeps it smooth and prevents separation so your bars stay cohesive.
- Crush Cereal Slightly: Lightly crushing cornflakes creates a better texture that holds together without being soggy.
- Use Coconut Oil for Chocolate: This ensures the chocolate doesn’t stiffen up too hard and adds a subtle flavor twist.
- Freeze Before Chocolate Dip: Firm bars are much easier to coat without falling apart or melting in your hands.
How to Serve Healthy Homemade Butterfingers Recipe
Garnishes
I like to sprinkle just a pinch of flaky sea salt on top right after dipping the bars in chocolate. It heightens the flavor and gives a fancy touch that really impresses guests!
Side Dishes
These butterfingers go beautifully alongside a fresh fruit bowl or a small scoop of dairy-free ice cream for an indulgent yet balanced dessert pairing.
Creative Ways to Present
For parties, I love arranging these on a platter lined with parchment and decorating around them with crushed peanuts or cocoa nibs. They make the perfect bite-sized party snack your friends will rave about!
Make Ahead and Storage
Storing Leftovers
I find keeping these butterfingers in an airtight container in the fridge keeps them fresh for up to a week. The chocolate remains firm, and the peanutty inside stays crispy without getting soggy.
Freezing
Freezing is a game-changer with this recipe. I freeze extras in single layers inside parchment-lined containers, and they thaw quickly at room temp or straight from the freezer for a cool refreshing snack.
Reheating
Since these don’t really need reheating, I treat them like a candy bar—just enjoy chilled or at room temperature. If you do want softer chocolate, pop them in the microwave for a few seconds but watch closely to avoid melting.
FAQs
-
Can I use a different nut butter for this Healthy Homemade Butterfingers Recipe?
Absolutely! Almond butter or cashew butter can work well if you prefer, just choose one that’s creamy and unsweetened for the best texture and flavor.
-
Is this recipe gluten-free?
It depends on the brand of cornflakes you use. Many regular cornflakes contain malt barley, so look for gluten-free labeled cereals to make sure the recipe stays gluten-free.
-
How long do these butterfingers last in the fridge?
Stored in an airtight container, they usually last up to one week in the fridge without losing their crunch or flavor. Just keep an eye out for any condensation that might soften the bars.
-
Can I make these ahead of time for a party?
Definitely! I make these a day or two ahead and keep them chilled until serving. They hold up wonderfully, and the freezing step means they maintain their shape perfectly.
Final Thoughts
I absolutely love how this Healthy Homemade Butterfingers Recipe lets me enjoy that classic candy bar taste without the guilt or questionable ingredients. The crunchy texture, peanut butter goodness, and smooth chocolate make it a family favorite every time I make it. I hope you give it a try too—your pantry-friendly, naturally sweetened butterfingers are waiting to impress!
Print
Healthy Homemade Butterfingers Recipe
- Prep Time: 10 minutes
- Cook Time: 4 minutes
- Total Time: 1 hour 14 minutes
- Yield: 12–14 butterfingers 1x
- Category: Dessert
- Method: Stovetop
- Cuisine: American
- Diet: Gluten Free
Description
This Healthy Homemade Butterfingers recipe offers a delightful twist on the classic candy bar, using natural ingredients like peanut butter, honey, and cornflake cereal. Coated in melted chocolate, these homemade treats are perfect for satisfying sweet cravings with a healthier approach.
Ingredients
Butterfinger Base
- 1 cup peanut butter
- 1/3 cup honey
- 1/2 tsp vanilla extract
- 1/2 tsp sea salt
- 1 3/4 cup cornflake cereal
Chocolate Coating
- 1 cup chocolate chips (dairy free, if needed)
- 1 tsp coconut oil
Instructions
- Heat peanut butter mixture: In a saucepan over medium-low heat, combine the peanut butter, honey, vanilla extract, and sea salt. Heat for 2-4 minutes, stirring occasionally, until the mixture is heated through and smooth.
- Mix with cereal: Transfer the peanut butter mixture to a large mixing bowl containing the cornflake cereal. Stir thoroughly to combine, gently crushing some of the cereal to ensure all pieces are coated evenly.
- Form logs and freeze: Shape the mixture into 12 to 14 logs. Place them on a parchment-lined plate or baking sheet. Freeze for 1 hour to firm up.
- Melt chocolate coating: Once the logs are frozen, melt the chocolate chips and coconut oil together in the microwave or on the stove, taking care not to burn the chocolate.
- Dip logs in chocolate: Dip each frozen butterfinger log into the melted chocolate, allowing any excess to drip off. Return the dipped logs onto the parchment-lined plate and place them back in the freezer for about 10 minutes until the chocolate coating sets.
- Storage: Store the finished butterfingers in the refrigerator or freezer to keep them firm and fresh until ready to serve.
Notes
- Use dairy-free chocolate chips if you need a vegan or dairy-free option.
- To make the mixture easier to work with, crush the cereal slightly while mixing to ensure better coating.
- Store butterfingers in an airtight container to maintain freshness.
- For a crunchier texture, do not over-crush the cornflakes.
Nutrition
- Serving Size: 1 butterfinger (approximate)
- Calories: 160
- Sugar: 12g
- Sodium: 110mg
- Fat: 10g
- Saturated Fat: 4g
- Unsaturated Fat: 5g
- Trans Fat: 0g
- Carbohydrates: 15g
- Fiber: 1.5g
- Protein: 5g
- Cholesterol: 0mg


