
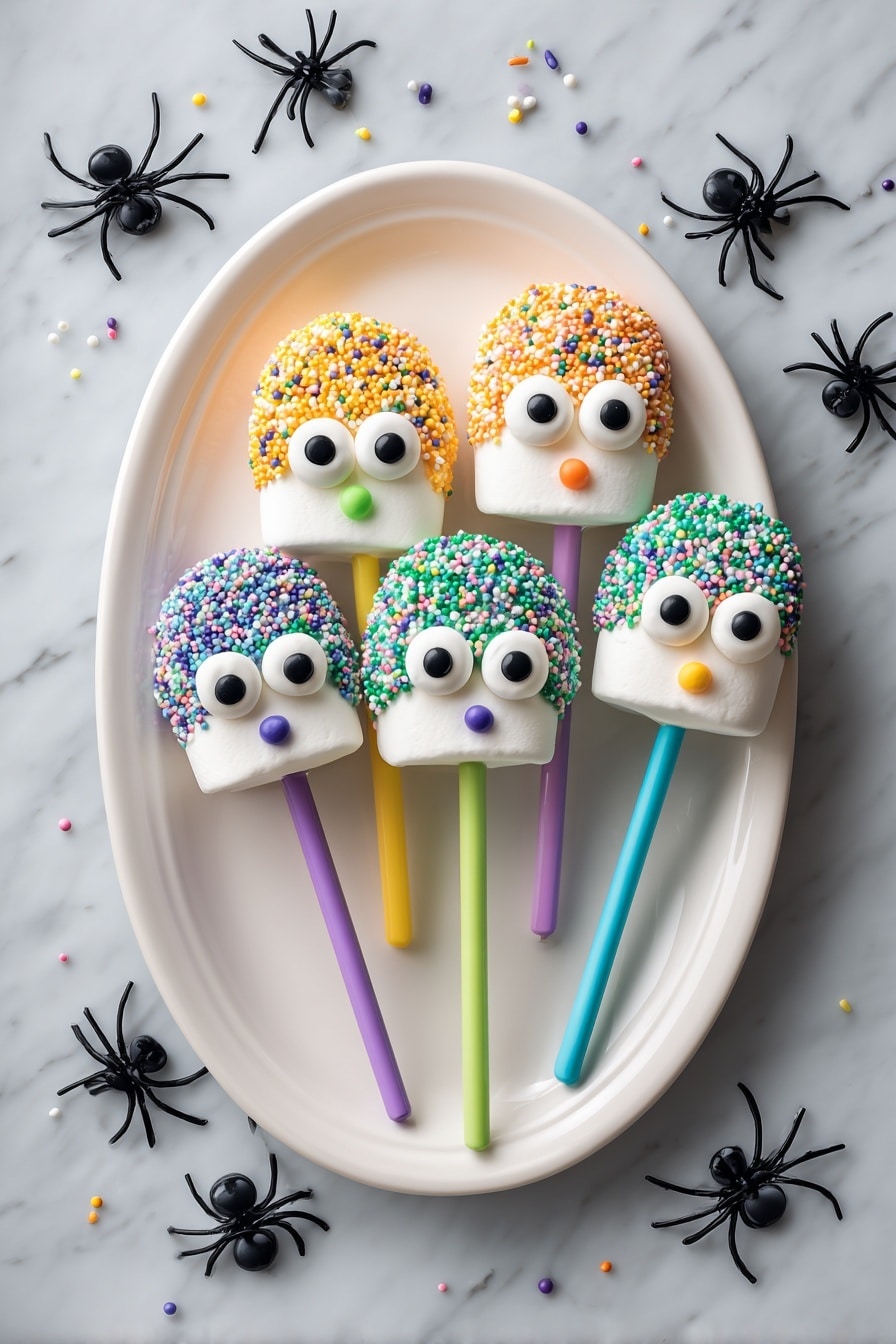
If you’re looking for a fun, festive treat that kids and adults alike will rave about, you’ve got to try this Halloween Marshmallow Pops Recipe. These adorable, colorful pops are not just super cute—they’re ridiculously easy to make, and I absolutely love how they brighten up any Halloween party or spooky movie night. Whether you’re a seasoned baker or a total beginner, this recipe is your new go-to for a quick and delightful Halloween snack.
Why You’ll Love This Recipe
- Super Simple: You’ll love how quick it is to transform ordinary marshmallows into spooky party pops.
- Festive & Fun: Perfect for Halloween vibes, kids go crazy for decorating and munching on these pops.
- Versatile Decoration: You can mix and match colors and toppings to fit any Halloween theme you love.
- Great for Beginners: I used to struggle with complicated Halloween treats, but this is foolproof.
Ingredients You’ll Need
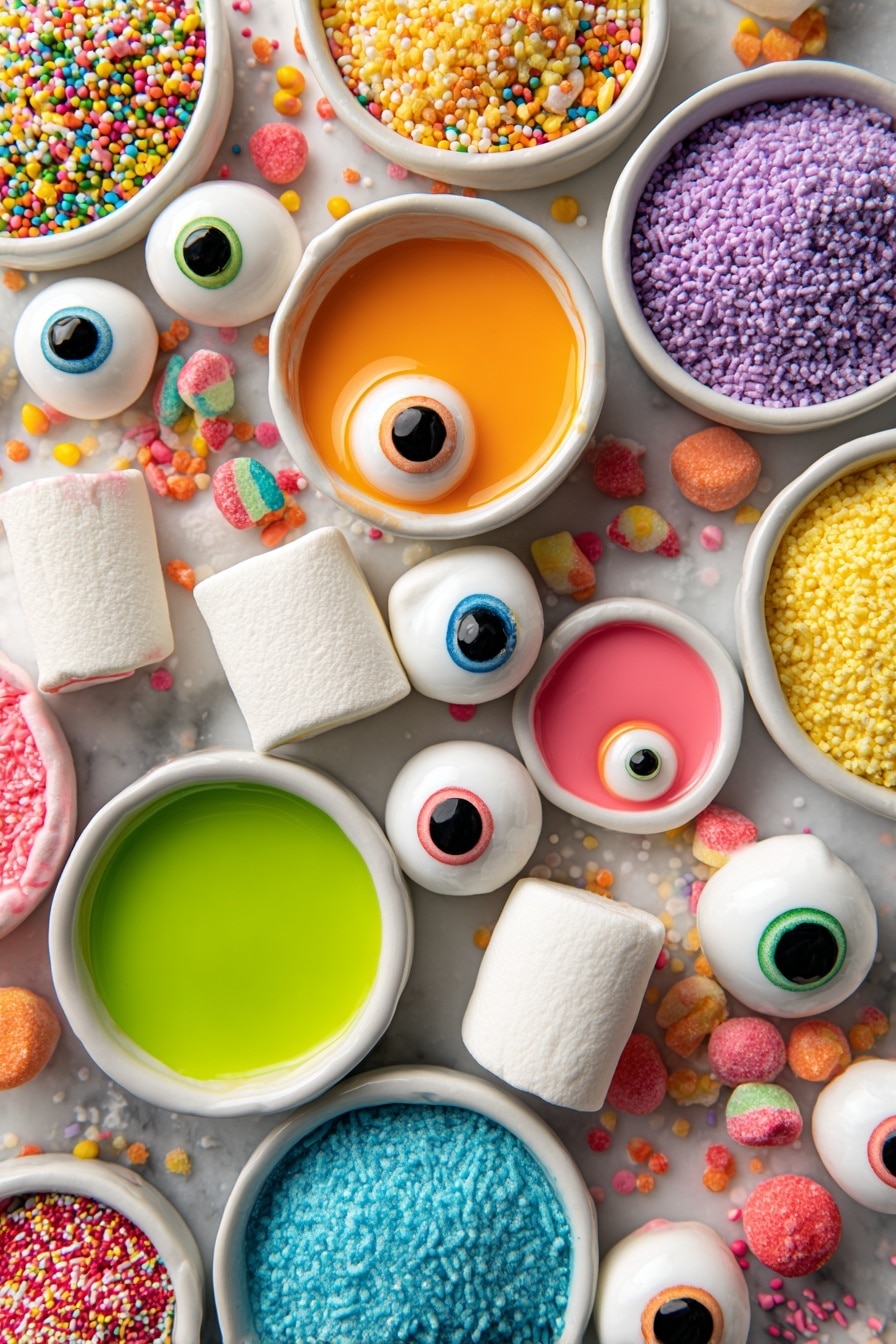
The magic of this Halloween Marshmallow Pops Recipe lies in the simple ingredients that still pack a punch of color and fun. You don’t need fancy stuff—just grab your favorite candy melts and a few playful toppings to add character.
- Jumbo Marshmallows: Big marshmallows hold the decorations well and create a great base for candy coating.
- Cake Pop Sticks: Essential for ease of dipping and decorating, plus makes it fun to hold!
- Sprinkles: Use these for “hair”—I like to pick bright Halloween colors for a festive look.
- Candy Eyes: These bring the pops to life; you can find reusable ones at most craft stores or online.
- Sweets for Mouth: Tiny candies or edible markers work great for giving your pops personality.
- Orange, Green, and Yellow Candy Melts: These melt easily and provide that classic Halloween palette that’s both vibrant and yummy.
Variations
I love how customizable this Halloween Marshmallow Pops Recipe is. Feel free to get creative with colors and toppings—this is your chance to make something uniquely spooky or silly. You can even tailor this recipe to suit dietary needs without losing any fun!
- Gluten-Free Option: Since marshmallows and candy melts are often gluten-free, it’s naturally perfect for gluten-sensitive guests.
- Different Color Themes: You can swap out the classic orange/green/yellow candy melts for purple and black to match your style—my kids love the neon colors!
- Vegan Candy Melts: If you want a vegan-friendly version, try vegan candy melts or melt chocolate chips with coconut oil.
- Character Faces: Using edible markers or candy eyes, you can create monsters, pumpkins, witches, or ghosts—the possibilities are endless!
How to Make Halloween Marshmallow Pops Recipe
Step 1: Prep Your Marshmallow Pops
Start by carefully pushing a cake pop stick into each jumbo marshmallow. Make sure to insert it firmly but gently so the marshmallow doesn’t tear or squish. Laying them out on a plate or tray gives you a neat workspace and makes the next steps easier. This pre-posting step is super important because a loose stick can cause a messy dip later on!
Step 2: Get Your Decorations Ready
Before melting any candy, line up your sprinkles, candy eyes, and sweets on small plates or baking sheets. Having everything close by helps when the candy melts are ready—you want to work fast before they harden. Trust me, I once left the sprinkles too far away and almost ruined my flow!
Step 3: Melt the Candy Melts
Pour the orange, green, and yellow candy melts into separate microwave-safe bowls. Follow the package instructions—usually heating in 30-second intervals and stirring in between to avoid burning. The melts should be smooth and completely lump-free for the best dip. I like to cover the bowls with plastic wrap after melting to keep the surface smooth, it really helps.
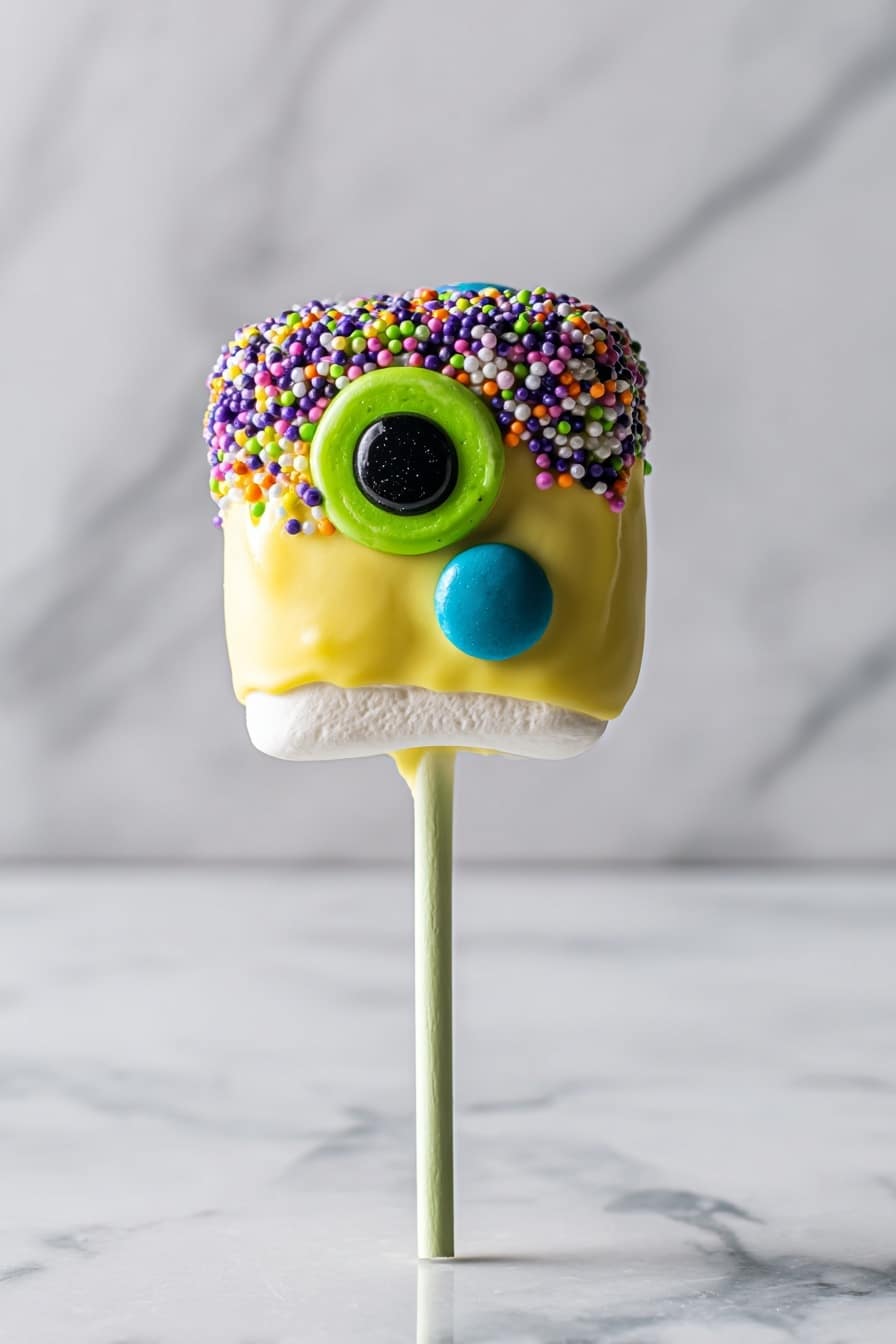
Step 4: Dip and Decorate
Dip each marshmallow pop into one color of melted candy, coating it evenly. Then quickly dip the top into your sprinkles to create the “hair.” This is where the pops get their personality! While the candy is still soft, gently press on the candy eyes and sweets for the mouth. Set the pops aside to harden—about 10 minutes does the trick. I like to place them upright in a styrofoam block or a shallow dish lined with parchment.
Step 5: Repeat and Enjoy!
Keep going until all your marshmallow pops are covered, decorated, and set aside to harden. I guarantee you’ll be tempted to eat one (or two!) right away—they’re just that good.
Pro Tips for Making Halloween Marshmallow Pops Recipe
- Use Room Temperature Marshmallows: They dip better and reduce sudden melting of the candy coating.
- Thin Your Candy Melts Slightly: Adding a teaspoon of vegetable oil or shortening can make dipping smoother and more even.
- Work Quickly with Decorations: The candy hardens fast, so have sprinkles and candy eyes ready before dipping.
- Avoid Overcrowding Pops: Give each pop space to dry upright to keep your designs intact and neat.
How to Serve Halloween Marshmallow Pops Recipe
Garnishes
I personally love adding a dash of edible glitter or a few chunky Halloween-themed sprinkles on top to amp up the festive vibe. You can also drizzle contrasting colors of melted candy for an artsy touch. The “hair” part is my favorite spot to experiment, and kids always get a kick out of creating wild hairstyles on their pops!
Side Dishes
Pair these marshmallow pops with a fresh fruit platter or some pumpkin spice popcorn for a complete Halloween snack table. I’ve also served them alongside warm apple cider, and it’s fun to watch everyone’s faces light up with that combo.
Creative Ways to Present
I love setting them up in a hollowed-out pumpkin or sticking them in a spooky skull-shaped foam block. Another idea is to place them standing in jars filled with candy corn or colored sugar crystals—this not only displays them beautifully but adds another layer of sweetness! You’ll find that presentation really makes guests go “Wow!”
Make Ahead and Storage
Storing Leftovers
I like to store leftover Halloween Marshmallow Pops in an airtight container at room temperature. This keeps them fresh and prevents the candy coating from getting sticky or melting. They generally last a couple of days—although in my house, I rarely have leftovers!
Freezing
If you want to freeze them, wrap each pop individually in plastic wrap and place them in a freezer bag. When thawed at room temperature, they maintain their texture well, just watch for slight condensation on the candy coating which you can gently pat dry.
Reheating
Since these are more of a candy treat, I usually don’t reheat them. But if you want to refresh the candy coating’s shine, a quick blast of warm air from a hairdryer held at a distance works great to soften any cracks.
FAQs
-
Can I use regular marshmallows instead of jumbo marshmallows for this Halloween Marshmallow Pops Recipe?
Absolutely! Smaller marshmallows work too, but jumbo ones give you more surface area to decorate and are easier to handle on sticks. If you use regular ones, just be careful during dipping—they might need a gentler touch to avoid falling off the stick.
-
What’s the best way to melt candy melts without burning them?
The key is patience! Heat them in short bursts (usually 20-30 seconds), stirring well in between. Avoid overheating because candy melts can seize or burn very easily. I’ve learned that covering the bowl with plastic wrap while resting keeps them smooth.
-
What decorations work best for the mouths on these pops?
Small candies like mini M&Ms, edible markers, or even colored icing pens work great to create expressive mouths. Choose something that won’t easily fall off once the candy coating hardens.
-
Can I prepare these a day in advance?
Yes! You can decorate and let them harden, then store them in an airtight container overnight. Just keep them cool and dry to maintain their crisp candy coating by the time of your party.
Final Thoughts
This Halloween Marshmallow Pops Recipe has become a favorite in my house every spooky season. It’s simple, playful, and just the right amount of sweet to excite both kids and adults without the stress of complicated baking. When friends come over, these pops always spark conversation and smiles—plus they’re so quick that you can whip them up last-minute and still look like a pro. Give it a try and add your personal twist—I’m betting these pops will be your Halloween treat staple for years to come!
Print
Halloween Marshmallow Pops Recipe
- Prep Time: 5 minutes
- Cook Time: 10 minutes
- Total Time: 15 minutes
- Yield: 12 marshmallow pops 1x
- Category: Dessert
- Method: No-Cook
- Cuisine: American
- Diet: Gluten Free
Description
These festive Halloween Marshmallow Pops are a fun and colorful treat perfect for celebrating the spooky season. Jumbo marshmallows are dipped in vibrant orange, green, and yellow candy melts, then decorated with sprinkles for hair, candy eyes, and sweet mouths to create playful Halloween characters. Easy to make and gluten-free, these pops are great for kids’ parties or as a seasonal dessert.
Ingredients
Marshmallows and Decorations
- 12 jumbo marshmallows (gluten-free)
- 12 cake pop sticks
- Sprinkles for hair
- Candy eyes
- Sweets for mouth
Candy Coating
- 170 g (1 cup) orange candy melts
- 170 g (1 cup) green candy melts
- 170 g (1 cup) yellow candy melts
Instructions
- Prepare Marshmallows: Insert a cake pop stick into each jumbo marshmallow carefully, ensuring they are secure and will not fall off during dipping.
- Set Up Decorations: Arrange all sprinkles, candy eyes, and sweets on a flat surface or small bowls for easy access when decorating.
- Melt Candy Coatings: Melt the orange, green, and yellow candy melts separately in bowls according to the packet instructions, typically by microwave heating in short intervals and stirring until smooth.
- Dip Marshmallows: Dip each marshmallow into a chosen color of melted candy melts, fully coating the marshmallow. Then immediately dip the top into sprinkles to create hair texture.
- Add Facial Features: While the candy coating is still wet, press candy eyes and sweets onto the marshmallow to form eyes and a mouth.
- Set to Harden: Place the decorated marshmallow pops on parchment paper or a silicone mat and allow the candy coating to harden completely before serving, which may take 10-15 minutes.
- Repeat: Repeat the dipping and decorating steps until all marshmallows are coated and decorated.
Notes
- Use gluten-free marshmallows to keep the pops safe for gluten-sensitive guests.
- If candy melts harden during dipping, gently reheat them to maintain a smooth coating.
- Decorate quickly after dipping before the candy melts begin to set to ensure the sprinkles and candy eyes stick properly.
- These pops are best enjoyed fresh but can be stored in an airtight container at room temperature for up to 2 days.
- Mix and match candy melt colors to customize your Halloween theme.
Nutrition
- Serving Size: 1 marshmallow pop
- Calories: 110
- Sugar: 18g
- Sodium: 15mg
- Fat: 2.5g
- Saturated Fat: 2g
- Unsaturated Fat: 0.4g
- Trans Fat: 0g
- Carbohydrates: 22g
- Fiber: 0g
- Protein: 0g
- Cholesterol: 0mg
