
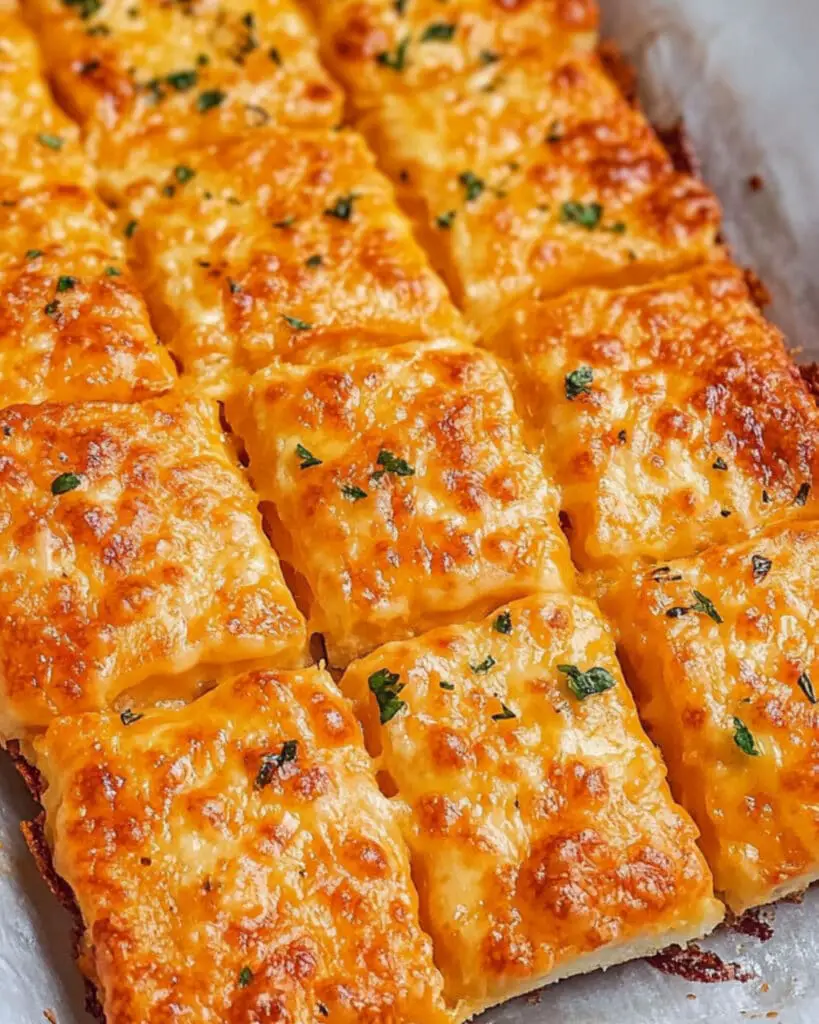
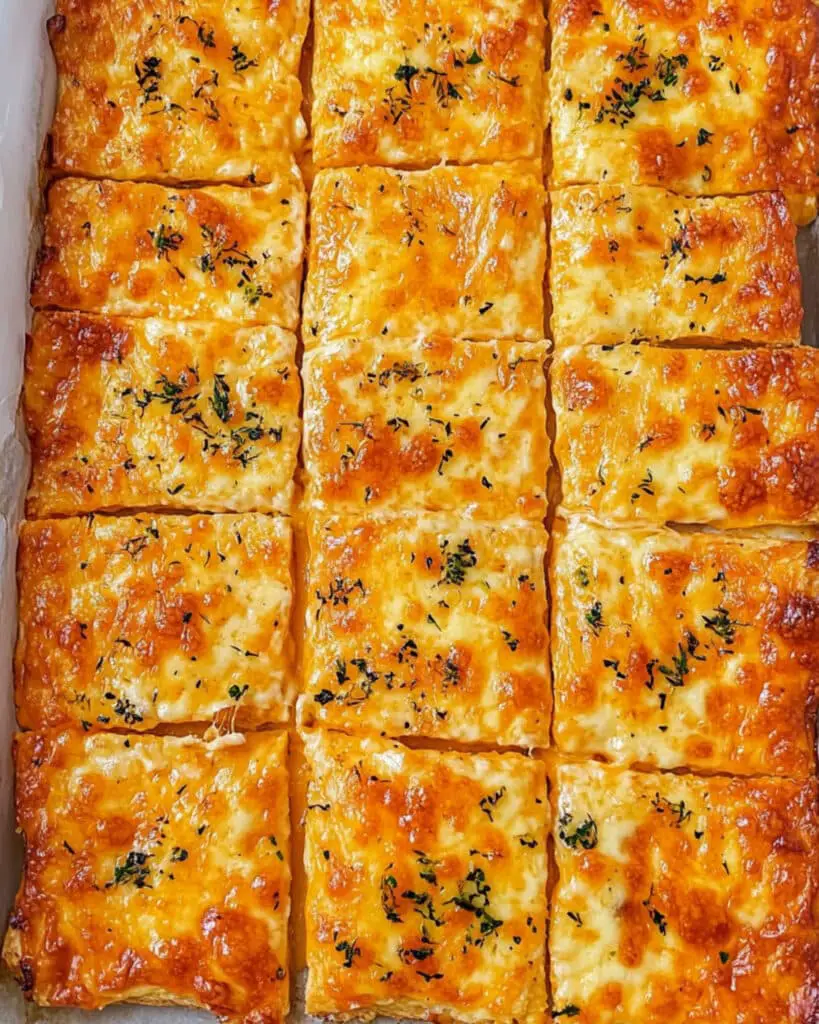
There’s nothing quite like the comforting aroma of freshly baked breadsticks loaded with melty cheese and garlic. These Easy Cheesy Breadsticks are your answer to quick, homemade deliciousness—perfect for when you crave a cozy appetizer, a snack with a cheesy pull, or a side dish to make any meal more inviting. In under 30 minutes, you get soft, golden breadsticks with a crispy edge and gooey cheese, all jazzed up with aromatic garlic and herbs. This recipe is incredibly fast, fuss-free, and uses simple ingredients you probably already have on hand, making it a total lifesaver for busy weeknights.
Why You’ll Love This Recipe
- Ridiculously Quick: Minimal prep, super speedy baking, and zero fuss—these come together faster than ordering delivery.
- Seriously Satisfying: Buttery, cheesy, garlicky—each bite is a flavor explosion that melts in your mouth.
- Kid and Crowd-Approved: Adults love them, but they’re always a huge hit with kids, too.
- Perfect Pairing: Whether next to soup, pasta, or a big salad, these breadsticks are the ideal finishing touch.
- Flexible: No special gadgets or skills needed—just unroll, top, bake, and enjoy.
Ingredients You’ll Need
Everything here is a classic for a reason—the result is so much greater than the sum of its parts!
- Refrigerated Pizza Crust Dough: The ultimate time-saver! Use a classic variety for the softest breadsticks, or a thin crust for extra crunch.
- Melted Butter: Brings the richness; brushing it on the dough ensures perfectly golden tops and amazing flavor.
- Minced Garlic: For undeniable aroma and deep, savory notes. Garlic powder works as a backup, but fresh is best!
- Mozzarella Cheese (Shredded): The star of the show for that irresistible cheesy stretch.
- Parmesan Cheese: Adds salty, nutty complexity, and helps the tops brown beautifully.
- Dried Basil: A touch of herbal freshness that ties all the flavors together.
- Salt and Pepper: Essential to wake up all the other flavors—season to taste!
Note: You’ll find the complete list of ingredients, along with their exact measurements, in the printable recipe card at the bottom of this post.
Variations
- Spicy Kick: Sprinkle crushed red pepper flakes over the cheese before baking.
- Cheeser’s Delight: Swap or add other cheeses—think sharp cheddar, provolone, or Monterey Jack.
- Herb Explosion: Mix in a little Italian seasoning, oregano, or fresh parsley for bolder flavors.
- Gluten Free: Use a store-bought gluten-free pizza dough; you’ll hardly notice the difference!
- Vegan Option: Use vegan butter and cheeses. Nutritional yeast can also lend a cheesy note.
How to Make Easy Cheesy Breadsticks
Step 1: Preheat and Prep
Set your oven to 425°F. While it heats up, grab a baking sheet and line it with parchment paper for effortless clean-up.
Step 2: Shape the Dough
Roll out your refrigerated pizza dough right on the parchment, shaping it into a rectangle that fills most of the baking sheet. No need to fuss with perfection—rustic is beautiful here.
Step 3: Garlic Butter Magic
Mix melted butter with minced garlic. Brush this golden goodness all over the dough, making sure to get those edges for maximum flavor. Sprinkle salt, pepper, and dried basil across the top—this simple layer adds layers of flavor you can actually taste.
Step 4: Layer the Cheeses
Next, blanket the dough with shredded mozzarella, then scatter Parmesan over the top. Don’t skimp—this is what makes each breadstick truly craveable.
Step 5: Cut Into Sticks
Using a pizza cutter, slice the dough into long strips, then cut across to make breadstick shapes. Don’t separate them yet—the cheese will stay on top as they bake together.
Step 6: Bake
Slide the baking sheet into your preheated oven and bake for 10-12 minutes, or until the cheese is bubbling and golden with a beautifully browned bottom.
Step 7: Finish and Serve
Once they’re out, gently separate the breadsticks along the cuts. Serve them hot and melty, with your favorite dipping sauce.
Pro Tips for Making the Recipe
- Upgrade Your Garlic: If you’re a garlic lover, add extra minced garlic or even a sprinkle of garlic powder on top for double flavor.
- Watch the Baking Time: Each oven is a little different; keep an eye on the breadsticks after 10 minutes for your perfect level of doneness.
- Crust Texture: For crispier breadsticks, let them bake a minute or two longer. For softer, chewier ones, take them out as soon as the cheese is bubbly.
- Reheat Like a Pro: If rewarming, use the oven or toaster oven for best texture—microwave works, but the crust softens.
How to Serve
- With Dips: Marinara is a classic, but ranch, garlic butter, or even spicy sriracha mayo takes them to the next level.
- Soup Sidekick: These are a dream dunked into tomato soup, minestrone, or creamy chowder.
- Paired with Pasta: Nothing beats serving these alongside a homemade pasta night or as a starter when hosting guests.
- Snack Board Addition: Slice into smaller pieces and add to a party platter with dips, cured meats, and veggies.
Make Ahead and Storage
Storing Leftovers
Wrap cooled breadsticks in foil or store in an airtight container in the fridge for up to 3 days.
Freezing
Freeze cooked, cooled breadsticks tightly wrapped or in a freezer bag for up to 2 months. Just thaw and crisp up in the oven before serving.
Reheating
For best results, reheat breadsticks in the oven at 350°F for 5-7 minutes, or in a hot skillet to revive that just-baked texture. The microwave works in a pinch, but the crust may be softer.
FAQs
-
Can I add toppings before baking?
Absolutely! Sliced olives, diced jalapeños, or a dusting of extra herbs can be sprinkled over the cheese before baking for a fun twist.
-
What if I don’t have parchment paper?
No problem. Just lightly grease your baking sheet with butter or oil to prevent sticking—keep an eye on the breadsticks so the bottoms don’t brown too quickly.
-
Can I prepare the breadsticks ahead of time?
Yes! Assemble the breadsticks (stop just before baking), then cover and refrigerate for up to 4 hours. Bake right before serving for the freshest flavor.
-
Is there a way to make these crispier or softer?
Bake a couple extra minutes for crispier breadsticks, or pull them out right when the cheese is melted for super soft results. Adjust to your favorite texture!
Final Thoughts
These Easy Cheesy Breadsticks prove that incredible homemade comfort food doesn’t have to take all evening or require a long list of ingredients. Quick, cheesy, and endlessly customizable, they’ll win over everyone at your table—so don’t be surprised if they disappear fast. Try them once, and you just might find yourself making them every week. Enjoy the simple joy of cheesy, garlicky, buttery bliss—you deserve it!
Print
Easy Cheesy Breadsticks Recipe
- Prep Time: 15 minutes
- Cook Time: 10 minutes
- Total Time: 25 minutes
- Yield: 10 servings 1x
- Category: Appetizers
- Method: Baking
- Cuisine: American
- Diet: Vegetarian
Description
These Easy Cheesy Breadsticks are the perfect quick appetizer or snack, made with refrigerated pizza dough, melty mozzarella, flavorful garlic butter, and a sprinkle of basil and parmesan. Crispy on the outside, gooey on the inside, and ready in only 25 minutes.
Ingredients
Dough
- 10 oz. can refrigerated pizza crust dough
Butter & Seasonings
- 1 Tbsp. melted butter
- 1 tsp. minced garlic
- 1 Tbsp. dried basil
- Salt and pepper to taste
Cheeses
- 1/2 cup shredded mozzarella cheese
- 1 Tbsp. parmesan cheese
Instructions
- Preheat the Oven: Preheat your oven to 425°F (220°C) to ensure proper browning and melting of the cheese.
- Prepare the Dough: Lay the refrigerated pizza dough out flat on a piece of parchment paper. Shape it into a rectangle that roughly matches the size of your baking sheet for even baking.
- Flavor with Butter & Garlic: In a small bowl, mix together the melted butter and minced garlic. Generously brush this mixture all over the surface of the pizza dough to infuse it with rich, garlicky flavor.
- Add Seasonings: Sprinkle the dough evenly with salt, pepper, and dried basil. This will add layers of flavor to each breadstick.
- Add the Cheese: Sprinkle the shredded mozzarella and parmesan cheese over the entire surface of the dough, ensuring even coverage for cheesy perfection.
- Cut the Breadsticks: Using a pizza cutter, slice the dough into long strips, then cut in half across to form breadstick shapes. Do not separate the dough at this stage; leave the cut lines as guides during baking.
- Bake: Slide the parchment (with dough) onto your baking sheet, and bake for 10-12 minutes, or until the cheese is melted and the edges are golden brown.
- Separate and Serve: Once baked, separate the breadsticks along pre-cut lines. Serve warm, optionally with your favorite dipping sauce.
Notes
- For extra crispiness, bake directly on a preheated pizza stone.
- Add red pepper flakes for a spicy kick.
- These breadsticks taste great with marinara or ranch dipping sauce.
- Leftovers can be reheated in the oven or air fryer for best texture.
Nutrition
- Serving Size: 1 breadstick
- Calories: 110
- Sugar: 0.7g
- Sodium: 210mg
- Fat: 5g
- Saturated Fat: 2.3g
- Unsaturated Fat: 2g
- Trans Fat: 0g
- Carbohydrates: 13g
- Fiber: 0.6g
- Protein: 4g
- Cholesterol: 8mg


