
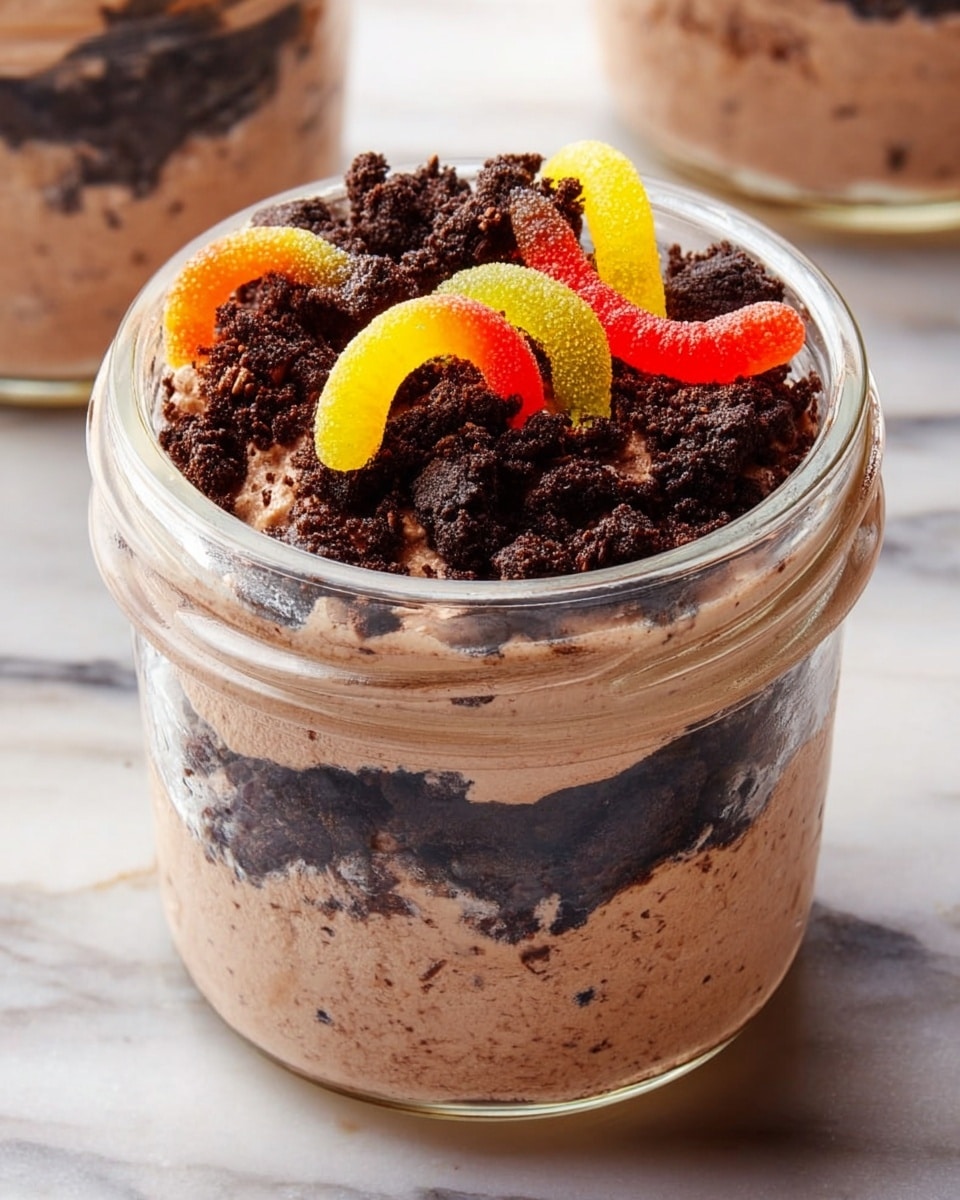
If you’re looking for a fun, simple dessert that always brings a smile, let me introduce you to my all-time favorite Dirt Pudding with Gummy Worms Recipe. This playful treat is not just delicious but also super easy to throw together, making it perfect for family gatherings, kids’ parties, or anytime you want to impress with minimal fuss. Trust me, once you try it, you’ll want to keep this recipe in your back pocket for happy occasions!
Why You’ll Love This Recipe
- Kid-Approved Fun: The gummy worms crawling over “dirt” made from crushed Oreos instantly turn this dessert into a crowd-pleaser for kids and adults alike.
- No-Bake Ease: No oven necessary! This pudding comes together in minutes, which makes it perfect for last-minute dessert cravings or beginner cooks.
- Light and Creamy Texture: I love how the whipped cream adds fluffiness that balances the rich chocolate pudding perfectly.
- Versatile and Customizable: It’s easy to swap toppings or even pudding flavors to match your mood or season.
Ingredients You’ll Need
The magic of this Dirt Pudding with Gummy Worms Recipe comes together with simple, easy-to-find ingredients that you probably already have on hand or can pick up quickly. Each one plays its part—the Oreos create that perfect “dirt” texture, while the whipped cream keeps it light and fluffy.
- Instant chocolate pudding mix: I use the classic 3.5-ounce packs for that rich and creamy base.
- Whole milk: It’s the perfect liquid to achieve a smooth pudding consistency—don’t skimp on this for better flavor.
- Cold heavy cream: Cold is key here, so your whipped cream turns out light and fluffy every time.
- Powdered sugar: Adds just the right touch of sweetness without graininess, essential for silky whipped cream.
- Pure vanilla extract: Trust me, a splash makes a huge difference, adding a warm, comforting note.
- Oreos (crushed): The star of the “dirt” part—make sure to save some for the garnish!
- Gummy worms: Fun, colorful, and yes—totally optional but I don’t skip them, because they bring this dessert to life.
Variations
One of the best things about this Dirt Pudding with Gummy Worms Recipe is how easy it is to customize. Over time, I’ve played with different flavors and add-ins, which keeps it fresh and exciting every time I make it.
- Use different pudding flavors: Chocolate is classic, but pistachio or vanilla pudding can be a fun twist. Once, I made a peppermint version around the holidays—so festive and fresh!
- Swap the candy worms: For a less sweet option, I’ve replaced gummy worms with fresh berries or chocolate chips; you’ll be surprised how tasty it gets.
- Dairy-free version: Try coconut milk and a dairy-free whipped topping for allergies or vegan needs. I tried it for a friend, and it held up surprisingly well!
How to Make Dirt Pudding with Gummy Worms Recipe
Step 1: Whisk Together the Pudding
Start by pouring the instant chocolate pudding mix into a large bowl, then whisk in the whole milk. I usually whisk vigorously until the mixture starts to thicken, which takes about three minutes. You’ll notice the texture go from watery to creamy—that’s your cue to move on to the next step. A tip: don’t rush this—proper thickening is key for the perfect pudding base.
Step 2: Whip Up the Cream
Next, get your cold heavy cream ready in a mixer bowl, add the powdered sugar and vanilla, and whip on medium-high speed until shiny stiff peaks form. It might sound fancy, but watching the cream transform from liquid to fluffy clouds is always satisfying. Just be careful not to overwhip, or you’ll end up with butter instead of whipped cream—I learned that lesson the hard way!
Step 3: Fold and Mix the Goodness
Now for the fun part—fold about one-third of your crushed Oreos and all that beautiful whipped cream into the chocolate pudding. I use a spatula here and gently fold to keep the mixture airy. This is where your dessert starts to look like actual dirt, but way tastier!
Step 4: Assemble and Garnish
Divide the pudding mixture into cups or transfer it to a trifle dish if you’re feeling fancy. Sprinkle the remaining crushed Oreos on top, and then wiggle those gummy worms in there. My family goes crazy for this part—it’s such a joy watching everyone dive in!
Pro Tips for Making Dirt Pudding with Gummy Worms Recipe
- Use Cold Heavy Cream: I always chill my mixing bowl and whisk beforehand for extra fluffy whipped cream.
- Crush Oreos Just Right: I learned it’s best to crush them into small chunks instead of powder for that “dirt” crunch texture.
- Gently Fold Ingredients: Preserve the airiness of whipped cream by folding carefully, not stirring.
- Chill Before Serving: Letting it sit in the fridge for at least an hour helps flavors meld perfectly and firms up consistency.
How to Serve Dirt Pudding with Gummy Worms Recipe
Garnishes
I love keeping it simple with extra crushed Oreos on top—it adds that perfect crunch. And of course, the gummy worms are a must for me because they bring the whole “dirt” theme to life so well. Sometimes I toss on a few mini chocolate chips or even a sprinkle of edible glitter for an extra special touch when serving kids.
Side Dishes
Since this dessert is already quite rich and sweet, I usually serve it alongside fresh fruit like strawberries or a citrus salad to add balance. A light cup of coffee or milk is all you need to round out this indulgent treat.
Creative Ways to Present
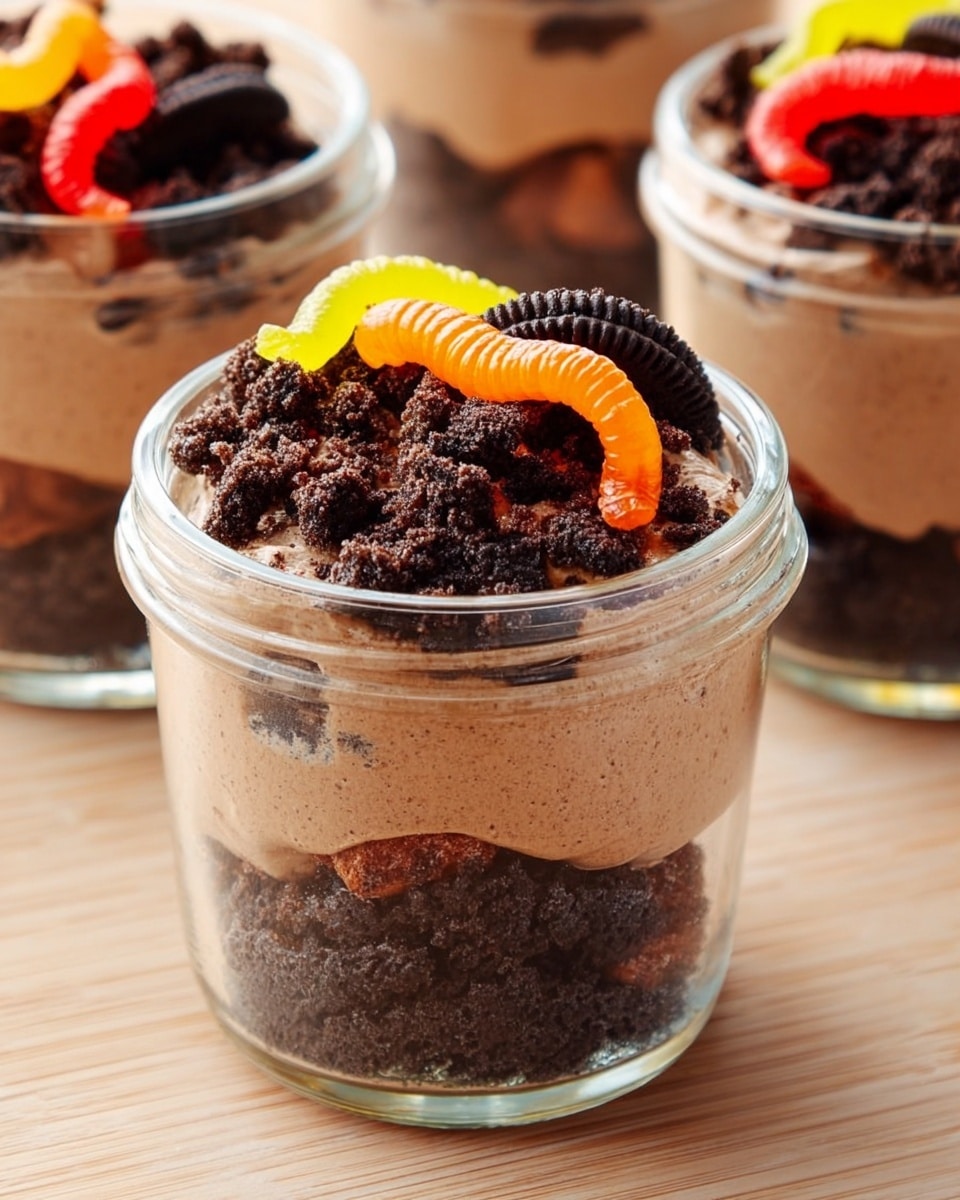
For birthday parties, I like to serve the dirt pudding in small mason jars or clear plastic cups layered with gummy worms crawling through each layer. You could also make a layered trifle with alternating pudding and Oreo layers, then top with garden-themed decorations for a fun “worm garden” dessert dish!
Make Ahead and Storage
Storing Leftovers
I usually cover leftover pudding tightly with plastic wrap and store it in the fridge. It keeps well for about 2-3 days, but I recommend enjoying it fresh for the best texture—especially since the Oreos can soften over time.
Freezing
Freezing isn’t ideal for this recipe because the whipped cream and pudding can separate or become icy when thawed. If you have leftovers, just stick to refrigeration for the best taste and texture.
Reheating
This dessert is best served cold, so no reheating needed! Just give it a quick stir if any liquid separates, then garnish again if you want to refresh the look before serving.
FAQs
-
Can I make Dirt Pudding with Gummy Worms Recipe ahead of time?
Absolutely! You can prepare the pudding layers and store them covered in the fridge for a few hours or overnight. Just add the gummy worms and final Oreos garnish right before serving to keep them fresh and fun-looking.
-
Can I use low-fat milk or cream?
While you can use lower-fat options, I’ve found the texture and richness aren’t quite the same. Whole milk and heavy cream give this pudding its signature creamy, luscious mouthfeel.
-
What’s the best way to crush Oreos for this recipe?
I like to place them in a zip-top bag and gently crush with a rolling pin until you have a mix of small chunks and fine crumbs. This creates a more interesting texture than finely ground cookie crumbs alone.
-
Can I substitute gummy worms with another candy?
Definitely! You can use gummy bears, chocolate-covered raisins, or even fresh berries for a less sweet but equally fun topping.
-
Is this recipe suitable for kids to make?
Yes! Kids love helping with this recipe, especially folding the ingredients together and decorating with gummy worms—it’s a great way to get them excited about making desserts that are easy and mess-free.
Final Thoughts
I absolutely love how this Dirt Pudding with Gummy Worms Recipe brings a bit of fun and nostalgia to the table every time I make it. It’s a wonderful balance of textures and flavors, plus it’s so straightforward that even the busiest of us can pull it off. Whether you’re making it for little ones or just want a dessert that’s simple yet special, I promise this recipe has you covered. Go ahead, try it out—your friends and family will thank you for the delicious dirt-filled adventure!
Print
Dirt Pudding with Gummy Worms Recipe
- Prep Time: 10 mins
- Cook Time: 0 mins
- Total Time: 25 mins
- Yield: 5 servings 1x
- Category: Dessert
- Method: No-Cook
- Cuisine: American
Description
This delightful Dirt Pudding dessert combines creamy chocolate pudding with fluffy whipped cream and crunchy Oreos, topped with playful gummy worms for a fun and tasty treat perfect for parties or family gatherings.
Ingredients
Pudding Mixture
- 2 (3.5-oz.) packages instant chocolate pudding mix
- 3 cups whole milk
Whipped Cream
- 2 cups cold heavy cream
- 1/4 cup powdered sugar
- 1 tsp. pure vanilla extract
Other
- 1 (14-oz.) package Oreos, crushed, divided (about 2 cups)
- Gummy worms, for garnish
Instructions
- Prepare the pudding: In a large bowl, whisk together the instant chocolate pudding mix and whole milk until the mixture is smooth and well combined. Let it sit for about 3 minutes to thicken properly.
- Make the whipped cream: Using a stand mixer with a whisk attachment or a hand mixer in a large bowl, beat the cold heavy cream along with powdered sugar and vanilla extract until stiff peaks form, indicating the cream is fully whipped and stable.
- Combine pudding and whipped cream: Gently fold the whipped cream and about one-third of the crushed Oreos into the thickened chocolate pudding until fully incorporated and smooth.
- Assemble the dessert: Divide the pudding mixture evenly between serving cups or transfer it into a trifle dish. Garnish each serving generously with the remaining crushed Oreos and add gummy worms on top for a fun and thematic decoration.
Notes
- For best results, chill the pudding and bowl before whipping the cream to help it whip up faster and hold its shape better.
- Use full-fat dairy ingredients for a richer flavor and creamier texture.
- Gummy worms add a fun and whimsical touch perfect for kids’ parties or Halloween celebrations.
- This dessert can be prepared a few hours in advance and refrigerated until serving to enhance flavors and texture.
- To make it gluten-free, substitute the Oreos with gluten-free chocolate sandwich cookies.
Nutrition
- Serving Size: 1 serving (approx. 1 cup)
- Calories: 410
- Sugar: 35g
- Sodium: 150mg
- Fat: 27g
- Saturated Fat: 16g
- Unsaturated Fat: 9g
- Trans Fat: 0.5g
- Carbohydrates: 37g
- Fiber: 1g
- Protein: 5g
- Cholesterol: 95mg


