
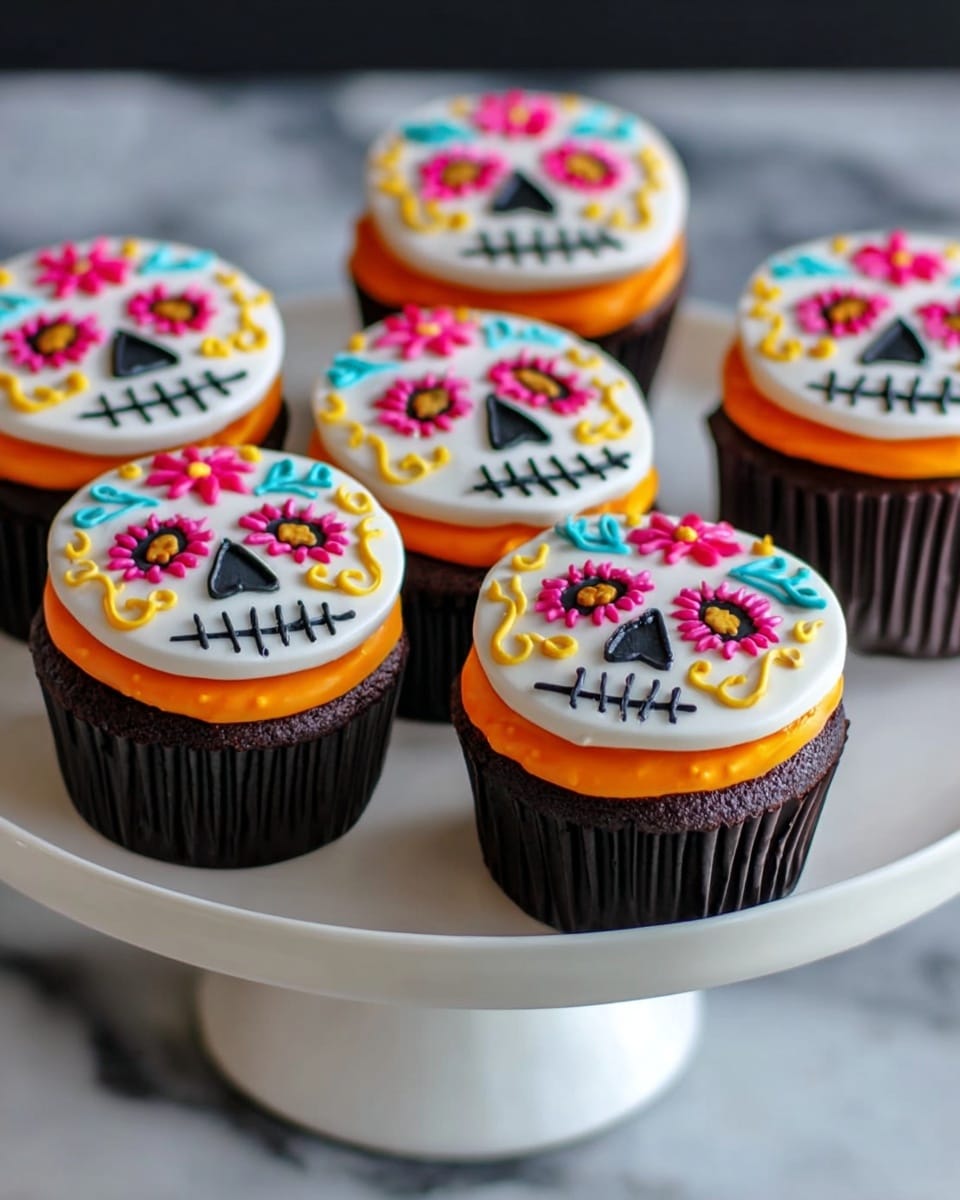
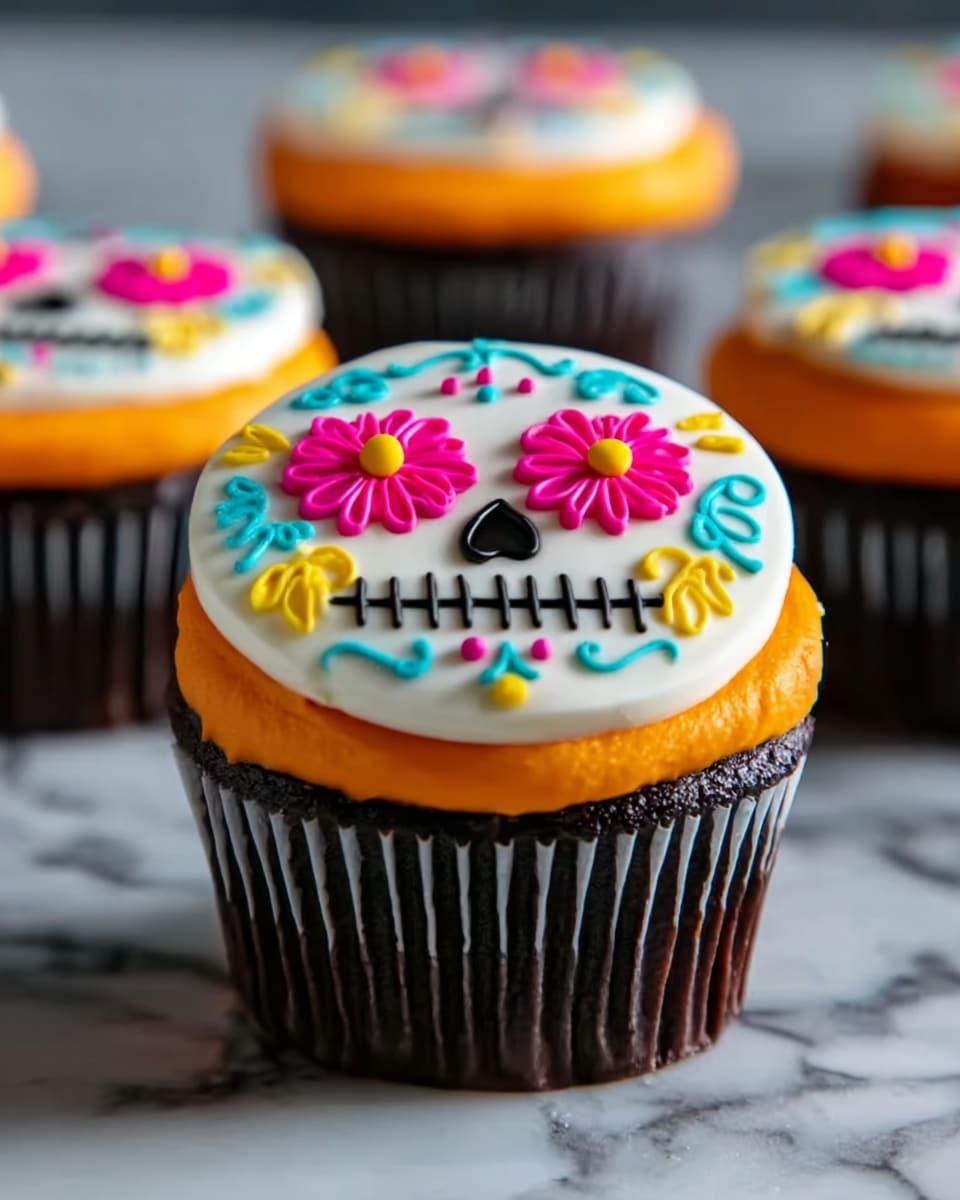
If you’re looking to celebrate Día de los Muertos in the sweetest way possible, I’ve got just the thing for you: a *Day of the Dead Cupcakes Recipe* that’s as festive as it is delicious. These cupcakes are more than just a dessert—they’re a fun artistic project that turns simple chocolate cupcakes into colorful sugar skull masterpieces with buttercream and royal icing. Trust me, once you try this recipe, you’ll want to make it every year.
Why You’ll Love This Recipe
- Vibrant and Festive: The royal icing decorations bring those iconic colorful sugar skull designs right to your cupcakes.
- Fun Baking & Decorating: You’ll enjoy the creative process of piping the intricate designs, making it a great project for you or with family.
- Perfect Texture Combo: Moist chocolate cupcakes paired with smooth orange-tinted buttercream frosting are a surefire hit.
- Make-Ahead Friendly: The fondant toppers can be made in advance and kept ready for assembly on the day you want to serve.
Ingredients You’ll Need
This *Day of the Dead Cupcakes Recipe* relies on a few standout ingredients that work perfectly to create both delicious cake and striking decoration. I like to keep my pantry stocked for when inspiration strikes. Some of these require a little patience, but I promise it’s worth every second.
- White fondant: This is your canvas! I recommend a smooth, high-quality fondant that rolls evenly without tearing.
- Royal icing: You’ll tint this in bright colors like hot pink, yellow, aqua, and black for all the detailed piping work—my favorite part!
- Chocolate cupcakes: Rich and moist cupcakes serve as the perfect base. You can buy pre-made if you’re short on time, but homemade always steals the show.
- Buttercream frosting: I tint mine orange to bring that classic Dia de los Muertos vibe, but feel free to experiment with shades that suit your style!
Variations
One of the best parts about this *Day of the Dead Cupcakes Recipe* is how versatile it is. I love putting my own spin on the decorations or tweaking the flavors to suit different tastes and dietary needs. You can really make this recipe your own.
- Flavor Swap: I once swapped out chocolate cupcakes for a spiced pumpkin cake, and it added a wonderful autumnal twist that my family couldn’t get enough of.
- Dairy-Free Option: When I made these for a friend with lactose intolerance, I simply used coconut-based buttercream and dairy-free fondant—no one could tell the difference!
- Color Customization: If you want to try different colors for royal icing, bold reds and purples also look fantastic and bring a unique flair to the traditional skull designs.
How to Make Day of the Dead Cupcakes Recipe
Step 1: Roll Out and Cut Your Fondant Circles
Start by lightly dusting your work surface with powdered sugar—that helps keep the fondant from sticking and makes rolling a breeze. Roll out your white fondant to about 1/8-inch thick; you want them thin enough to be flexible but thick enough to hold shape after drying. Using a 2 1/2-inch cookie cutter, cut out perfect circles. This is your blank canvas for each skull topper, so take your time to get smooth edges without cracking.
Step 2: Mark Key Facial Features
With a toothpick, lightly mark where the eyes and nose will go on each fondant circle. I discovered this trick makes piping the royal icing details so much easier—and you won’t have to worry about symmetry as much. If you’re a visual person, do this step carefully. It’s a little like drawing a map before you paint.
Step 3: Pipe the Vibrant Royal Icing Details
Here’s where the fun begins! Using a #3 piping tip, pipe eight long hot pink teardrop shapes around the eyes in an asterisk pattern. Then with a #4 tip, fill the centers of those shapes with bright yellow royal icing—this contrast really brings the skulls to life. Add large yellow dots at the temples for more pop, and pipe a black upside-down heart for the nose using a #1 tip. Next, carefully outline the smile and teeth in black.
Use aqua royal icing (#1 tip) to pipe a heart on the forehead, aqua dots around the yellow temple dots, scrolls on the cheeks, and black dots and comma shapes for embellishment. Don’t rush this part—patience here really pays off in the final look. Allow your toppers to dry and harden overnight.
Step 4: Frost and Assemble
Once your royal icing toppers are dry and firm, it’s time to assemble. Spread or pipe orange-tinted buttercream frosting generously over each chocolate cupcake, then gently press a fondant topper on. The contrast between the rich chocolate, bright frosting, and colorful skulls makes for stunning treats. I love how the frosting acts like glue but also tastes incredible!
Pro Tips for Making Day of the Dead Cupcakes Recipe
- Fondant Handling: I learned that storing fondant wrapped tightly in plastic wrap keeps it from drying out while you’re working on the toppers in batches.
- Royal Icing Consistency: Getting your royal icing just right—not too runny or too stiff—makes piping those delicate details much easier. Practice on parchment paper first if you’re new!
- Drying Time: I used to rush the drying process, but letting the royal icing dry overnight ensures the toppings won’t smudge or collapse during assembly.
- Assembly Patience: Press fondant toppers gently onto buttercream; too much pressure can dent the frosting but too little and they won’t stick well.
How to Serve Day of the Dead Cupcakes Recipe
Garnishes
I often add a few edible glitter highlights or tiny sugar flowers around the edges for an extra festive touch—these little details elevate the presentation and make the cupcakes feel extra special. Plus, they give a nod to the floral elements of traditional Day of the Dead decorations.
Side Dishes
Since these cupcakes are pretty rich and sweet, I like to serve them alongside spiced hot chocolate or a fresh citrus punch to balance flavors. Fresh fruit platters or lightly spiced Mexican coffee are also fantastic companions.
Creative Ways to Present
I’ve set these cupcakes on colorful papel picado banners and rustic wooden trays during celebrations—creating a striking visual that fits the Day of the Dead theme beautifully. Another idea I tried was arranging them on tiered stands decorated with marigold petals; it made dessert the centerpiece of the party!
Make Ahead and Storage
Storing Leftovers
Leftover decorated cupcakes can be stored in an airtight container at room temperature for a day or two. After that, I recommend refrigerating to keep the buttercream fresh. I learned that fondant can sweat in the fridge, so keeping the container sealed helps prevent condensation.
Freezing
I’ve frozen unfrosted chocolate cupcakes before baking day, wrapped tightly in plastic wrap and foil. Once thawed, add the frosting and fondant toppers fresh for best results because the decoration doesn’t freeze well. This trick saves prep time if you need to bake in advance.
Reheating
Since these are cupcakes, I don’t actually reheat them much. If some are chilled, I let them sit at room temperature for about 30 minutes before serving—that way, the buttercream softens back to creamy perfection. Avoid microwaving to protect the integrity of the royal icing decorations.
FAQs
-
Can I make the royal icing decorations ahead of time?
Absolutely! I recommend piping and fully drying the royal icing decorations on the fondant the day before you plan to assemble the cupcakes, so they’re firm and won’t smudge.
-
What if I don’t have a lot of experience with piping royal icing?
Start by practicing the shapes on parchment paper first. Once you’re comfortable, transfer those skills to the fondant circles. Using the toothpick marks as guides also helps keep your designs symmetrical and neat.
-
Can I use store-bought cupcakes for this recipe?
Definitely! I’ve used both homemade and good-quality store-bought chocolate cupcakes. Just make sure they’re fresh and sturdy enough to support the buttercream and toppers.
-
How do I store decorated Day of the Dead cupcakes?
Keep them in an airtight container at room temperature for up to two days. For longer storage, refrigerate but keep the container sealed to avoid moisture affecting the fondant and icing.
Final Thoughts
I absolutely love how this *Day of the Dead Cupcakes Recipe* combines baking with art, giving you a delicious way to honor a beautiful tradition. When I first tried this, I was nervous about the piping, but it turned out to be such a rewarding process—and my family went crazy for these cupcakes. If you’re looking for a festive, interactive, and downright fun recipe to celebrate, this one has you covered. Give it a try, and don’t be afraid to make those colorful designs your own!
Print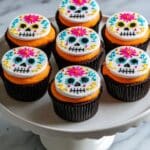
Day of the Dead Cupcakes Recipe
- Prep Time: 1 hour 20 minutes
- Cook Time: 20 minutes
- Total Time: 1 hour 40 minutes
- Yield: 32 cupcakes 1x
- Category: Dessert
- Method: Baking
- Cuisine: Mexican
Description
These vibrant Day of the Dead Cupcakes feature chocolate cupcakes topped with bright orange buttercream and adorned with intricately decorated white fondant sugar skull toppers, perfect for celebrating Día de los Muertos with a festive and colorful touch.
Ingredients
Cupcakes
- 32 chocolate cupcakes
Buttercream Frosting
- Buttercream frosting tinted orange
Fondant Toppers
- White fondant
- Royal icing tinted hot pink
- Royal icing tinted yellow
- Royal icing tinted aqua
- Royal icing tinted black
- Powdered sugar for dusting
Instructions
- Prepare Fondant Base: Lightly dust your work surface with powdered sugar, then roll out the white fondant to about 1/8-inch thickness.
- Cut Fondant Circles: Use a 2 1/2-inch diameter cookie cutter to cut out circle shapes from the fondant.
- Mark Facial Features: Mark the fondant circles with a toothpick to indicate where the eyes and nose will be placed.
- Pipe Pink Teardrops: Using a #3 piping tip, pipe eight long hot pink teardrop shapes around the eyes in an asterisk pattern for decorative accents.
- Fill Eye Centers: With a #4 piping tip, fill the centers of the pink teardrops with bright yellow royal icing for eye detail.
- Temple Decorations: Pipe large yellow dots at the temples on each fondant circle.
- Outline Nose: Using a #1 piping tip, pipe an upside-down heart in black royal icing to form the nose shape.
- Smile and Teeth: Pipe the smiling mouth and teeth details clearly in black icing.
- Forehead Decoration: Pipe a heart in aqua royal icing in the center of the forehead using a #1 tip.
- Temple Accents: Pipe small aqua dots around the yellow dots at each temple.
- Cheek Scrolls: Pipe aqua scroll designs on each cheek for embellishment.
- Forehead Dotting: Pipe a large black dot above the aqua heart, with two smaller black dots below it.
- Side Comma Shapes: Pipe two black comma shapes on each side of the large black dot on the forehead.
- Yellow Dot Highlights: Pipe two yellow dots above the black elements and three yellow dots above each eye.
- Drying Time: Allow all royal icing toppers to dry and harden overnight for stability.
- Assemble Cupcakes: Spread orange-tinted buttercream frosting on the cooled chocolate cupcakes, then press the decorated fondant toppers firmly on top to complete.
Notes
- Ensure the royal icing is stiff enough to hold intricate piping details and to dry hard.
- Use powdered sugar or cornstarch to prevent fondant from sticking while rolling.
- Let cupcakes cool completely before applying buttercream and fondant toppers to prevent melting.
- Toppers can be made a day ahead and stored in an airtight container to maintain shape.
- Customize colors of royal icing to match your personal Day of the Dead theme.
Nutrition
- Serving Size: 1 cupcake
- Calories: 280
- Sugar: 25g
- Sodium: 150mg
- Fat: 14g
- Saturated Fat: 7g
- Unsaturated Fat: 5g
- Trans Fat: 0g
- Carbohydrates: 34g
- Fiber: 2g
- Protein: 3g
- Cholesterol: 40mg


