
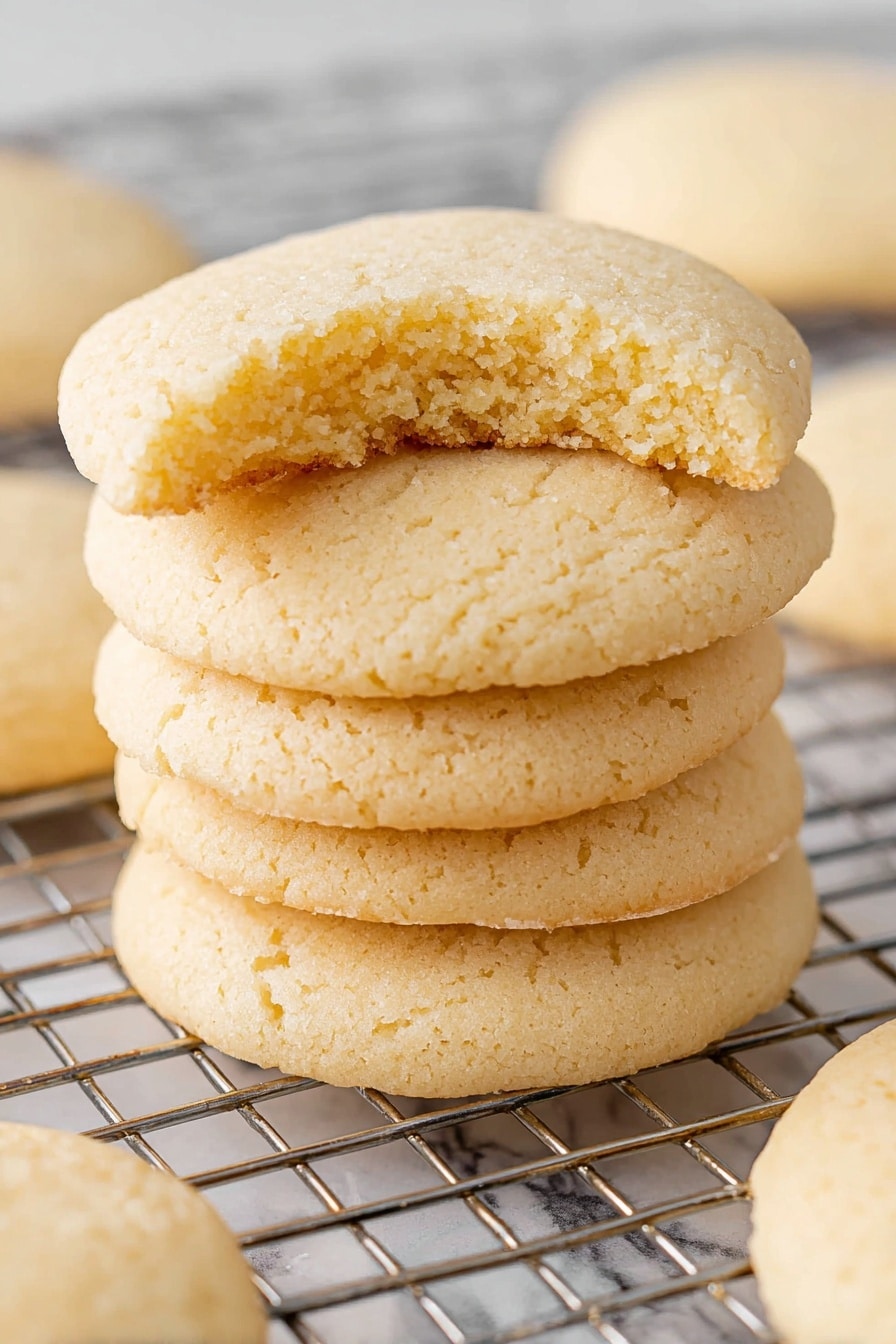
If you’re on the hunt for a truly comforting, old-school treat, I’ve got just the thing for you. This Classic Old-fashioned Tea Cakes Recipe is one of those timeless delights that instantly brings warm memories of cozy afternoons with a cup of tea (or coffee, if that’s your jam). The beauty here is in its simplicity—the tender crumb, the subtle vanilla sweetness, and that perfect hint of buttery richness make these tea cakes utterly irresistible. Stick around, because I’m going to share some tips that’ll help you nail these every single time!
Why You’ll Love This Recipe
- Unexpectedly Simple: The ingredient list is straightforward but the flavor and texture feel incredibly special.
- Perfect for Beginners: You don’t need to be a pro baker to get great results, this recipe is forgiving and fun.
- Versatile and Adaptable: You can easily tweak it with different flavors or shapes without losing that classic charm.
- Nostalgic Comfort: This recipe will bring you and your loved ones a taste of homemade tradition that never goes out of style.
Ingredients You’ll Need
The magic of this Classic Old-fashioned Tea Cakes Recipe comes from simple, pantry-staple ingredients that work so well together you’ll want to bake these time and time again. Here’s what you’ll want to look for:
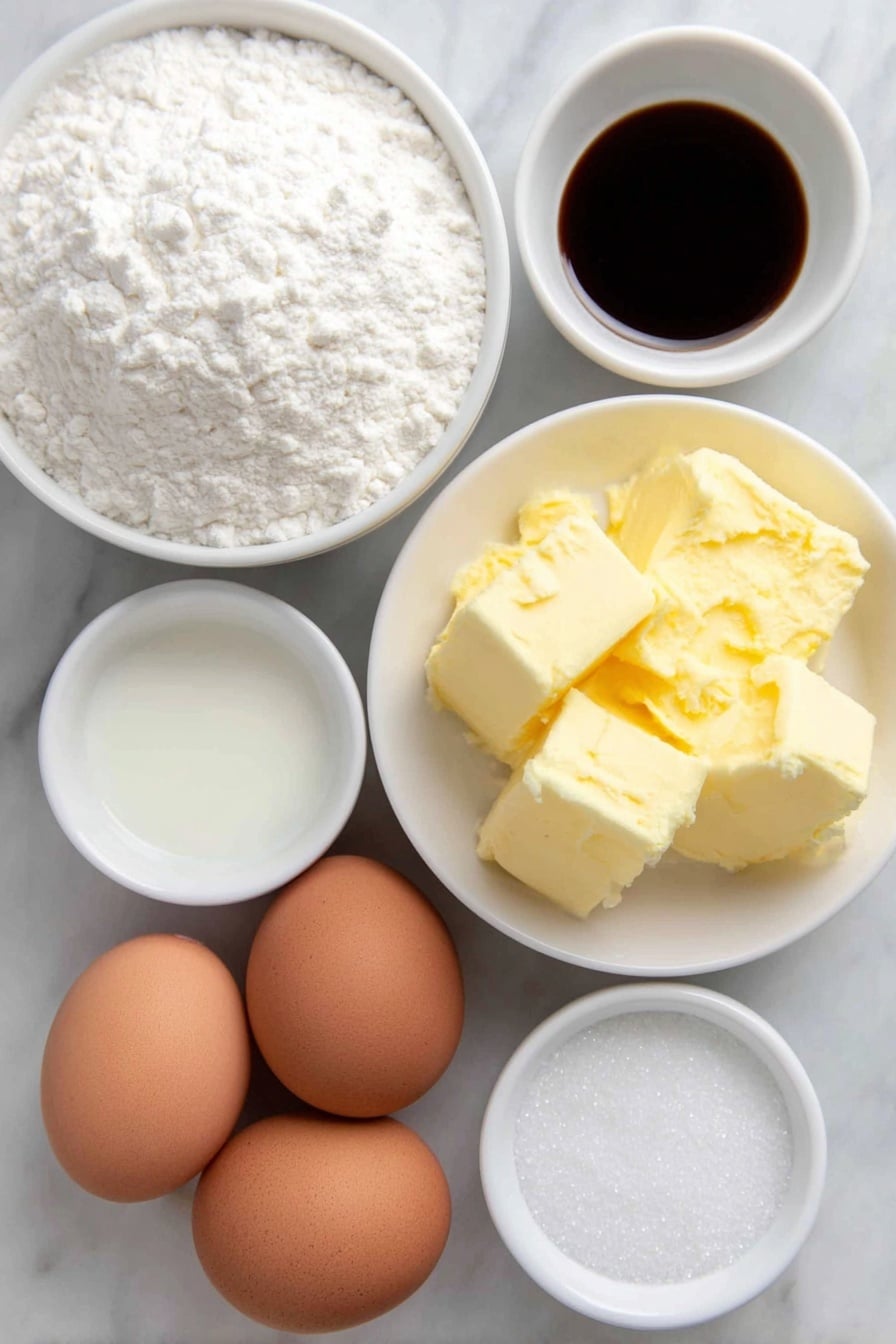
- Granulated Sugar: Using regular granulated sugar helps create that tender crumb and just enough sweetness without being overpowering.
- Unsalted Butter: Make sure it’s at room temperature; this makes creaming easier and ensures the texture comes out just right.
- Large Eggs: Eggs add moisture and help bind everything together — I always let mine come to room temp for smoother mixing.
- Vanilla Extract: Pure vanilla elevates the flavor and adds warmth to these tea cakes.
- All-purpose Flour: This is your base; I recommend measuring by spooning the flour into your measuring cup to avoid packing.
- Baking Powder: The gentle lift makes these cakes soft and a little puffy.
- Salt: Balances out the sweetness and enhances the overall flavor — don’t skip it!
- Whole Milk: Adds moisture and richness, making the dough easy to handle and the tea cakes tender.
Variations
I love that this Classic Old-fashioned Tea Cakes Recipe is such a blank canvas—you can easily personalize it to suit your mood or what’s in your pantry. I often experiment with different flavors and textures just to keep things exciting!
- Citrus Zest: Adding a teaspoon of lemon or orange zest to the dough gives a fresh and bright twist that I adore, especially in spring.
- Spices: A pinch of cinnamon or nutmeg brings a warming depth that’s fantastic for fall or winter.
- Glaze or Icing: Drizzling a simple powdered sugar glaze on top makes them feel a bit fancy and perfect for tea parties.
- Alternative Flours: For a twist, you can try substituting part of the flour with whole wheat or almond flour, but keep in mind this changes the texture slightly.
- Dairy-free: Swap out the butter and milk with plant-based alternatives if you’re dairy-free—I’ve had great results with vegan butter and oat milk.
How to Make Classic Old-fashioned Tea Cakes Recipe
Step 1: Cream Butter and Sugar Until Fluffy
Start by getting your butter and sugar nice and friendly in the mixer bowl—cream them together for about 3 to 5 minutes until the mixture is light in color and fluffy. This step is key because it incorporates air, giving the tea cakes that lovely texture. Don’t rush it! Make sure your butter is softened but not melted, or you won’t get those perfect little pockets of lightness.
Step 2: Add Eggs and Vanilla for Flavor and Moisture
Next, beat in the eggs one at a time, then add your vanilla extract. Listening to the batter become smooth and homogenous is oddly satisfying, and you’ll know you did well when it’s all shiny and combined.
Step 3: Mix Dry Ingredients and Incorporate Slowly
Whisk together the flour, baking powder, and salt in a separate bowl. With your mixer on low, add half of these dry ingredients to the wet mixture—don’t dump it all in at once! Then add the milk, which helps to keep the dough tender, followed by the remaining dry ingredients. Mix just until combined. Overmixing here can stiffen the dough, so keep an eye on it—it should be soft and easy to handle.
Step 4: Chill the Dough for Shape and Flavor
Wrap or cover your dough and pop it in the fridge for at least 3 hours. I’ve found that chilling overnight greatly improves the texture and flavor, plus it makes shaping much easier. Patience pays off here, so don’t skip this step—it’s what helps your tea cakes hold their shape rather than spread too thin.
Step 5: Shape and Flatten Your Tea Cakes
When your dough is chilled and ready, preheat your oven to 350°F and line cookie sheets with parchment paper. Use roughly 2 tablespoons of dough for each tea cake—I use a #40 cookie scoop to keep them uniform. Roll each portion into a ball with your hands, then gently press down with the bottom of a glass to flatten them to about a ¼ inch thickness. This step is crucial because you want them thin enough to bake through evenly but still soft and tender.
Step 6: Bake to Golden Perfection
Bake for 10 to 12 minutes, watching closely. The edges should start turning a soft golden color while the centers puff slightly. I learned the hard way that overbaking dries these cakes out, so take them out as soon as you spot those golden edges. Let them cool on the baking sheets for about 15 minutes before moving them to a wire rack to cool completely.
Pro Tips for Making Classic Old-fashioned Tea Cakes Recipe
- Room Temperature Ingredients: Bringing eggs and butter to room temp before mixing makes everything blend together more smoothly and helps with texture.
- Don’t Skip the Chill: Chilling the dough is a game changer—it controls spreading and enhances flavor so don’t rush to bake immediately.
- Use a Cookie Scoop: For even baking and consistent size, a cookie scoop takes all the guesswork out of portioning dough.
- Watch the Bake Time Closely: Pull the tea cakes when edges just start turning golden to keep them soft and tender inside.
How to Serve Classic Old-fashioned Tea Cakes Recipe
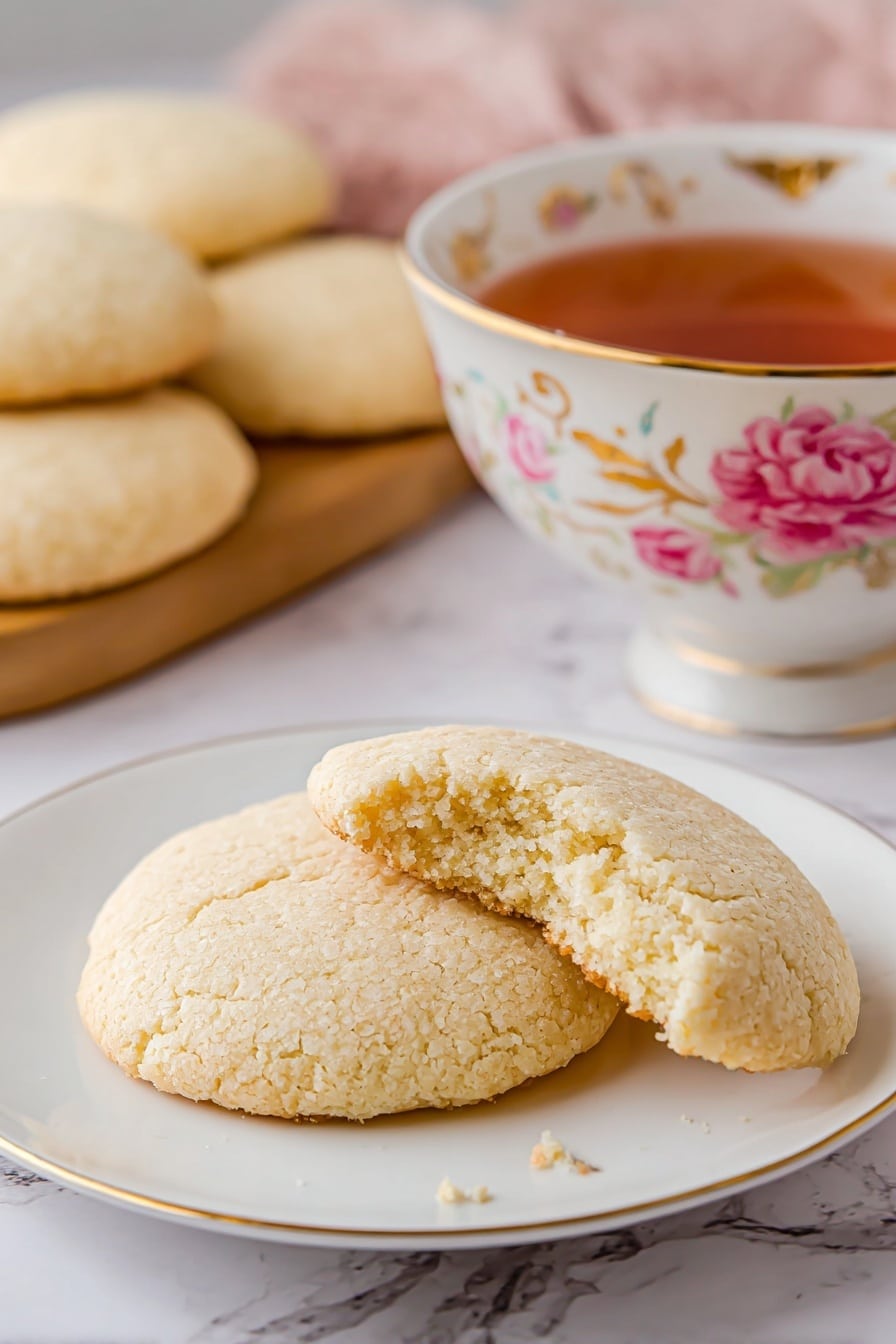
Garnishes
I usually keep it simple with these tea cakes, but sometimes I sprinkle a little powdered sugar on top after baking—it adds a pretty, delicate finish without overpowering the vanilla flavor. On special occasions, a light drizzle of lemon glaze works wonders too, adding a zingy brightness that cuts through the buttery sweetness.
Side Dishes
Pairing these tea cakes with a hot cup of your favorite black or green tea is classic for a reason. I’ve also enjoyed them alongside fresh fruit preserves or a smear of homemade jam. If you prefer coffee, a creamy cappuccino or latte complements the subtly sweet crumb beautifully.
Creative Ways to Present
For tea parties or holiday gatherings, I’ve layered these tea cakes on a tiered cake stand with fresh berries and edible flowers for a charming display. Wrapping them individually in parchment paper tied with twine makes a lovely homemade gift that friends and family always rave about.
Make Ahead and Storage
Storing Leftovers
I keep leftover tea cakes in an airtight container at room temperature, and they usually stay fresh and soft for up to one week. If your kitchen is on the warmer side, storing them in a cool spot helps retain their texture without becoming too soft or sticky.
Freezing
These tea cakes freeze incredibly well. I like to freeze them in single layers wrapped tightly in plastic wrap and then store them in a freezer-safe bag. When you want some, just thaw at room temperature for a couple of hours—like magic, they’re almost as fresh as the day you made them!
Reheating
If you want to warm them up, a quick 10-15 second zap in the microwave is perfect. Just be careful not to overdo it or they’ll dry out. Alternatively, pop them in a warm oven (about 300°F) for 5 minutes for a gentle refresh that revives their tender crumb and buttery aroma.
FAQs
-
Can I make this Classic Old-fashioned Tea Cakes Recipe gluten-free?
Absolutely! You can swap the all-purpose flour for a gluten-free flour blend that includes xanthan gum to mimic the structure of wheat flour. Keep in mind that texture might be slightly different, but the flavor will still be delightful.
-
What’s the best way to store these tea cakes?
Store them in an airtight container at room temperature for up to one week. If you want them longer, freezing works very well—just make sure to wrap them well to prevent freezer burn.
-
Can I skip chilling the dough?
You can, but I don’t recommend it. Chilling the dough helps the tea cakes keep their shape and develop better flavor. If you’re short on time, chilling for at least 3 hours is a good compromise.
-
Can I add mix-ins like chocolate chips or nuts?
Yes! Adding small mix-ins like finely chopped nuts or mini chocolate chips can be delicious. Just fold them in with the dry ingredients gently to avoid overmixing the dough.
-
Is there a way to make these tea cakes dairy-free?
You bet. Substitute the butter with a dairy-free margarine or plant-based butter, and replace the whole milk with almond or oat milk. The texture will be slightly different but still tasty.
Final Thoughts
I honestly can’t get enough of this Classic Old-fashioned Tea Cakes Recipe—it’s like a warm hug baked into a simple, elegant cookie. Whether you’re baking for a special occasion or just to enjoy a quiet moment with a cup of tea, these tea cakes never disappoint. Give them a try and see how comforting and satisfying a little old-fashioned baking can be. Trust me, your kitchen (and your taste buds) will thank you!
Print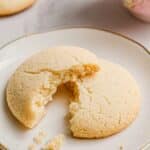
Classic Old-fashioned Tea Cakes Recipe
- Prep Time: 10 minutes
- Cook Time: 10-12 minutes
- Total Time: 3 hours 22 minutes
- Yield: 20 cookies 1x
- Category: Dessert
- Method: Baking
- Cuisine: American
Description
Classic old-fashioned tea cakes with a soft and tender crumb, perfect for enjoying with a cup of tea. These simple yet delicious cookies feature a delicate vanilla flavor and a light, buttery texture that melts in your mouth.
Ingredients
Wet Ingredients
- 1 cup granulated sugar
- ½ cup unsalted butter, room temperature
- 2 large eggs, room temperature
- 2 teaspoons vanilla extract
- ¼ cup whole milk
Dry Ingredients
- 3 cups all purpose flour
- 2 teaspoons baking powder
- ½ teaspoon salt
Instructions
- Cream Butter and Sugar: In the bowl of a stand mixer fitted with a paddle attachment, or in a large bowl with a hand mixer, cream the sugar and butter together until light and fluffy, about 3-5 minutes. Then beat in the eggs and vanilla extract until well combined.
- Mix Dry Ingredients: In a separate bowl, whisk together the flour, baking powder, and salt to ensure even distribution of the leavening agents.
- Combine Wet and Dry Ingredients: With the mixer on low speed, add half of the dry ingredient mixture to the wet ingredients and mix until incorporated. Then mix in the milk, followed by the remaining dry ingredients. Mix just until combined to avoid overworking the dough.
- Chill the Dough: Cover the dough and chill it in the refrigerator for at least 3 hours, or overnight if possible, to help the cookies hold their shape during baking.
- Preheat Oven and Prepare Baking Sheets: Once chilled, preheat your oven to 350°F (175°C) and line baking sheets with parchment paper to prevent sticking.
- Shape the Cookies: Scoop 2 tablespoons of dough using a #40 cookie scoop or a standard tablespoon and roll it into a smooth ball with your hands. Place the balls on the prepared baking sheets at least 2 inches apart.
- Flatten the Dough Balls: Use the flat bottom of a glass to gently press each dough ball to about ¼ inch thick, ensuring even baking.
- Bake: Bake the cookies for 10 to 12 minutes, or until they have puffed slightly and the edges begin to turn a light golden color.
- Cool: Remove the cookies from the oven and allow them to cool on the baking sheet for 15 minutes before transferring to a wire rack to cool completely.
Notes
- Chill the dough for at least 3 hours to help the cookies maintain their shape during baking.
- Use a #40 cookie scoop (about 2 tablespoons) for uniform cookie size and even baking.
- Bake until the edges are just lightly golden; avoid overbaking to keep cookies soft.
- Optional: Roll out dough to ¼-inch thickness and use a 2–2.5 inch cutter to form rounds for a more uniform shape.
- Store cooled cookies in an airtight container at room temperature for up to one week to maintain freshness.
Nutrition
- Serving Size: 1 cookie
- Calories: 150
- Sugar: 9g
- Sodium: 110mg
- Fat: 7g
- Saturated Fat: 4g
- Unsaturated Fat: 3g
- Trans Fat: 0g
- Carbohydrates: 20g
- Fiber: 1g
- Protein: 2g
- Cholesterol: 40mg

