
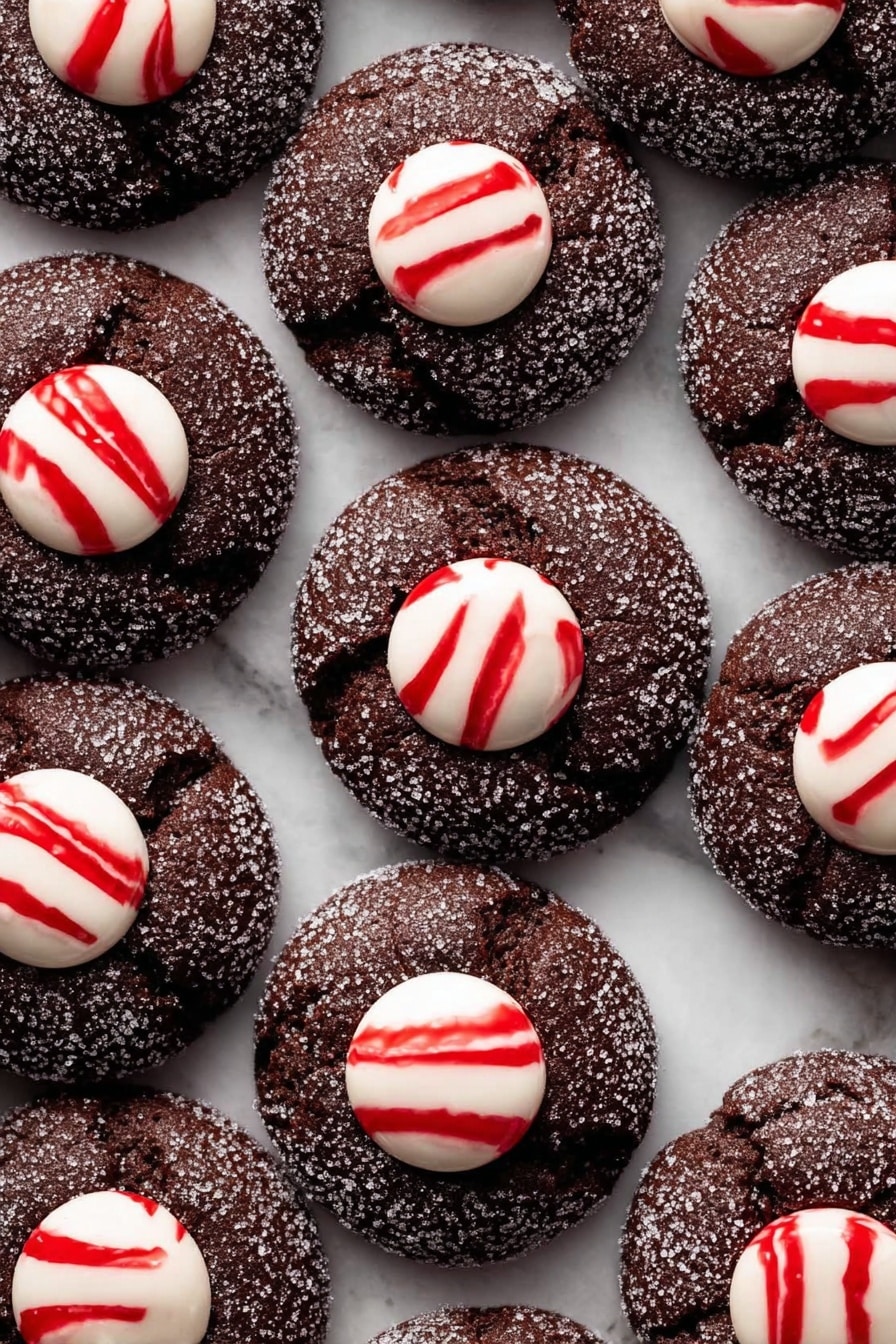
If you’re looking for a cookie recipe that combines rich chocolate with a refreshing hint of peppermint — and finishes with that delightful melt-in-your-mouth Hershey’s Kiss — then you’re in for a treat. This Chocolate Peppermint Kiss Cookies Recipe is one of my absolute favorites, especially during the holidays, but honestly, I love them any time of the year. The chewy chocolate base with that peppermint kiss on top? It’s a match made in cookie heaven, and I can’t wait to share all the tips and tricks that make these cookies fan-freaking-tastic.
Why You’ll Love This Recipe
- Perfect Peppermint-Chocolate Combo: The cocoa-rich dough paired with candy cane flavored Hershey’s Kisses creates an irresistible festive flavor.
- Chewy, Soft Texture: Thanks to the brown sugar and egg yolks, the cookies come out chewy and soft—never dry or crumbly.
- Simple Yet Impressive: These cookies come together easily, but your friends and family will think you spent hours in the kitchen.
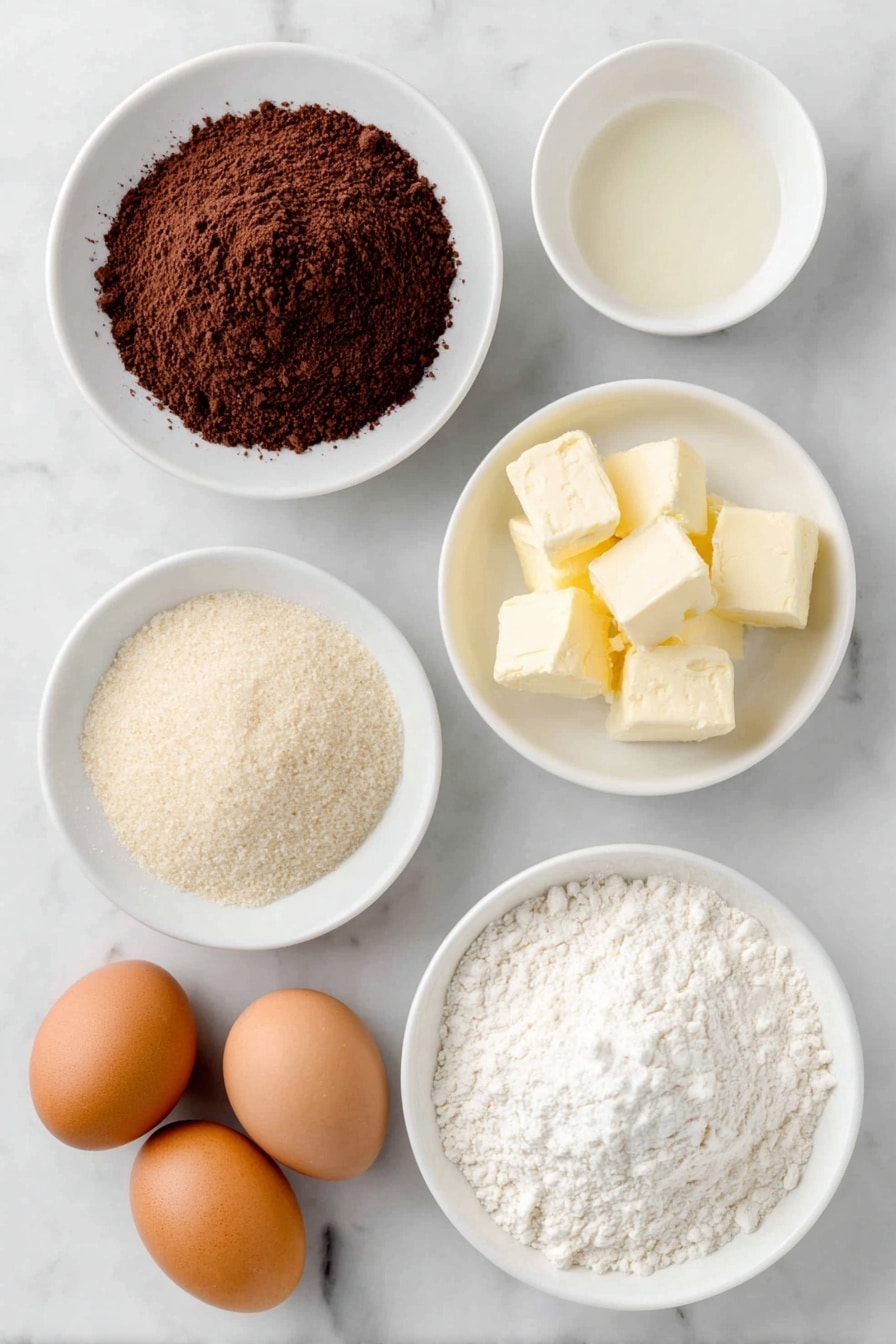
Ingredients You’ll Need
To get that ideal balance of chocolate and peppermint, you want to use quality cocoa powder and those special Candy Cane Hershey Kisses. Each ingredient plays a part in making these cookies delicious and easy to bake.
- All-purpose flour: Make sure to measure it properly for the best cookie texture; spoon and level or weigh it for precision.
- Dutch-process cocoa powder: This smooth cocoa is less acidic and gives that rich chocolate flavor without bitterness.
- Baking powder and baking soda: The combination helps the cookie rise just right without getting cakey.
- Salt: Balances the sweetness and enhances chocolate flavor.
- Unsalted butter: Softened, it provides tenderness and richness, allowing you to control the salt levels better.
- Light brown sugar: Adds moisture and chewiness with a mild molasses flavor.
- Granulated sugar: Helps create a nice crust and sweetness balance.
- Egg yolks: Using yolks instead of whole eggs gives these cookies that dense, chewy texture I adore.
- Vanilla extract: Just a splash amps up all the other flavors.
- Candy Cane Hershey Kisses: The star on top! Frozen before baking so they keep their shape after pressing in hot cookies.
- Additional granulated sugar: For rolling the dough balls to add a lovely sparkle and slight crunch.
Variations
One of the joys of this Chocolate Peppermint Kiss Cookies Recipe is how easy it is to tweak to your own tastes or diet. Over time, I’ve played with a few variations, and you might enjoy experimenting too.
- Gluten-Free Version: I swapped the all-purpose flour for a gluten-free blend, and while the texture is slightly different, the flavor still shines beautifully.
- Dark Chocolate Twist: Using dark cocoa powder instead of Dutch-process gives a more intense chocolate flavor if that’s how you roll.
- Mint Extract Boost: If you crave extra mint, a drop or two of peppermint extract in the dough works wonders, but be gentle—peppermint is powerful!
- Festive Toppings: Try crushing candy canes and sprinkling on top before baking for extra peppermint crunch.
How to Make Chocolate Peppermint Kiss Cookies Recipe
Step 1: Freeze Your Candy Cane Kisses
Start by unwrapping 34 Candy Cane Hershey Kisses and pop them in the freezer for at least 30 minutes. I discovered this little trick because pressing room temp Kisses into hot cookies makes them melt and lose their shape. Freezing keeps them firm and lovely on top.
Step 2: Mix the Dry Ingredients
In a medium bowl, whisk together the flour, cocoa powder, baking powder, baking soda, and salt until evenly combined. This ensures your cookies will bake evenly and have that balanced chocolate flavor I’m so picky about.
Step 3: Cream Butter and Sugars
In a large bowl, beat the softened butter with brown sugar and granulated sugar using an electric mixer for 1-2 minutes, until light and fluffy. This step is key because it adds air to the dough, which gives your cookies that ideal lift and chew.
Step 4: Add Egg Yolks and Vanilla
Mix in the two room-temperature egg yolks and vanilla extract until the mixture is pale and fluffy, about 1-2 minutes. I love how this makes the dough rich and silky without the extra egg whites that can sometimes dry out cookies.
Step 5: Combine Wet and Dry Ingredients
Add the dry ingredients to your wet mixture, mixing just until combined. Overmixing here can toughen cookies, so stop when you no longer see flour streaks. The dough should be soft and slightly sticky.
Step 6: Scoop, Roll, and Sugar Coat
Use a 1-tablespoon scoop (or a rounded tablespoon) to portion out dough balls. Roll each ball in the extra granulated sugar, which I love because it adds a subtle shiny crust and a tiny bit of crunch. Arrange them on parchment-lined baking sheets about 2 inches apart—space is important since these cookies spread a touch while baking.
Step 7: Bake and Press the Kisses
Bake at 350°F (175°C) for 7-8 minutes, aiming for 7 minutes if you want a chewier cookie. As soon as the cookies come out of the oven, immediately press a frozen Candy Cane Kiss gently into the center of each cookie. Be quick but gentle here — if the cookie is too cool, the Kiss won’t stick; too hot and it might melt too much.
Step 8: Cool Completely
Let your cookies cool completely on the baking sheet. This step is crucial because the Kisses need time to set as the cookies firm up. Don’t rush this part — I’ve found that rushing to move them early can cause the chocolate to crack or lose its cool candy cane pattern, which we definitely want to avoid.
Step 9: Enjoy and Store
Once cooled, dig in! If you have leftovers, store the cookies in an airtight container at room temperature. They’ll stay tasty for about three days—though mine never last that long.
Pro Tips for Making Chocolate Peppermint Kiss Cookies Recipe
- Freeze Your Kisses: Freezing the Candy Cane Kisses before pressing them into warm cookies prevents melting and keeps the shape perfect every time.
- Measure Flour Carefully: Using a spoon-and-level method or weighing flour helps avoid dry, crumbly cookies—a lesson I learned the hard way!
- Don’t Overmix Dough: Stop mixing as soon as the dry ingredients are incorporated to keep cookies tender and soft.
- Bake on Parchment: Baking on parchment paper prevents sticking and makes cleanup a breeze, plus helps cookies bake evenly.
How to Serve Chocolate Peppermint Kiss Cookies Recipe

Garnishes
I usually keep these cookies simple because the Candy Cane Kiss on top is such a beautiful garnish on its own. But if I want to dress them up for a party, I sprinkle a pinch of crushed candy cane or mini peppermint bits on the cookies right after pressing in the Kiss—it adds a festive touch and extra crunch that guests adore.
Side Dishes
These cookies pair wonderfully with a cold glass of milk, peppermint hot chocolate, or even coffee with a hint of mint syrup. If you’re hosting a holiday gathering, I’d serve them alongside a cheese platter—chocolate and cheese are an unexpected, delightful combo!
Creative Ways to Present
For celebrations, I like stacking these cookies in a clear glass jar with layers of red and white tissue paper or arranging them on a festive platter surrounded by holly and pine sprigs. Wrapping a few cookies with a ribbon and gifting them as homemade treats always brings smiles.
Make Ahead and Storage
Storing Leftovers
Once cooled, store your Chocolate Peppermint Kiss Cookies in an airtight container at room temperature for up to three days. I like to layer them with parchment paper between so they don’t stick together or break, especially if you’re stacking for storage.
Freezing
These cookies freeze beautifully! If I’m baking in advance, I freeze the baked cookies (without the Kiss) on a tray first, then transfer them to a freezer bag or airtight container. When ready to serve, I thaw them, then press the frozen Kisses on top so they stay fresh and delicious.
Reheating
If you want that fresh-baked warmth, pop a cookie in the microwave for about 10 seconds or a few minutes in a low oven (275°F). This softens the cookie and slightly melts the Kiss, giving that gooey, irresistible texture. Just watch closely so it doesn’t overheat!
FAQs
-
Can I use regular Hershey Kisses instead of Candy Cane ones?
Absolutely! Regular milk chocolate Hershey Kisses work fine if you want a classic chocolate cookie. Just remember the peppermint flavor is what makes this recipe special, so consider adding a drop of peppermint extract to the dough if you switch to regular Kisses.
-
Why do I need to freeze the kisses before baking?
Freezing the Kisses prevents them from melting too much when pressed into the hot cookies. This maintains their pretty shape and gives you that perfect peppermint chunk on top. Trust me, this step really makes a difference!
-
Can I make these cookies ahead of time?
You can definitely prep the dough up to a day in advance and refrigerate it. When ready, roll, sugar-coat, and bake as usual. You can also freeze baked cookies without the Kiss and add the chilled Kisses before serving.
-
What if I don’t have Dutch-process cocoa?
You can use natural cocoa powder, but it might affect the flavor slightly, making it a bit more acidic or bitter. I recommend sticking to Dutch-process if possible for the smoothest chocolate taste.
-
How can I make these cookies more festive?
Try pressing a few crushed candy canes onto the dough balls before baking or sprinkling colored sugar on top. Serving with holiday-themed napkins or plates also adds that extra festive vibe.
Final Thoughts
This Chocolate Peppermint Kiss Cookies Recipe has a special place in my heart—and on my cookie platter every holiday season. From the chewy chocolate base to the cool peppermint kiss nestled right on top, each bite feels like a little celebration. I’m so happy to share this one with you because I know you and your loved ones will enjoy making and eating these just as much as I do. So, get your mixer ready, freeze those kisses, and treat yourself to these fabulous cookies—you won’t regret it!
Print
Chocolate Peppermint Kiss Cookies Recipe
- Prep Time: 15 minutes
- Cook Time: 7 minutes
- Total Time: 22 minutes
- Yield: 34 cookies 1x
- Category: Dessert
- Method: Baking
- Cuisine: American
Description
These Chocolate Peppermint Blossoms are festive, chewy chocolate cookies topped with a minty Candy Cane Hershey Kiss. Perfect for holiday gatherings, they combine rich cocoa, soft butter-based dough, and a crunchy peppermint chocolate center that sets beautifully when cooled on the baking sheets.
Ingredients
Dry Ingredients
- 1 1/2 cups (188 g) all-purpose flour, spooned and leveled
- 1/2 cup (40 g) Dutch process cocoa powder
- 1/2 tsp baking powder
- 1/2 tsp baking soda
- 1/2 tsp salt
Wet Ingredients
- 3/4 cup (168 g) unsalted butter, softened
- 3/4 cup (165 g) light brown sugar, packed
- 1/4 cup (50 g) granulated sugar
- 2 egg yolks, at room temperature
- 1 tsp vanilla extract
Toppings
- 34 Candy Cane Hershey Kisses, frozen
- 1/4 cup (50 g) granulated sugar for rolling dough balls
Instructions
- Freeze Candy Cane Kisses: Unwrap 34 Candy Cane Hershey Kisses and place them in the freezer for 30 minutes to harden for pressing into the baked cookies.
- Preheat Oven and Prepare Baking Sheets: Preheat your oven to 350°F (175°C) and line three baking sheets with parchment paper. Set aside.
- Mix Dry Ingredients: In a medium bowl, whisk together flour, cocoa powder, baking powder, baking soda, and salt until evenly combined. Set aside.
- Cream Butter and Sugars: Using an electric mixer, cream the softened butter, brown sugar, and granulated sugar together in a large bowl for 1-2 minutes until light and fluffy.
- Add Egg Yolks and Vanilla: Mix in the egg yolks and vanilla extract until the mixture is pale in color and fluffy, about 1-2 minutes.
- Combine Dry and Wet Ingredients: Gradually add the dry ingredients to the wet ingredients and mix just until combined to form the cookie dough.
- Portion Dough: Using a 1-tablespoon cookie scoop, divide the dough into 34 equal portions and roll each into a ball.
- Coat Dough Balls: Roll each dough ball in the 1/4 cup granulated sugar, then place them about 2 inches apart on the prepared baking sheets (12 on the first two sheets and 10 on the last).
- Bake Cookies: Bake the cookies for 7-8 minutes at 350°F; 7 minutes if you prefer chewier cookies.
- Press Candy Cane Kisses: Immediately after removing from the oven, press a frozen Candy Cane Hershey Kiss into the center of each cookie.
- Cool on Baking Sheets: Let the cookies cool completely on the baking sheets so the chocolate kiss sets and maintains its shape.
- Serve and Store: Serve the cookies once cooled. Store leftovers in an airtight container for up to three days.
Notes
- Measure Flour Properly: Avoid scooping flour directly with your cup as it can cause too much flour to be used, resulting in dry cookies. Instead, spoon flour into the measuring cup and level it off with a knife or use a kitchen scale with 125 grams per cup for accuracy.
- For a chewier texture, bake closer to 7 minutes instead of 8.
- Freezing the Candy Cane Kisses is essential to ensure they maintain shape when pressed into hot cookies.
- Do not overcrowd the baking sheets to allow even baking and spreading.
Nutrition
- Serving Size: 1 cookie
- Calories: 120
- Sugar: 9g
- Sodium: 85mg
- Fat: 6g
- Saturated Fat: 3.5g
- Unsaturated Fat: 2g
- Trans Fat: 0g
- Carbohydrates: 16g
- Fiber: 1.5g
- Protein: 1.5g
- Cholesterol: 30mg


