If you’ve been dreaming of that perfect balance between rich chocolate and refreshing mint, then I’ve got a treat for you — a Chocolate Mint Whoopie Pies Recipe that’s absolutely fan-freaking-tastic. When I first tried making these, I was hooked by how soft and cakey the chocolate cookies are, paired with a luxuriously creamy mint filling that isn’t overpowering but just right. Stick with me, and you’re going to love how easy and rewarding these little desserts are to make!
Why You’ll Love This Recipe
- Perfect Texture: The chocolate cookies come out soft and cake-like every time, no dry or dense bites here.
- Mint That’s Just Right: The peppermint filling is refreshingly cool without ever feeling too strong or artificial.
- Simple Ingredients: You probably already have most of what you need in your pantry and fridge.
- Great for Sharing: These whoopie pies make fantastic gifts or party treats that will definitely impress.

Ingredients You’ll Need
Let’s chat about the ingredients before diving in — these are thoughtfully chosen to balance flavor and texture. The combination of Dutch-process cocoa and buttermilk keeps the chocolate flavor rich yet tender, while real butter in both parts of the recipe brings that classic creamy touch.

- All-purpose flour: A staple for structure—measure carefully to avoid dense cookies.
- Dutch-process cocoa powder: Gives a deep, robust chocolate flavor that’s less acidic than natural cocoa.
- Baking soda: Helps the pies rise and become fluffy, so don’t skip it!
- Fine sea salt: Enhances all the flavors; it’s the secret ingredient that makes chocolate sing.
- Unsalted butter: Key to creaminess; room temperature butter whips up nicely for the right texture.
- Dark brown sugar: Adds moisture and a hint of caramel flavor, making the cookies softer.
- Egg: Binds everything together and adds richness.
- Vanilla extract: Balances the chocolate and mint with warmth.
- Buttermilk: That tang and acidity tenderize the cookies perfectly.
- Powdered sugar: For the filling—I sift to keep it lump-free and smooth.
- Peppermint extract: Absolutely must be peppermint, not mint or spearmint, for that fresh, cool flavor.
- Heavy cream: Helps the filling reach a dreamy, pipeable texture.
- Green gel food coloring (optional): For a festive pop without affecting taste.
Variations
I’ve played around with this Chocolate Mint Whoopie Pies Recipe a bit, and I honestly encourage you to make it your own! Adding a fun twist or accommodating dietary tweaks is easier than you’d think.
- Gluten-Free Version: I swapped the all-purpose flour for a 1:1 gluten-free baking flour blend once, and they still turned out wonderfully soft just like the original.
- Dairy-Free Filling: Using vegan butter and coconut cream in the mint filling gave me a delicious dairy-free pie that my friends loved.
- Chocolate Chip Boost: Tossing mini chocolate chips into the batter adds a nice texture surprise and extra chocolate punch.
- Mint Intensity: Adjust the peppermint extract to your liking; I find 1/4 teaspoon subtle and 1/2 teaspoon more vibrant—start small!
How to Make Chocolate Mint Whoopie Pies Recipe
Step 1: Mix and Prep Your Chocolate Cookie Batter
Start by preheating your oven to 375°F and lining your baking sheets with parchment paper — trust me, this makes cleanup easier and prevents sticking. Sift together the flour, cocoa powder, baking soda, and salt to keep things airy and lump-free. When you beat the butter and dark brown sugar, take your time to get it light and fluffy — I always whip for a good 3 minutes because this step makes the texture of your cakes velvety. After adding the egg and vanilla, your batter will look rich and silky.
Step 2: Alternate Adding Dry and Wet Ingredients
This is where patience pays off! Add half the flour mixture, then half the buttermilk, beating on low to combine gently. Scrape down the bowl sides to avoid lumps. Repeat with the remaining flour and buttermilk. You’ll notice the batter is a bit sticky — that’s perfect, like a thick cake batter, and it’ll bake into that soft texture we love.
Step 3: Scoop and Bake Your Whoopie Pies
I use a spring-loaded 1 ½-tablespoon scoop to keep the pies uniform in size, spacing them about 2 inches apart on your baking sheets. Bake for 11 minutes until the pies look dry on top and gently spring back to the touch. Let them rest for 5 minutes on the pan before transferring to a wire rack to cool completely — this cooling phase helps them set up just right.
Step 4: Whip Up the Mint Filling
With your stand mixer and paddle attached, blend powdered sugar and butter on low speed to start, increasing to medium high until super smooth — scraping the bowl is key here to get everything combined. Add salt, peppermint extract (remember to use peppermint, not mint), and heavy cream, beating until creamy and light. If you want that iconic minty green color, stir in a few drops of green gel food coloring and mix till you have an even shade.
Step 5: Assemble Your Whoopie Pies
Time for the fun part! Dollop or pipe the mint filling onto the flat side of half your cookies using the same scoop size for even portions. Gently sandwich with the remaining cookies. Pro tip: If you’re planning to transport these beauties, chill them for about an hour first so they’re firmer and less delicate.
Pro Tips for Making Chocolate Mint Whoopie Pies Recipe
- Room Temperature Ingredients: Cold ingredients make mixing tricky – always bring butter, egg, and buttermilk to room temp before starting.
- Avoid Overbaking: The cakes should be just set and springy; overbaking makes them dry, so watch them closely around the 10-minute mark.
- Peppermint Extract Caution: A little goes a long way; start with less and add more if needed to avoid a soapy taste.
- Use a Spring-Loaded Scoop: It ensures evenly sized pies that bake perfectly and stack neatly.
How to Serve Chocolate Mint Whoopie Pies Recipe

Garnishes
I love dusting a tiny bit of cocoa powder or powdered sugar over the tops to give them a little elegant finish. Sometimes I sprinkle crushed peppermint candies on the filling edges for that extra minty crunch and festive look. It’s such a crowd-pleaser, especially around the holidays.
Side Dishes
These whoopie pies pair wonderfully with a simple glass of cold milk or a cup of peppermint tea if you want to keep the flavor theme going. For something richer, a scoop of vanilla ice cream or a drizzle of hot fudge can turn this into a decadent dessert experience.
Creative Ways to Present
For parties, I’ve arranged them on a wooden platter with fresh mint leaves and sprigs of rosemary around—the herbal green adds a fresh pop and smells amazing. Wrapping individual pies in parchment paper tied with a pretty ribbon makes sweet take-home gifts that guests always appreciate.
Make Ahead and Storage
Storing Leftovers
I usually keep leftover whoopie pies in an airtight container at room temperature for up to one day. This keeps the filling soft and the cookies tender. Refrigerating longer than that is fine, but they do firm up a bit, so I always bring them back to room temp before serving.
Freezing
Freezing is a great option! I freeze the sandwiches individually wrapped in plastic wrap, then place them in a freezer bag to prevent freezer burn. They freeze well for up to 2 months and thaw beautifully in the fridge overnight.
Reheating
Because these are best at room temp, I let frozen whoopie pies thaw in the fridge and then sit on the counter for about 30 minutes before serving. If you want to gently warm the cookies, a few seconds in the microwave can help soften the filling without melting it completely.
FAQs
-
Can I use regular cocoa powder instead of Dutch-process in this Chocolate Mint Whoopie Pies Recipe?
Absolutely, but keep in mind that Dutch-process cocoa is less acidic and provides a smoother, more mellow chocolate flavor. If you use natural cocoa powder, you might notice a slightly sharper taste and a subtle difference in color and texture due to its acidity. Adjusting the baking soda amount might also be necessary if you swap.
-
What if I don’t have buttermilk? Can I substitute it?
Sure thing! You can make a quick substitute by adding 1 tablespoon of lemon juice or white vinegar to 1 1/4 cups of milk. Let it sit for 5 minutes until it curdles, then use as you would buttermilk. This acidity is important for tender cookies and balanced flavor.
-
Can I make the filling without a stand mixer?
Definitely! If you don’t have a stand mixer, a hand mixer works just as well. Just make sure to beat the butter and sugar thoroughly to break down any lumps and get a smooth, creamy consistency. Patience is key here!
-
How do I avoid a soapy taste with peppermint extract in the filling?
Great question! Peppermint extract can be quite potent. Start with the smaller amount called for in the recipe, taste the filling, and add more only if you really need it. Also, make sure to use pure peppermint extract and not oil or imitations, which can cause that soapy off-flavor.
-
Can these whoopie pies be made ahead for parties?
Yes! You can bake the cookie rounds a day or two in advance and store them airtight. Assemble with fresh filling on the day of your event for the best texture. Alternatively, assemble ahead and refrigerate, just bring them to room temperature before serving to soften the filling.
Final Thoughts
I absolutely love how this Chocolate Mint Whoopie Pies Recipe brings together two classic flavors into a handheld treat that’s both nostalgic and fresh. It’s one of those desserts I find myself baking when I want to impress guests without fuss or when I need a quick but delicious indulgence for my family. I hope you give it a try soon — there’s something truly magical about biting into a soft chocolate cake sandwich with that creamy mint filling. You’ll be so glad you did!
Print
Chocolate Mint Whoopie Pies Recipe
- Prep Time: 35 minutes
- Cook Time: 11 minutes
- Total Time: 46 minutes
- Yield: 18 whoopie pies 1x
- Category: Dessert
- Method: Baking
- Cuisine: American
Description
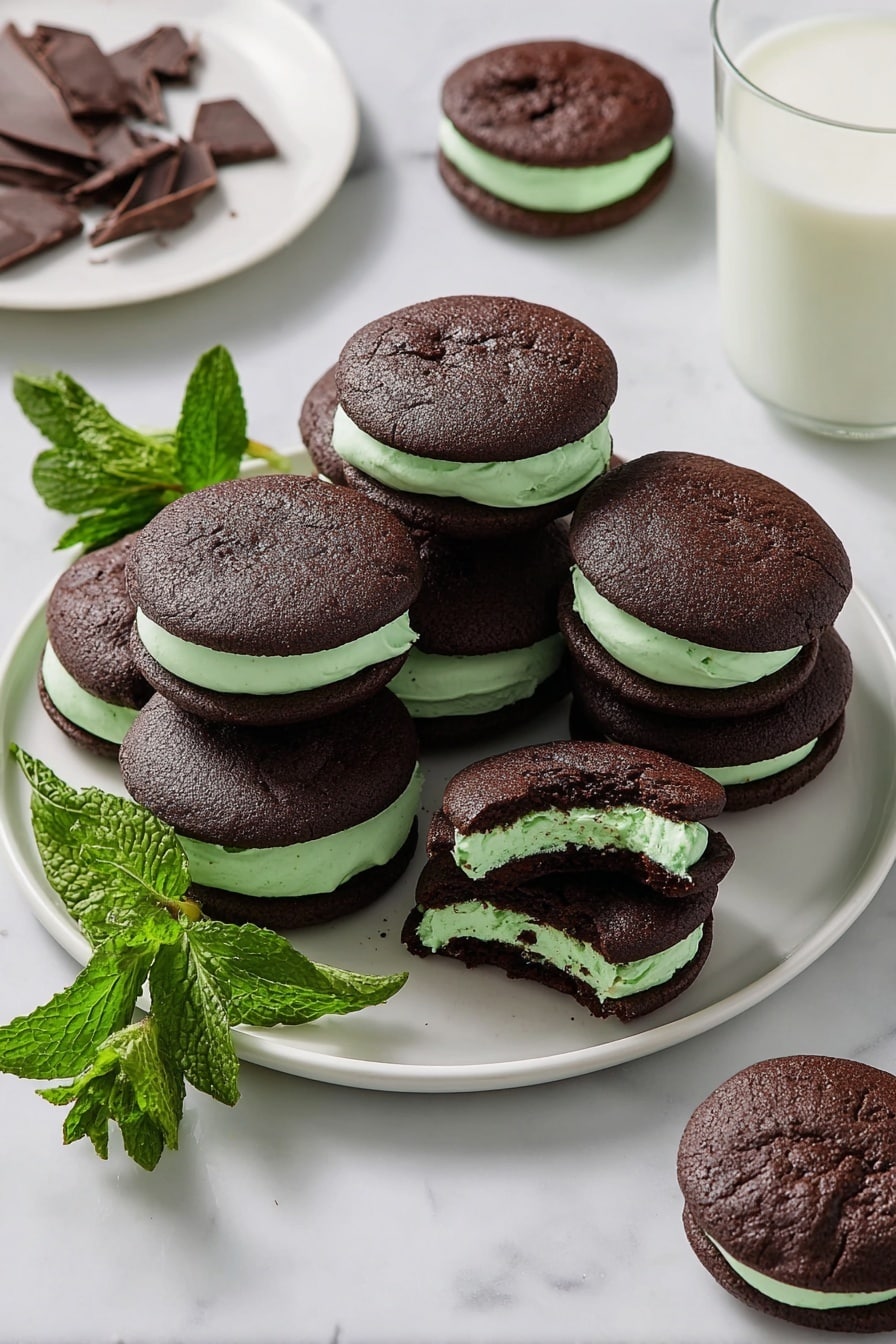
These Chocolate Whoopie Pies with Mint Filling are a delightful treat featuring rich, chocolatey cake sandwiches filled with a smooth and refreshing peppermint buttercream. Perfectly soft and cakey, these whoopie pies combine the comforting allure of classic chocolate with a cool minty twist, ideal for holiday gatherings or any special occasion.
Ingredients
For whoopie pies:
- 1 2/3 cups (212 grams) all-purpose flour
- 2/3 cup (57 grams) Dutch-process cocoa powder
- 1 1/2 teaspoons baking soda
- 1/2 teaspoon fine sea salt
- 1 stick (113 grams) unsalted butter, at room temperature
- 1 cup (200 grams) lightly packed dark brown sugar
- 1 large egg, at room temperature
- 1 teaspoon vanilla extract
- 1 1/4 cups (296 grams) buttermilk, at room temperature
For mint filling:
- 3 cups (375 grams) powdered sugar, sifted
- 2 sticks (227 grams) unsalted butter, at room temperature
- 1/4 teaspoon fine sea salt
- 1/4 to 1/2 teaspoon peppermint extract, depending on desired intensity
- 1 to 2 tablespoons heavy cream
- Green gel food coloring, if desired
Instructions
- Preheat and prepare baking sheets: Preheat your oven to 375°F (190°C) and line two large baking sheets with parchment paper to ensure easy removal and prevent sticking.
- Combine dry ingredients: Sift together the all-purpose flour, Dutch-process cocoa powder, baking soda, and fine sea salt into a medium mixing bowl to ensure even distribution and no lumps.
- Mix butter and sugar: In the bowl of an electric mixer fitted with the paddle attachment, beat the unsalted butter and dark brown sugar on low speed until combined. Increase speed to medium-high and continue beating for 3 minutes until light and fluffy. Scrape down the sides of the bowl to incorporate all ingredients.
- Add egg and vanilla: Add in the egg and vanilla extract, beating on medium-high speed for another 3 minutes until the mixture is very well combined and smooth.
- Incorporate dry and wet ingredients: Add half of the flour mixture followed by half of the buttermilk to the batter. Mix on low speed until just combined, scraping the bowl as needed. Repeat with the remaining buttermilk and flour mixture. The batter should be fluffy and slightly sticky, similar to a thick cake batter.
- Scoop and bake the whoopie pies: Use a medium 1 ½-tablespoon spring-loaded scoop to drop mounds of batter onto the prepared baking sheets, spacing them 2 inches apart. Bake for 11 minutes, or until the pies spring back lightly when pressed and look dry on top. Allow them to cool on the baking sheets for 5 minutes, then transfer to wire racks to cool completely.
- Prepare the mint filling: In the bowl of a stand mixer with the paddle attachment, combine the sifted powdered sugar and unsalted butter. Mix on low speed until blended, then increase to medium speed and beat for 3 minutes until smooth. Scrape down the bowl as necessary. Add the fine sea salt, peppermint extract, and heavy cream, beating on medium speed for one minute until light and creamy. Add green gel food coloring if desired, mixing until color is uniform.
- Assemble the whoopie pies: Using the 1 ½-tablespoon scoop or a piping bag fitted with a decorative tip, dollop or pipe the mint filling onto the flat side of half of the cooled whoopie pies. Top gently with the remaining pies to form sandwiches.
- Storage and serving tips: Store assembled whoopie pies at room temperature in an airtight container for up to one day or refrigerate for up to four days. Best served at room temperature to allow the buttercream to soften. For transport, chill the pies for at least one hour to firm them up and reduce fragility.
Notes
- Always use peppermint extract for the filling to achieve the correct mint flavor; avoid using mint or spearmint extract as they differ in taste.
Nutrition
- Serving Size: 1 whoopie pie
- Calories: 320 kcal
- Sugar: 30 g
- Sodium: 150 mg
- Fat: 18 g
- Saturated Fat: 11 g
- Unsaturated Fat: 6 g
- Trans Fat: 0 g
- Carbohydrates: 38 g
- Fiber: 3 g
- Protein: 3 g
- Cholesterol: 45 mg


