If you’re looking to impress at your next Halloween gathering or just want a fun, festive treat to enjoy at home, you’ll absolutely love this Chocolate Covered Halloween Oreos Recipe. These colorful, spooky Oreos are not only super easy to make but also turn out looking so adorable, they could steal the show on any dessert table. Plus, I’ll share some insider tips and tricks that I’ve learned along the way to make sure your Chocolate Covered Halloween Oreos come out perfect every time. Let’s dive in!
Why You’ll Love This Recipe
- Easy to Make: Even if you’ve never dipped treats before, the step-by-step process is super beginner-friendly.
- Vibrant Halloween Colors: The candy melts come in festive hues that make each Oreo pop with spooky charm.
- Customizable Decorations: You can add sprinkles, candy eyeballs, or pipe fun designs to suit your Halloween vibe.
- Great for Parties or Gifts: These keep well at room temp and look fancy enough to wow friends and family.

Ingredients You’ll Need
Each ingredient here works together beautifully to create a candy-coated masterpiece you’ll be proud of. The candy melts are a lifesaver for easy, smooth candy coatings, and using Halloween-themed colors sets just the right mood.
- Chocolate Sandwich Cookies: Classic Oreos work best for that perfect crunch and creamy center contrast.
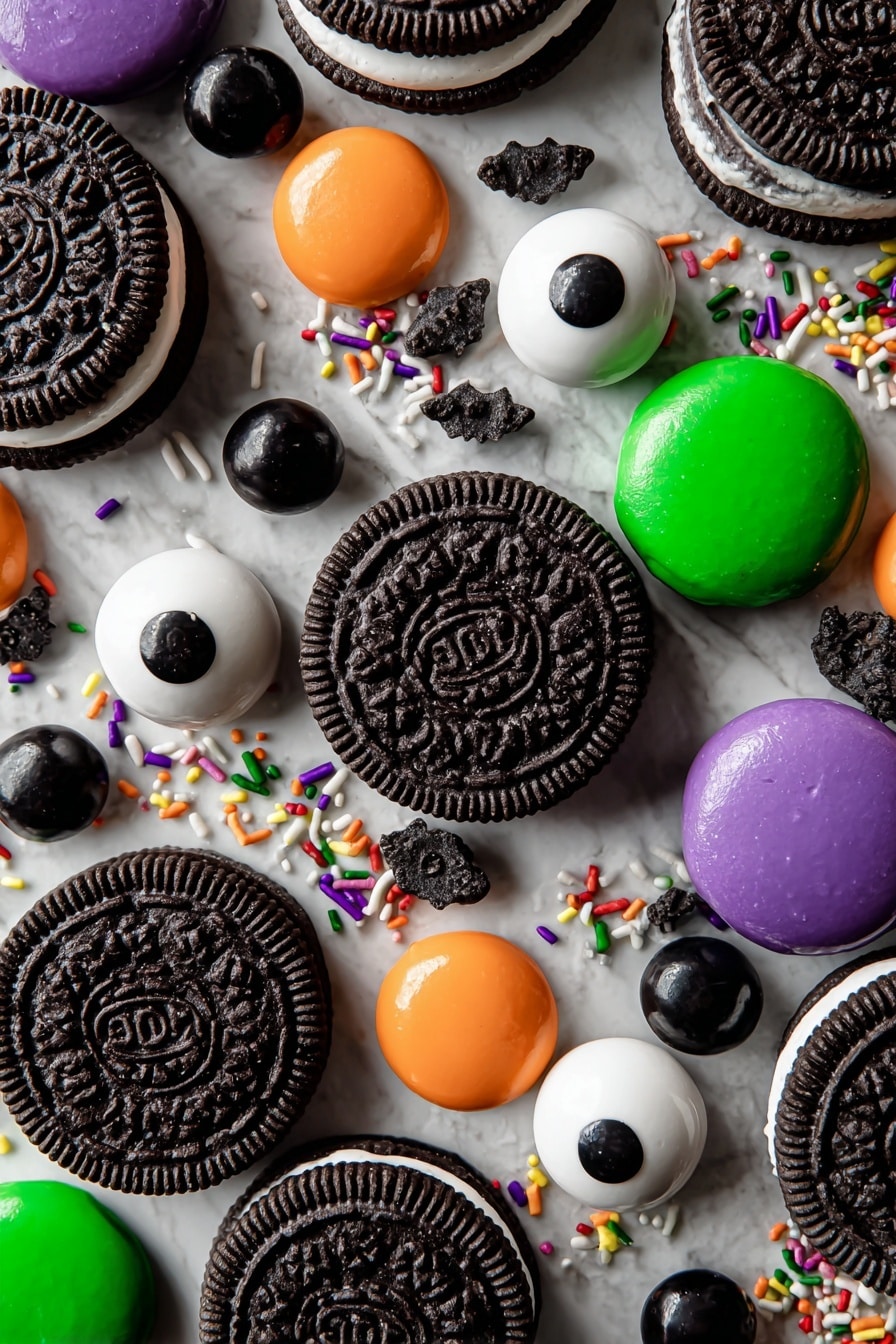
- Candy Melts (white, green, purple, orange, black): These make it easy to get that smooth, colorful coating — just melt and dip!
- Halloween Sprinkles: Adds that festive crunch and keeps things fun and playful.
- Candy Eyeball Decorations: These quirky little accents give your Oreos an extra spooky personality.
Variations
I love mixing it up depending on the year or my mood — sometimes going all out with colors, other times sticking to just one or two for a more minimalist look. Feel free to make this recipe your own; the possibilities are endless!
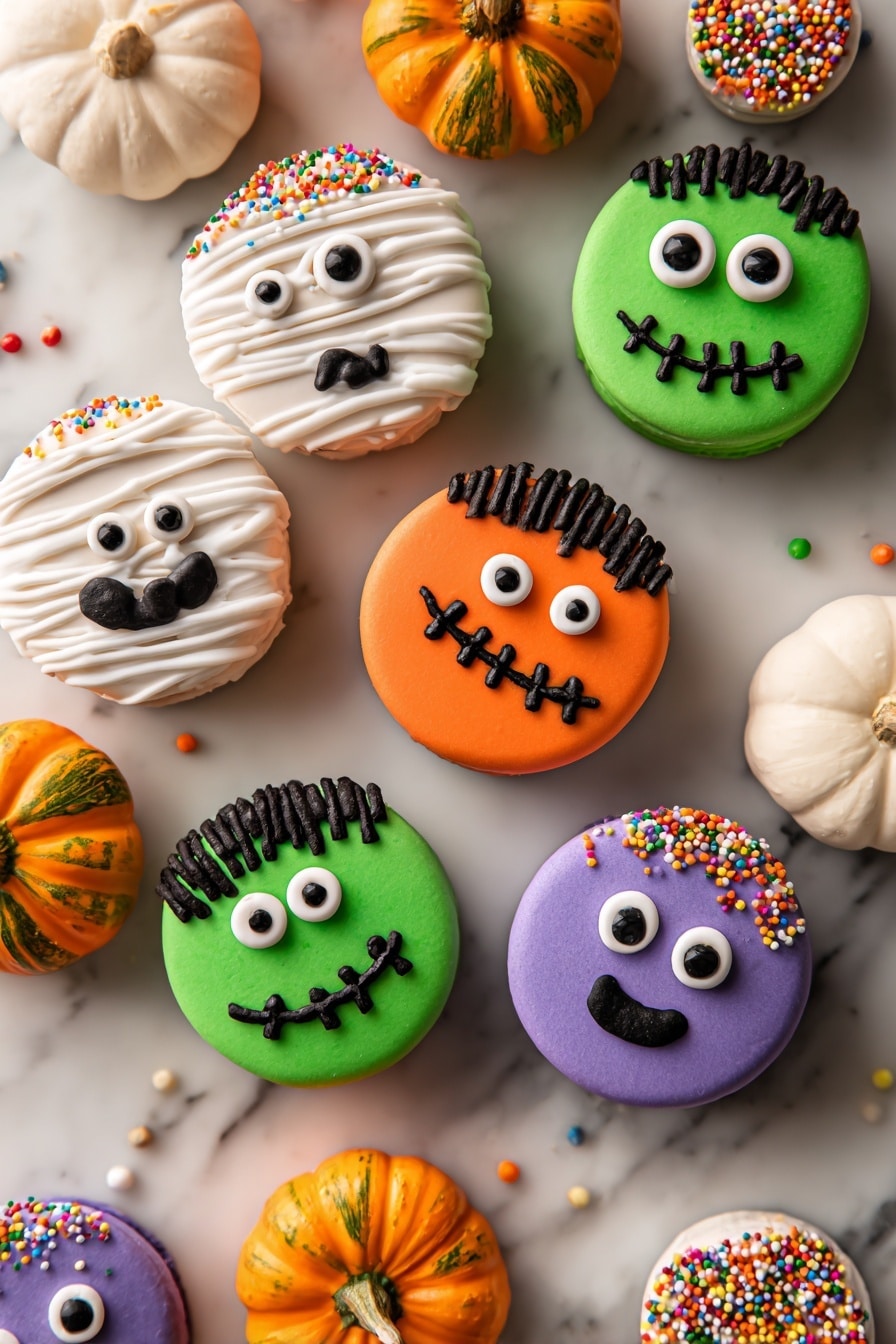
- Spooky Faces: I once piped little spider webs and creepy grins with the black candy melts — a HUGE hit at my nephew’s party.
- All White Coating: For a ghostly effect, dip all Oreos in white candy melts and use minimal black piping for eyes.
- Peanut Butter Filling: Swap your regular Oreos for peanut butter filling to add a nutty twist I can’t get enough of.
- Gluten-Free Option: Use gluten-free sandwich cookies and ensure your candy melts are GF-certified if needed.
How to Make Chocolate Covered Halloween Oreos Recipe
Step 1: Prep Your Workspace
Start by lining a cookie sheet with wax paper or a silicone baking mat. This is your Oreo “landing zone” after dipping — trust me, this little step saves you from sticky messes and keeps your cookies flawless.
Step 2: Melt the Candy Melts
Place one color of candy melts in a microwave-safe glass bowl. Microwave at 50% power for 30 seconds, stir, then repeat until smooth and fully melted. I learned the hard way not to rush this — heating slowly prevents burning and keeps your candy silky.
Step 3: Dip Your Oreos
Drop one Oreo at a time into the melted candy melts. Use a spoon to turn the cookie upside-down, fully coating all sides. Then, lift it out with a fork, gently shake off the excess coating, and set it on your prepared sheet. Add sprinkles or candy eyeballs while the coating is still wet.
Step 4: Add Final Touches
Once the coating hardens, melt the black candy melts just like before and use a piping bag with a small tip to pipe fun details—think spooky spider webs, creepy smiles, or simple eyes. Don’t worry if your first few aren’t perfect — practice makes perfect!
Step 5: Let Them Set and Store
Allow all your Chocolate Covered Halloween Oreos to fully harden at room temperature. Then, store them in an airtight container — they’ll stay fresh and delicious for up to two weeks, which is great because your family might want to hoard them!
Pro Tips for Making Chocolate Covered Halloween Oreos Recipe
- Go Low and Slow on Melting: Heating candy melts slowly at half power prevents scorching and keeps your coating smooth and glossy.
- Use a Fork with Wider Spacing: A wider fork helps you lift the Oreos without too much candy melt pooling around the edges.
- Add Decorations While Wet: Don’t wait too long to add sprinkles or eyeballs — they stick better and don’t fall off once dry.
- Avoid Humidity: If it’s humid, your candy coating might sweat or fail to harden properly; aim for a dry day or a cool room.
How to Serve Chocolate Covered Halloween Oreos Recipe
Garnishes
I love sprinkling a few extra candy eyeballs and a light drizzle of contrasting candy melts over the finished Oreos — it elevates the look and adds little pops of fun texture. Plus, kids get a kick out of picking their favorite designs!
Side Dishes
Pair these Chocolate Covered Halloween Oreos with a batch of spooky cupcakes or some fruit-infused sparkling cider for a balanced, festive spread that both kids and adults enjoy.
Creative Ways to Present
For Halloween parties, I like arranging these Oreos on orange and black tiered trays or placing them inside small cellophane bags tied with themed ribbon — perfect for party favors. Another idea is to serve them alongside a DIY “decorate your own Oreo” station for extra fun!
Make Ahead and Storage
Storing Leftovers
I store mine in a cool, dry place in an airtight container, layered between parchment paper to avoid sticking. This method keeps the Chocolate Covered Halloween Oreos fresh and crisp for at least two weeks.
Freezing
If you want to make these in advance, freezing works wonderfully. Just freeze the Oreos in a single layer on a baking sheet first, then transfer to a freezer-safe container. When you’re ready, thaw at room temperature — they keep their snap and flavor beautifully.
Reheating
These don’t need reheating, but if you want the candy melts a bit softer for eating, let them sit at room temperature for a few minutes. Avoid microwaving, which can ruin the texture of the chocolate coating.
FAQs
-
Can I use regular chocolate instead of candy melts for the Chocolate Covered Halloween Oreos Recipe?
You can, but candy melts are specially formulated to melt smoothly and harden with a glossy finish without tempering, which is ideal for dipping. Regular chocolate can be trickier to work with and may not coat as evenly or harden as nicely without tempering.
-
How do I prevent the candy coating from cracking on my Chocolate Covered Halloween Oreos?
Make sure to coat the Oreos evenly and avoid applying thick layers. Also, keep the finished Oreos at room temperature and away from cold drafts. Rapid temperature changes can cause cracking.
-
What’s the best way to store leftover Chocolate Covered Halloween Oreos?
Store them in an airtight container at room temperature, layering parchment paper between cookies to prevent sticking. They’ll stay fresh for up to two weeks.
-
Can I add other decorations besides sprinkles and candy eyeballs?
Absolutely! Mini chocolate chips, edible glitter, colored sugar, or even edible markers can add unique flair. Just add decorations while the candy coating is still soft so they stick well.
Final Thoughts
This Chocolate Covered Halloween Oreos Recipe has become a beloved tradition at my house. I still remember the first time I made them and how my kids’ eyes lit up when they saw the colorful, spooky treats. Making them together became part of our Halloween fun! I’m confident you’ll enjoy how easily these come together and how much family and friends will rave about your creations. So go ahead, give this a try—your Halloween dessert game is about to get seriously upgraded.
Print
Chocolate Covered Halloween Oreos Recipe
- Prep Time: 30 minutes
- Cook Time: 0 minutes
- Total Time: 30 minutes
- Yield: 40 cookies 1x
- Category: Dessert
- Method: No-Cook
- Cuisine: American
Description
These festive Chocolate Covered Halloween Oreos are a fun and colorful treat perfect for Halloween parties and celebrations. Featuring Oreo cookies dipped in vibrant candy melts and decorated with spooky sprinkles and candy eyeballs, these delightful sweets combine creamy chocolate coating with the classic sandwich cookie for a spooky, sweet snack that’s sure to impress kids and adults alike.
Ingredients
Cookies
- 40 chocolate sandwich cookies (Oreos)
Candy Coating
- 6 ounces white candy melts
- 6 ounces green candy melts
- 6 ounces purple candy melts
- 6 ounces orange candy melts
- 2 ounces black candy melts
Decorations
- Halloween sprinkles
- Candy eyeball decorations
Instructions
- Prepare the Work Surface: Line a cookie sheet with wax paper or use a smooth reusable silicone baking mat to place the dipped cookies on. This will prevent sticking and make cleanup easy.
- Melt the Candy Coating: In a microwave-safe glass bowl, melt one color of candy melts at 50% power. Stir the melts after every 30 seconds until completely smooth and fully melted. Be careful not to overheat.
- Dip the Oreo Cookies: Using a spoon, carefully drop one Oreo cookie into the melted candy. Flip the cookie upside down inside the bowl to coat all sides thoroughly. Then, use a fork to lift the cookie out of the candy, gently shaking off any excess coating to avoid drips.
- Set the Cookies: Transfer the coated Oreo onto the prepared cookie sheet. Immediately decorate by adding Halloween-themed sprinkles or candy eyeball decorations onto the wet candy coating before it hardens to ensure they adhere properly.
- Repeat with Remaining Colors: Repeat the melting and dipping process with the remaining candy melt colors, coating and decorating the cookies as desired in each color.
- Add Additional Detailing: Once all cookies have been dipped and the coating has hardened, melt the black candy melts and pipe designs onto the cookies using a piping bag fitted with a small tip to add spooky details like spider webs or faces.
- Storage: Store the fully set chocolate covered Halloween Oreos in an airtight container at room temperature for up to two weeks, maintaining freshness and crispness of the coating.
Notes
- Use a silicone baking mat or wax paper to prevent sticking during the drying process.
- Work with one color of candy melts at a time to avoid mixing colors.
- If candy melts become too thick, add a small amount of vegetable oil to make them smoother for dipping.
- Be patient while the coating hardens to avoid smudging decorations.
- These treats are best stored at room temperature to keep the candy melts shiny and crisp.
Nutrition
- Serving Size: 1 cookie
- Calories: 150
- Sugar: 18g
- Sodium: 85mg
- Fat: 7g
- Saturated Fat: 5g
- Unsaturated Fat: 1.5g
- Trans Fat: 0g
- Carbohydrates: 22g
- Fiber: 1g
- Protein: 1g
- Cholesterol: 0mg