
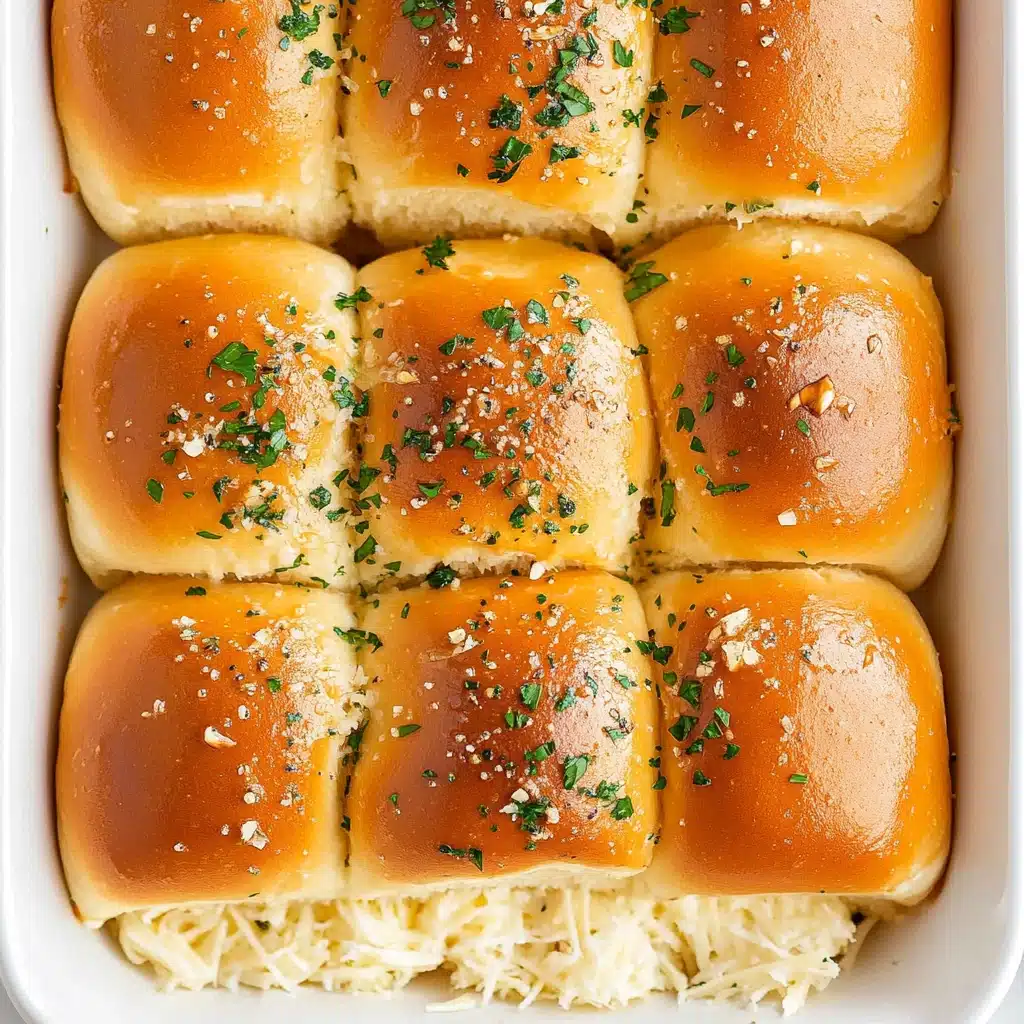
If you’re craving something oozing with melty cheese, packed with zippy flavor, and just plain fun to eat, these Cheesy Garlic Pesto Chicken Sliders are your new go-to. Imagine juicy chicken, fresh basil pesto, and a garlicky butter drizzle… all tucked into pillowy-soft slider buns. These sliders are a rave-worthy crowd-pleaser, whether for game day, a family snack, or easy entertaining!
Why You’ll Love This Recipe
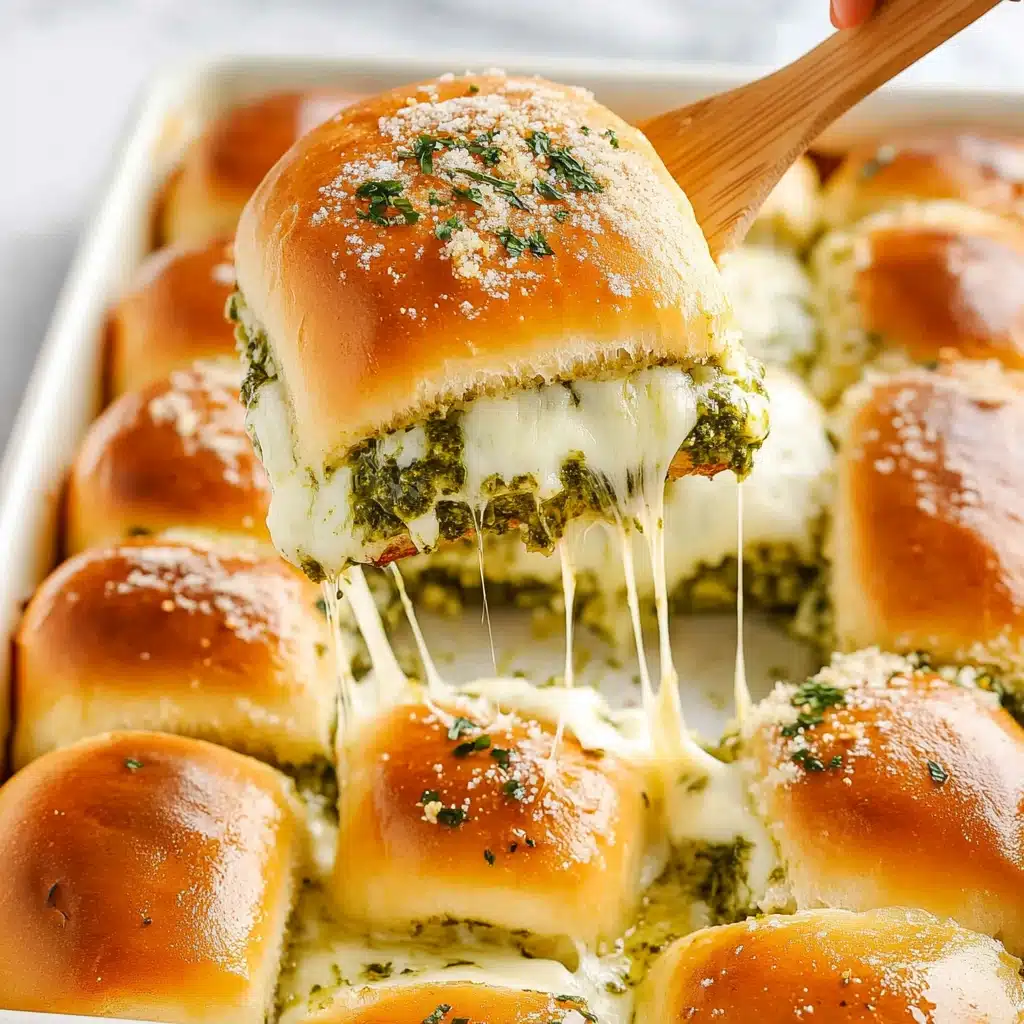
- Seriously Cheesy: Every slider is loaded with gooey mozzarella, making each bite a gloriously melty experience.
- Flavor Bomb: Vibrant basil pesto and rich garlic butter soak into every crevice, building layers of bold, crave-worthy flavors.
- Effortless Crowd-Pleaser: All you need is 30 minutes and one pan—perfect for easy party prep or lazy weeknights.
- Ultra Versatile: These Cheesy Garlic Pesto Chicken Sliders are endlessly customizable for picky eaters, potlucks, or meal prepping.
Ingredients You’ll Need
You might already have most of these staples waiting in your kitchen, and that’s the beauty of this recipe—each ingredient has a starring role, from the herby pesto to the tender chicken and golden, garlicky tops. Here’s what brings these sliders to life:
- Slider Rolls: Opt for soft, pull-apart dinner rolls or Hawaiian rolls for the ultimate fluffy base that soaks up all the flavors.
- Unsalted Butter: Melted butter forms the backbone of that irresistible, golden garlic topping.
- Garlic: Freshly minced cloves give every bite that unmistakable, mouthwatering aroma—skip the jarred stuff if you can!
- Fresh Parsley: A sprinkle of bright, fresh parsley adds color and a lovely herbal lift.
- Basil Pesto: Store-bought or homemade—either one brings a punch of bold, herby flavor that pairs seamlessly with chicken and cheese.
- Cooked, Shredded Chicken: A rotisserie chicken is a convenient, flavorful shortcut, but any leftover cooked chicken will work.
- Shredded Mozzarella Cheese: Mozzarella gives you that ooey-gooey cheese pull everyone loves—don’t skimp!
- Salt and Pepper: Just a pinch helps round out all the other flavors and makes the garlic shine.
Variations
One of the best things about Cheesy Garlic Pesto Chicken Sliders? You can switch them up to suit any mood, ingredient on hand, or dietary need. Get creative and put your own spin on the filling or toppings!
- Bread Swap: Use gluten-free slider rolls or mini brioche buns for a different texture or to make the recipe gluten-friendly.
- Pesto Play: Try sun-dried tomato pesto or a spicy arugula pesto instead of classic basil for a dazzling flavor twist.
- Protein Switch: Use sliced turkey, roast beef, or even grilled portobello mushrooms for a vegetarian option.
- Cheese Lovers’ Dream: Add provolone, fontina, or Monterey Jack in addition to the mozzarella for extra ooze and flavor.
How to Make Cheesy Garlic Pesto Chicken Sliders
Step 1: Prep Your Pan and Buns
Preheat your oven to 375°F and lightly grease a 9×13-inch baking pan. Place your slider rolls, still connected, on a cutting board and use a serrated knife to slice across the entire package—gently, so you keep the tops and bottoms each as one single piece. This keeps things tidy and makes assembly a breeze!
Step 2: Make the Garlic Butter
In a small bowl, combine the melted butter with your finely minced garlic and fresh parsley. Stir it up and set aside, dreaming of the golden, fragrant buns you’ll soon enjoy.
Step 3: Layer on the Flavor
Add just the bottom half of the sliced rolls to your prepared pan. Generously slather half the pesto across the cut surface. Top that with your shredded chicken (make sure it’s evenly distributed), then pile on the mozzarella cheese for max meltiness.
Step 4: Add Pesto and the Top Layer
Now, spread the remaining pesto liberally over the cut side of your roll tops. Place them cut-side down over the cheese so every layer explodes with basil flavor in every bite.
Step 5: Brush and Bake
Brush the entire top of the sliders with your prepared garlic butter. Sprinkle with salt and pepper to taste. Cover loosely with foil and bake for about 10 minutes. Then uncover and bake another 5–10 minutes until the tops are lightly browned and the cheese is bubbling like a dream.
Pro Tips for Making Cheesy Garlic Pesto Chicken Sliders
- Shred Chicken While Warm: Shredding warm, just-cooked or freshly purchased rotisserie chicken gives you soft strands that soak up more pesto—and makes assembling the sliders much easier.
- Cover Loosely for Ultimate Melt: Tenting the foil keeps the buns from crisping too early and gives the cheese time to fully melt and mingle into the chicken below.
- Generous Garlic Butter: Don’t skimp when brushing the tops—extra garlic butter means those slider buns bake up gorgeous, golden, and supremely flavorful.
- Customize Your Cheese: Feel free to add a sprinkle of parmesan or swap mozzarella for your cheese of choice if you love a sharper or creamier bite!
How to Serve Cheesy Garlic Pesto Chicken Sliders
Garnishes
Right before serving, sprinkle your sliders with chopped fresh basil or extra parsley for a pop of color and fresh flavor. A light dusting of grated parmesan over the tops is also gorgeous (and seriously tasty!).
Side Dishes
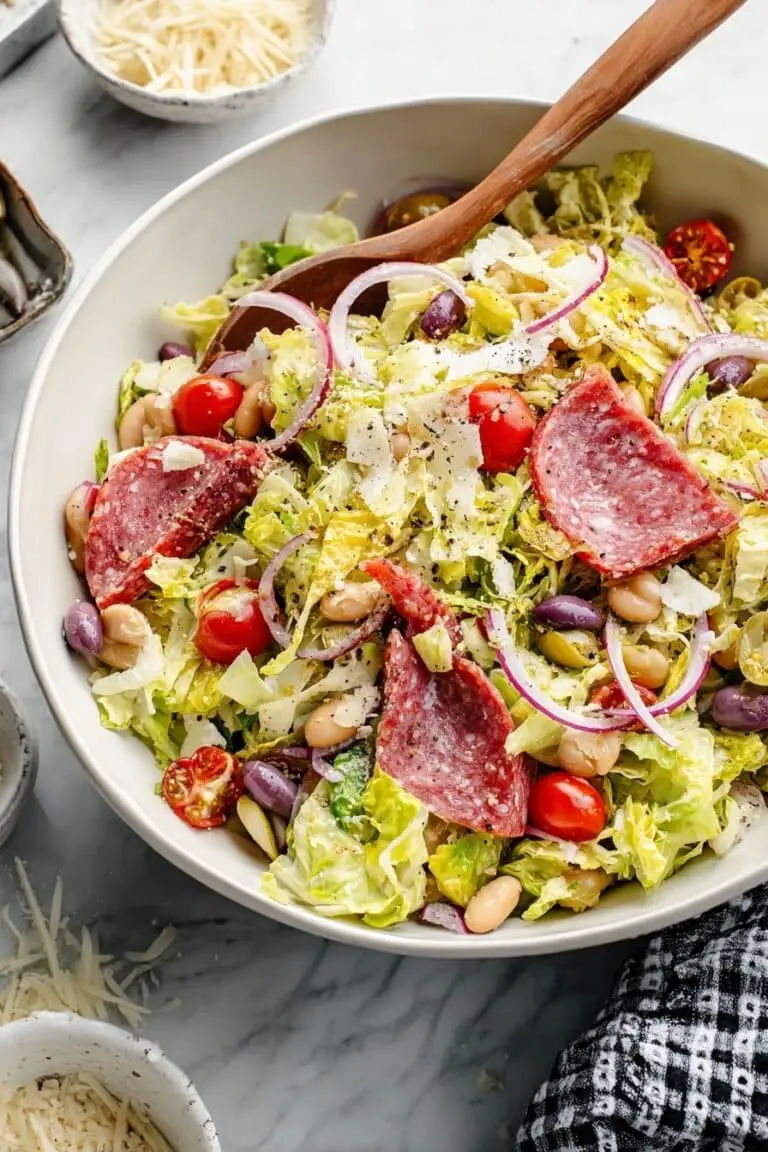
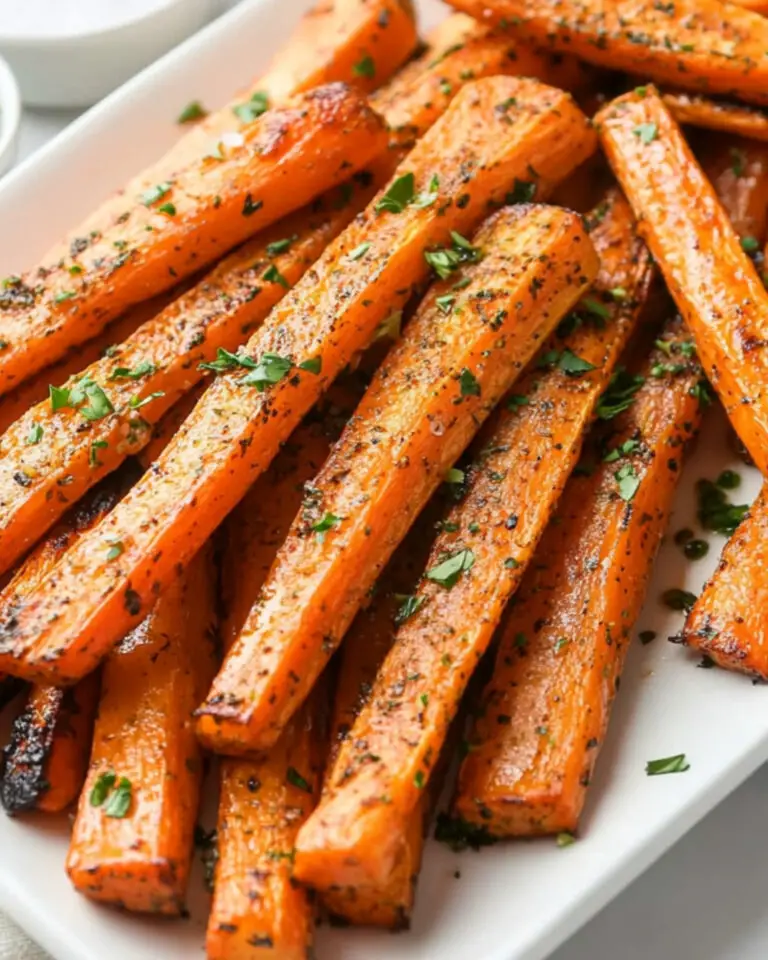
Pair Cheesy Garlic Pesto Chicken Sliders with a crisp Caesar salad, tangy marinated tomatoes, or a simple bowl of kettle chips for a grab-and-go vibe. For heartier appetites, consider roasted potatoes or a side of soup—the sliders are perfect for dunking!
Creative Ways to Present
Arrange the sliders in a circle around a bowl of extra pesto or garlic aioli for dipping—party style! For lunchboxes or picnics, wrap each slider individually in parchment for portable, mess-free eating. Try skewering each slider with a cute pick and a cherry tomato for a little extra flair.
Make Ahead and Storage
Storing Leftovers
Cool your Cheesy Garlic Pesto Chicken Sliders completely, then tuck any leftovers into an airtight container and refrigerate for up to 3 days. They stay moist and flavorful, so you’ll love them just as much the next day.
Freezing
You can freeze completely cooked and cooled sliders! Wrap them tightly in foil and pop them in a freezer bag. For freshest flavor, enjoy within 2 months—just thaw overnight in the fridge before reheating.
Reheating
To reheat, cover the sliders with foil and warm in a 350°F oven for 10–15 minutes, or until the cheese is melty and the rolls are heated through. For the best texture, avoid microwaving if possible—it makes the bread tough.
FAQs
-
Can I make Cheesy Garlic Pesto Chicken Sliders ahead of time?
Absolutely! You can assemble the sliders up to a day in advance. Just hold off on brushing the tops with garlic butter until right before baking. Cover and refrigerate the prepped sliders, then bring them to room temperature and complete the final steps when you’re ready to serve.
-
What can I use instead of shredded chicken?
Rotisserie chicken is super convenient, but any cooked chicken works. You can also swap in turkey, ham, or even thinly sliced cooked eggplant for a meatless version of Cheesy Garlic Pesto Chicken Sliders!
-
How do I prevent the sliders from getting soggy?
To avoid soggy bottoms, don’t overload the pesto and make sure any chicken you use isn’t dripping wet. Using a sturdy roll like Hawaiian or dinner rolls also helps keep everything perfectly together.
-
Can I double the recipe for a party?
Definitely! Just grab a second baking pan and double up all the ingredients. Since Cheesy Garlic Pesto Chicken Sliders hold well after baking, they’re ideal for making in bulk—just be sure to keep batches covered if you’re serving them later.
Final Thoughts
I hope you’re inspired to whip up these Cheesy Garlic Pesto Chicken Sliders soon—whether for a quick weeknight dinner, your next potluck, or simply to treat yourself. They’re impossibly easy, reliably delicious, and so much fun to share. If you give them a try, let me know how they turn out. Happy slider making!
Print
Cheesy Garlic Pesto Chicken Sliders Recipe
- Prep Time: 10 minutes
- Cook Time: 20 minutes
- Total Time: 30 minutes
- Yield: 6 servings 1x
- Category: Appetizer, Main Course
- Method: Baking
- Cuisine: Global
- Diet: Vegetarian
Description
These Cheesy Garlic Pesto Chicken Sliders are a delicious and easy-to-make appetizer or meal. Perfect for gatherings or a quick family dinner, these sliders are packed with flavor and gooey cheese.
Ingredients
Slider Rolls:
- 12 count package slider rolls
Garlic Butter Mixture:
- 6 Tbsp unsalted butter, melted
- 4 cloves garlic, finely minced
- 2 tsp minced fresh parsley
Pesto Chicken Filling:
- 2/3 cup basil pesto, homemade or store-bought (divided)
- 2 cups cooked and shredded chicken
- 1 1/2 cups shredded mozzarella cheese
- Salt and pepper, to taste
Instructions
- Preheat Oven and Prepare Pan: Preheat oven to 375°F and grease a 9×13-inch baking pan.
- Prepare Slider Rolls: Slice the slider rolls horizontally and place the bottom half in the prepared pan.
- Make Garlic Butter Mixture: Combine melted butter, minced garlic, and parsley in a bowl.
- Layer Ingredients: Spread half of the pesto on the bottom rolls, layer chicken and cheese, then add remaining pesto and top rolls.
- Brush and Season: Brush the garlic butter over the rolls, sprinkle with salt and pepper.
- Bake: Cover with foil and bake for 10 minutes, then uncover and bake for another 5-10 minutes until cheese is melted.
Notes
- You can customize these sliders with additional toppings like sliced tomatoes or arugula.
- For a crispier top, broil the sliders for a few minutes after baking.
Nutrition
- Serving Size: 1 slider
- Calories: 320
- Sugar: 2g
- Sodium: 580mg
- Fat: 18g
- Saturated Fat: 8g
- Unsaturated Fat: 8g
- Trans Fat: 0g
- Carbohydrates: 26g
- Fiber: 1g
- Protein: 15g
- Cholesterol: 55mg

