
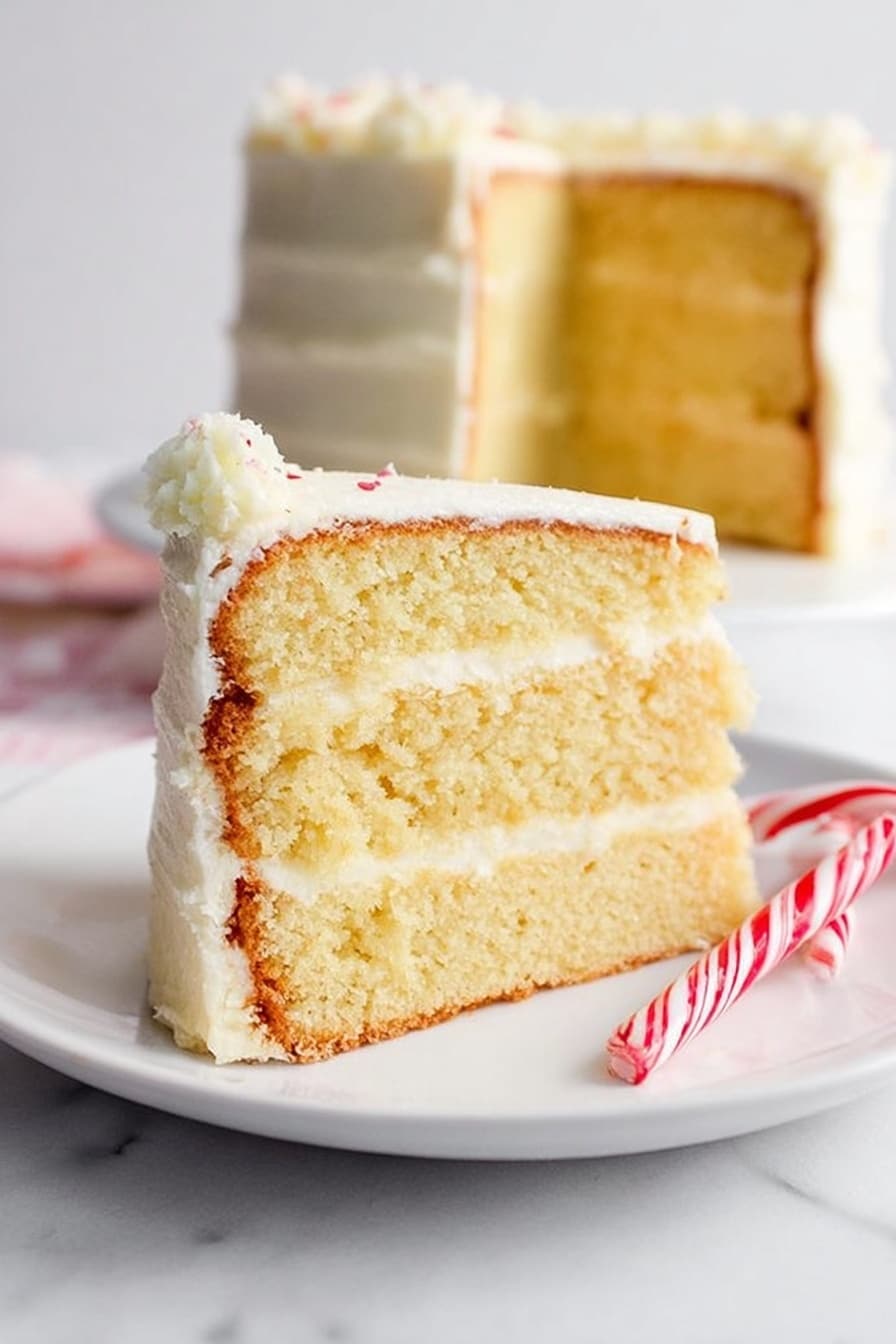
If you’re on the hunt for a festive, show-stopping dessert that combines rich layers and that unmistakable holiday peppermint punch, you’re in for a treat with my Candy Cane Layered Cake Recipe. This cake isn’t just any cake—it’s a celebration in every bite, perfectly layered with dreamy frostings and topped with crunchy candy canes. Whether you’re baking for a holiday party or just craving something special, stick around—I’m sharing all my secrets to making this fan-freaking-tastic cake come to life in your kitchen.
Why You’ll Love This Recipe
- Layered Texture: Multiple delicate layers deliver a light and moist bite every time.
- Festive Peppermint Flavor: The candy cane crushed in the batter and peppermint buttercream make it unmistakably holiday!
- Two Frostings, Twice the Fun: Mint buttercream and cream cheese frostings create a beautiful balance of creamy and tangy.
- Guaranteed Crowd-Pleaser: My family goes crazy for this one, and I bet your guests will too.

Ingredients You’ll Need
The magic truly starts with quality ingredients that play off the candy cane’s minty zing perfectly. I always recommend using full-fat dairy options for the creamiest frosting and fresh candy canes for the best peppermint flavor and crunch.

- Unsalted butter: Use softened butter for a smooth batter and silky frostings.
- Granulated sugar: Standard white sugar works best for sweetness and texture.
- Large eggs: Bring them to room temperature for better mixing.
- Sour cream: Adds moisture and a subtle tang to keep the cake tender.
- Vanilla extract: Enhances the overall flavor profile without overpowering the peppermint.
- Cake flour: Provides the perfect soft crumb for this layered cake.
- Baking powder and baking soda: Both your leavening agents to get that nice rise.
- Salt: Balances sweetness and elevates the other flavors.
- Whole milk: For richness and moisture—don’t swap for a lower fat milk.
- Candy canes (crushed and whole): Freshly crushed candy canes fold into the batter, while whole candy canes make for stunning decoration.
- Icing sugar: The base for smooth and fluffy frostings.
- Peppermint extract: For a concentrated mint kick in the buttercream frosting.
- Heavy cream: Adds creaminess and lightness to the buttercream.
- Cream cheese: Softened, it makes the perfect tangy contrast frosting for the outside.
Variations
I love how versatile this Candy Cane Layered Cake Recipe can be. Over the years, I’ve tweaked it for dietary needs, flavor experiments, and even themed parties. You can really make it your own—and I encourage you to do just that!
- Gluten-Free Version: I once swapped the cake flour for a gluten-free blend, and it turned out just as tender.
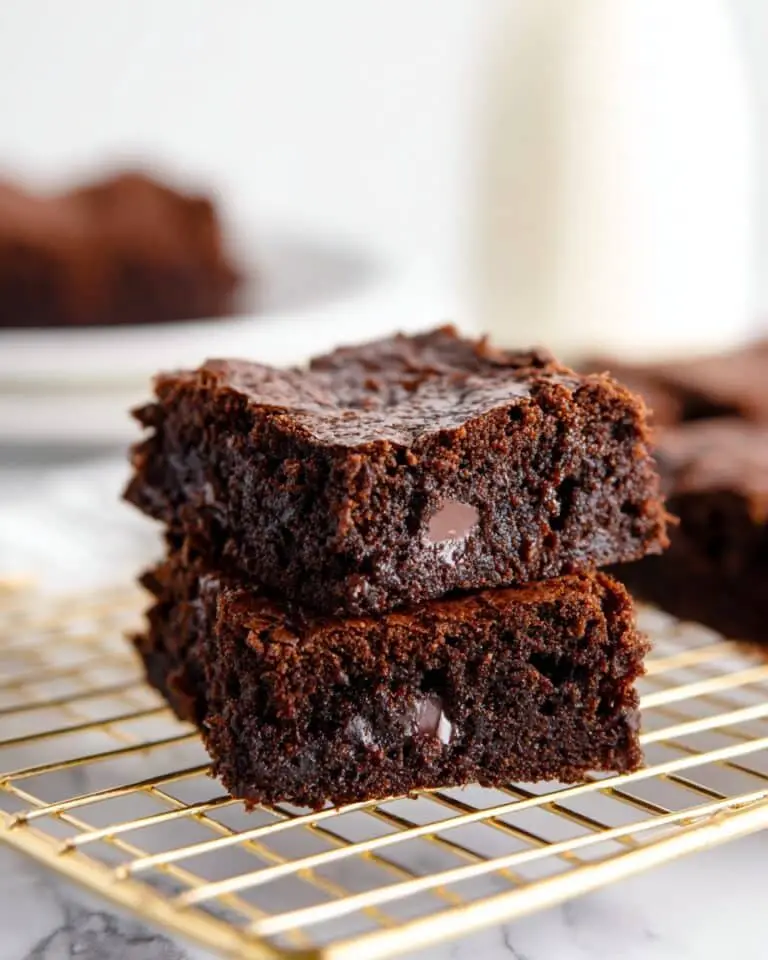
- Chocolate Candy Cane Cake: Adding cocoa powder to the batter makes a delicious chocolate-mint combo that I adore around Christmas.
- Dairy-Free Frosting: Use coconut cream and dairy-free butter alternatives to keep it vegan-friendly without skimping on creaminess.
- Extra Peppermint Crunch: Mix in crushed peppermint candies within the cream cheese frosting for surprising textures.
How to Make Candy Cane Layered Cake Recipe
Step 1: Prepping the Cake Batter
First things first—preheat your oven to 350°F. In a large mixing bowl, cream the softened butter on medium speed with a handheld or stand mixer until it’s smooth and fluffy—about 1-2 minutes. This step is crucial because air whipped into the butter helps give your cake that light texture. Next, gradually add the granulated sugar and continue beating until the mixture becomes pale and fluffy, usually another 1-2 minutes. When I first tried this recipe, I underestimated this step, and the cake was dense, so don’t rush it!
Step 2: Adding Eggs, Sour Cream, and Flavorings
Add the eggs one at a time, mixing well after each addition to keep the batter smooth and even. Incorporate the sour cream and vanilla extract, beating until fully combined. Then, slowly pour in the milk while mixing on low—this prevents the batter from breaking and keeps everything smooth. If you add the milk too quickly, you’ll notice your batter separating, so take it slow here.
Step 3: Incorporating Dry Ingredients and Candy Canes
In a separate bowl, whisk together the cake flour, baking powder, baking soda, and salt. Now, with the mixer on low speed, gradually add the dry ingredients to your wet mix and stop as soon as you see no more flour streaks—overmixing can make the cake tough. Now comes the fun part: fold in the crushed candy canes gently with a spatula. You’ll love how those tiny peppermint shards peek through the batter!
Step 4: Baking and Cooling the Cake Layers
Divide the batter evenly between two 20-inch cake pans (make sure they’re greased and lined with parchment paper). Bake for 25–30 minutes. To test doneness, insert a toothpick into the center—it should come out clean with no wet batter attached. Once baked, allow the cakes to cool completely, then slice each cake horizontally in half. Layering your cake this way adds the height and visual wow-factor I absolutely love.
Step 5: Making the Mint Buttercream Frosting
Beat the softened butter for the buttercream until it’s light and fluffy, about 1-2 minutes. Gradually sift in the icing sugar for a lump-free finish. Stir in the peppermint extract, then slowly drizzle in the heavy cream while beating on medium-high speed until the buttercream is silky and smooth, which usually takes around 3 minutes. This frosting is my secret weapon for that fresh peppermint hit without overwhelming sweetness.
Step 6: Preparing the Cream Cheese Frosting
In another bowl, beat together the cream cheese and butter until perfectly smooth and creamy. Add in the icing sugar and vanilla extract and whip it again until you have a luscious frosting that’s just tangy enough to complement the sweet mint buttercream. I learned this combo balances the flavors beautifully—it’s like a little party on your palate.
Step 7: Assembling Your Candy Cane Layered Cake Recipe
Start by layering the cake rounds with the mint buttercream frosting between each slice—don’t be shy with it! If you have frosting leftover, spread it evenly over the top and sides of the assembled cake. Pop the cake into the fridge for about an hour; this chill time firms up the buttercream so the next frosting layer glides on smoothly. Finish by covering the entire cake with the cream cheese frosting. For the final festive touch, decorate with crushed candy canes sprinkled on top and whole candy canes elegantly placed around. I genuinely love how this looks—it’s almost too pretty to eat (almost!).
Pro Tips for Making Candy Cane Layered Cake Recipe
- Room Temperature Ingredients: Always bring your butter, eggs, and cream cheese to room temp—it’s a game changer for smooth mixing and texture.
- Don’t Overmix: Stop mixing as soon as your dry ingredients are incorporated to keep the cake tender and soft.
- Chill Between Frosting Layers: Refrigerating the cake after the buttercream layer helps keep the frosting neat when you add cream cheese on top.
- Use Fresh Candy Canes: Old candy canes can get chewy or lose their snap—fresh ones make a better crunch and flavor impact.
How to Serve Candy Cane Layered Cake Recipe
Garnishes
I love to keep it simple yet festive by topping the cake with whole candy canes around the edges and a generous sprinkle of crushed candy canes in the center. If I’m feeling fancy, I’ll add some edible silver glitter or small fresh mint leaves for a pop of color and an extra fresh note. These little touches make the presentation irresistibly charming.
Side Dishes
Pair this decadent cake with a warm mug of hot chocolate or a cup of rich coffee to balance the peppermint sweetness. If you’re hosting a brunch or after-dinner spread, add some fresh fruit like oranges or raspberries on the side—they add a nice tart contrast that complements the cake beautifully.
Creative Ways to Present
For holiday gatherings, I’ve arranged individual slices on pretty plates garnished with mini candy canes and a dusting of powdered sugar to mimic snow—it’s a festive touch that always impresses! Another fun idea is to make mini versions of this cake using cupcake pans and then top each with a peppermint candy and a swirl of buttercream. Trust me, these little delights become instant conversation starters.
Make Ahead and Storage
Storing Leftovers
Once fully frosted and decorated, I store any leftover Candy Cane Layered Cake Recipe covered loosely with plastic wrap in the fridge. It keeps beautifully for 3-4 days, and the flavors seem to deepen, which I actually enjoy. Just remember to bring slices to room temperature before serving so the frostings soften and taste their best.
Freezing
If you want to make this ahead of time for a party, I’ve had great success freezing individual layers before frosting. Wrap each layer tightly in plastic wrap and then aluminum foil. When ready to use, thaw in the fridge overnight and frost as usual. You can even freeze the assembled but unfrosted cake layered with buttercream, then add the cream cheese frosting and decorations fresh on the day you serve it.
Reheating
I typically don’t reheat cake because it’s best served fresh or chilled, but if you want to slightly soften a refrigerated slice, leave it out at room temp for about 20-30 minutes. Avoid microwaving, as it can melt the frostings unevenly and make the texture soggy.
FAQs
-
Can I use crushed peppermint candies instead of candy canes?
Yes! Peppermint candies can be a good substitute, but candy canes tend to have a better crunch and balance of sweetness and peppermint flavor. Just be sure to crush them finely to evenly distribute throughout your cake and frosting.
-
How do I prevent the cake from drying out?
Using sour cream in the batter helps keep moisture in the cake. Also, avoid overbaking by checking with a toothpick a few minutes before the suggested bake time ends. Storing the cake covered in the fridge also locks in moisture.
-
Can I make this cake without cream cheese?
Absolutely! You can use just the mint buttercream frosting for all layers and the exterior. The cream cheese frosting adds a lovely tang and firmness but is not mandatory if you prefer a simpler or dairy-free approach.
-
Is this cake suitable for kids?
Definitely—this cake is kid-friendly and perfect for holiday parties. Just make sure younger kids are supervised if you’re decorating with whole candy canes to avoid any choking hazards.
Final Thoughts
This Candy Cane Layered Cake Recipe is one of those special desserts that brings people together. I absolutely love how it fills the kitchen with peppermint-sweet warmth and how the layers create a stunning centerpiece for any occasion. You’ll find that once you bake it, it becomes a holiday staple in your household like it is in mine. So grab those candy canes and get baking—I promise your friends and family will thank you with every delicious bite.
Print
Candy Cane Layered Cake Recipe
- Prep Time: 25 minutes
- Cook Time: 30 minutes
- Total Time: 1 hour 10 minutes
- Yield: 12 servings 1x
- Category: Dessert
- Method: Baking
- Cuisine: American
Description
This Candy Cane Layered Cake combines moist vanilla cake layers with refreshing peppermint buttercream and smooth cream cheese frosting. The crushed and whole candy canes add festive crunch and a burst of minty flavor, perfect for holiday celebrations or any time you crave a delightful seasonal treat.
Ingredients
Cake
- ¾ cup unsalted butter, softened to room temperature
- 1 and ½ cups granulated sugar
- 3 large eggs
- ½ cup sour cream
- 1 teaspoon vanilla extract
- 2 and ½ cups cake flour
- 1 and ½ teaspoons baking powder
- ½ teaspoon baking soda
- ¼ teaspoon salt
- 1 cup whole milk
- ½ cup candy canes, crushed
Decorations
- 12 whole candy canes
Mint Buttercream Frosting
- 1 and ½ cups unsalted butter, at room temperature
- 6 cups icing sugar
- 1 teaspoon peppermint extract
- ⅓ cup heavy cream, at room temperature
Cream Cheese Frosting
- 12 oz. cream cheese, softened to room temperature
- 4 and ½ cups icing sugar
- 1 and ½ teaspoons vanilla extract
Instructions
- Preheat Oven: Preheat your oven to 350°F (177°C) to prepare for baking the cake layers.
- Make Cake Batter: In a large bowl, cream ¾ cup unsalted butter using a mixer until smooth and fluffy (about 1-2 minutes). Add 1 and ½ cups granulated sugar and beat until light and fluffy, another 1-2 minutes. Add 3 large eggs one at a time, beating after each addition for 2 minutes until combined. Mix in ½ cup sour cream and 1 teaspoon vanilla extract until fully combined. Slowly pour in 1 cup whole milk and mix until just combined.
- Add Dry Ingredients: Sift together 2 and ½ cups cake flour, 1 and ½ teaspoons baking powder, ½ teaspoon baking soda, and ¼ teaspoon salt. Gradually add these dry ingredients to the wet ingredients and beat on low speed until just combined. Avoid overmixing to keep the cake tender.
- Prepare Cake Pans and Bake: Evenly pour the batter into two 20-inch cake pans. Place them in the preheated oven and bake for 25 to 30 minutes, or until a toothpick inserted in the center comes out clean.
- Cool and Slice Layers: Allow the cakes to cool completely. Once cooled, cut each cake horizontally into half to create four thin layers.
- Prepare Mint Buttercream Frosting: Cream 1 and ½ cups unsalted butter with a hand mixer until light and fluffy, about 1-2 minutes. Gradually add 6 cups icing sugar until fully incorporated. Mix in 1 teaspoon peppermint extract. Slowly add ⅓ cup heavy cream and beat until smooth and creamy, about 3 minutes.
- Prepare Cream Cheese Frosting: Beat 12 oz. softened cream cheese with 1 and ½ cups unsalted butter until smooth and creamy using a hand mixer. Add 4 and ½ cups icing sugar and 1 and ½ teaspoons vanilla extract. Beat until smooth and creamy, about 2 minutes.
- Assemble Cake: Layer the cake starting with one cake layer, then spread a generous layer of mint buttercream frosting. Repeat until all layers are stacked. If there is leftover buttercream, spread it evenly on the top and sides of the cake. Refrigerate the assembled cake for one hour to set.
- Final Frosting and Decoration: Cover the chilled cake with the cream cheese frosting for a smooth finish. Decorate the cake by pressing crushed candy canes onto the sides and placing whole candy canes on top as garnish.
Notes
- Ensure the cake is completely cool before slicing and frosting to avoid melting the frosting.
- Sifting the dry ingredients helps keep the cake light and fluffy.
- Use room temperature ingredients for smoother batter and frostings.
- For an extra minty flavor, gently fold crushed candy canes into the cake batter before baking.
- Chill the cake after assembling the layers to make frosting easier.
- Store leftovers covered in the refrigerator for up to 3-4 days.
Nutrition
- Serving Size: 1 slice (approximately 1/12 of cake)
- Calories: 430
- Sugar: 42g
- Sodium: 210mg
- Fat: 24g
- Saturated Fat: 14g
- Unsaturated Fat: 8g
- Trans Fat: 0.5g
- Carbohydrates: 52g
- Fiber: 0.5g
- Protein: 4g
- Cholesterol: 95mg


