
Crispy on the outside, juicy on the inside – these Air Fryer Chicken Thighs are going to revolutionize your weeknight dinner game! With just a handful of pantry spices and about 30 minutes of cooking time, you’ll have incredibly flavorful chicken that tastes like you spent hours in the kitchen. The air fryer works its magic to create that perfect golden skin while keeping all the juicy goodness locked inside.
Why You’ll Love This Recipe
- Irresistibly Crispy Skin: The air fryer creates that restaurant-quality crispy skin that’s nearly impossible to achieve in a regular oven without drying out the meat.
- Juicy, Tender Meat: The quick cooking method seals in all the natural juices, resulting in chicken thighs that are incredibly moist and tender.
- Minimal Cleanup: Forget about oil splatters all over your stovetop! The air fryer contains the mess and makes cleanup a breeze.
- Budget-Friendly: Chicken thighs are typically less expensive than chicken breasts but pack so much more flavor – your wallet and taste buds will thank you.
- Versatile: This recipe works as a standalone star or pairs beautifully with countless side dishes for a complete meal.
Ingredients You’ll Need
- Chicken thighs: Use bone-in, skin-on thighs for maximum flavor and that perfect crispy exterior. The bones help retain moisture and add flavor, while the skin crisps up beautifully.
- Lemon: Adds brightness and helps tenderize the meat. The acidity balances the richness of the thighs perfectly.
- Paprika: Brings a subtle smokiness and gorgeous color to your chicken. Regular, smoked, or hot paprika all work well depending on your preference.
- Garlic powder: Provides that essential savory note without the risk of fresh garlic burning in the air fryer.
- Dried parsley: Adds a touch of color and mild herbal flavor that complements chicken beautifully.
- Dried oregano: Contributes an earthy, slightly peppery flavor that’s a classic pairing with chicken.
- Salt: Enhances all the other flavors and helps create that crispy exterior.
- Black pepper: Adds that necessary bit of heat and depth to the seasoning blend.
Note: You’ll find the complete list of ingredients, along with their exact measurements, in the printable recipe card at the bottom of this post.
Variations
Want to mix things up? Here are some delicious variations to try:
- Lemon Herb: Double the lemon juice and add 1 teaspoon of dried thyme for a bright, herb-forward flavor profile.
- Spicy Cajun: Replace the seasoning mix with 2 teaspoons of cajun seasoning for a kick of heat.
- Honey Garlic: Brush the cooked chicken with a mixture of 2 tablespoons honey, 1 tablespoon soy sauce, and 1 teaspoon minced garlic during the last 5 minutes of cooking.
- BBQ Style: Apply your favorite barbecue rub before cooking, then brush with BBQ sauce during the last 2-3 minutes.
- Mediterranean: Add 1 teaspoon each of dried rosemary and thyme to the seasoning mix, and finish with a sprinkle of crumbled feta cheese after cooking.
How to Make Air Fryer Chicken Thighs
Step 1: Prep the Chicken
Pat the chicken thighs dry with paper towels. This crucial step ensures crispy skin! Then drizzle the lemon juice over all sides of the chicken thighs.
Step 2: Season Generously
In a small bowl, combine the paprika, garlic powder, dried parsley, dried oregano, salt, and black pepper. Mix well, then sprinkle the seasoning liberally over both sides of the chicken thighs, making sure to get some under the skin for maximum flavor.
Step 3: Preheat the Air Fryer
Preheat your air fryer to 400°F for 5-10 minutes. Preheating is key for getting that initial sear that locks in juices.
Step 4: Cook Skin-Side Down
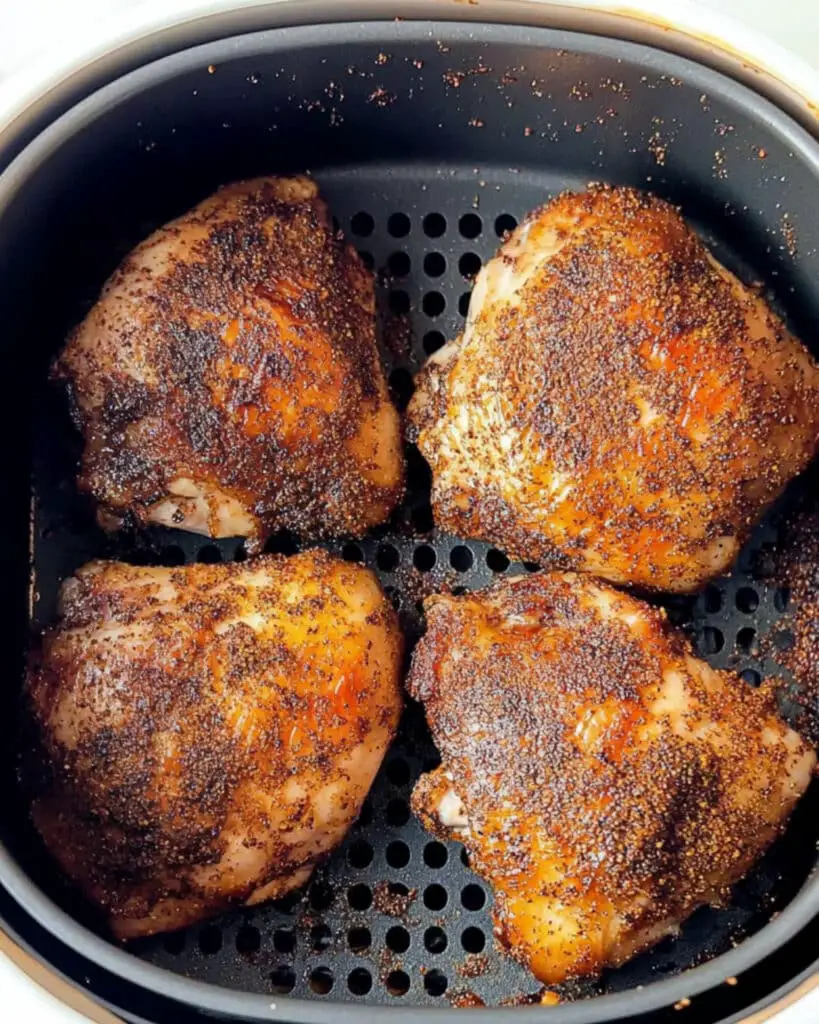
Place the seasoned chicken thighs in the air fryer basket skin-side down, making sure they’re in a single layer with a bit of space between each piece. Cook for 12 minutes.
Step 5: Flip and Finish
Carefully flip the chicken thighs using tongs and continue cooking for another 12-15 minutes until the internal temperature reaches 165°F and the skin is gloriously crispy.
Step 6: Rest Before Serving
Transfer the chicken thighs to a serving platter and let them rest for 5 minutes. This allows the juices to redistribute throughout the meat, ensuring every bite is succulent.
Pro Tips for Making the Recipe
- Dry the skin thoroughly: The drier the skin before cooking, the crispier it will get. Take an extra minute with those paper towels!
- Don’t crowd the basket: Air circulation is essential for even cooking, so cook in batches if needed.
- Season under the skin: Gently lift the skin and add some of your seasoning directly to the meat for flavor that goes beyond the surface.
- Flip gently: Use tongs rather than a fork to flip the chicken to avoid piercing the meat and letting those precious juices escape.
- Check temperature at the thickest part: For accurate readings, insert your meat thermometer into the thickest part of the thigh without touching the bone.
- Customize your cook time: Air fryers can vary in power, so you might need to adjust cooking times slightly. Start checking for doneness a few minutes earlier your first time.
How to Serve

These air fryer chicken thighs are versatile enough to pair with countless sides:
Perfect Pairings:
- Serve with a simple green salad and roasted potatoes for a classic dinner
- Pair with steamed vegetables and rice for a lighter option
- Serve alongside creamy mashed potatoes and green beans for ultimate comfort food
- Create a delicious grain bowl by placing sliced chicken over quinoa with roasted vegetables
Sauce Options:
Add an extra dimension of flavor with a drizzle of sauce just before serving:
- Garlic aioli
- Honey mustard
- Chimichurri
- Lemon-herb butter
Make Ahead and Storage
Storing Leftovers
Let chicken cool completely, then store in an airtight container in the refrigerator for up to 4 days. The skin won’t stay as crispy when stored, but the flavor will still be delicious.
Freezing
These chicken thighs freeze beautifully! Place cooled chicken in a freezer-safe container or wrap well in aluminum foil, then place in a freezer bag. Freeze for up to 3 months.
Reheating
For the best texture when reheating, place thawed chicken thighs back in the air fryer at 350°F for 5-7 minutes until heated through. This helps re-crisp the skin. Alternatively, reheat in a 350°F oven for 10-15 minutes. Microwave reheating works in a pinch but will result in softer skin.
FAQs
-
Can I use boneless, skinless chicken thighs instead?
Absolutely! Boneless, skinless thighs will cook faster, so reduce the cooking time to about 10-12 minutes total. You won’t get that crispy skin, but they’ll still be delicious. Check the internal temperature to ensure they reach 165°F.
-
My air fryer is small. Can I stack the chicken thighs?
For best results, avoid stacking. If you need to cook more than will fit in a single layer, it’s better to cook in batches. Stacking prevents proper air circulation, which is what creates that wonderful crispy exterior.
-
How do I know when the chicken thighs are done without a meat thermometer?
While a meat thermometer is the most reliable method, you can also check by cutting into the thickest part of a thigh. The meat should be opaque with no pink remaining, and the juices should run clear. However, investing in an inexpensive meat thermometer is highly recommended for perfect results every time.
-
Can I make this recipe with a different seasoning blend?
Definitely! Chicken thighs are incredibly versatile. Try Italian seasoning, Cajun seasoning, taco seasoning, or simply salt and pepper. The basic cooking method remains the same regardless of which seasonings you choose.
Final Thoughts
These Air Fryer Chicken Thighs are a game-changer for busy weeknights when you want something delicious without a ton of effort. The combination of crispy, seasoned skin and juicy, tender meat is unbeatable, and the simple preparation makes this recipe one you’ll return to again and again. Whether you’re an air fryer veteran or just getting started with this amazing appliance, this recipe is sure to become a regular in your dinner rotation. Give it a try tonight – your taste buds will thank you!
Print
Air Fryer Chicken Thighs Recipe
- Prep Time: 5 minutes
- Cook Time: 30 minutes
- Total Time: 40 minutes
- Yield: 4 servings 1x
- Category: Main-course
- Method: Air Frying
- Cuisine: American
Description
A quick and flavorful recipe for juicy and crispy Air Fryer Chicken Thighs. Marinated with zesty lemon juice and seasoned to perfection with a blend of spices, these chicken thighs are cooked to golden-brown deliciousness. Perfect for busy weeknights, this is the ultimate go-to recipe for a quick and satisfying main course. The air fryer makes the process easy and ensures crispy skin without the need for extra oil.
Ingredients
Chicken
- 4 chicken thighs (skin-on, bone-in)
- 1 lemon, juiced
Seasoning
- 1 tsp paprika
- 1 tsp garlic powder
- 1 tsp dried parsley
- 1/2 tsp dried oregano
- 1/2 tsp salt
- 1/2 tsp black pepper
Instructions
- Prepare the Chicken
Drizzle the lemon juice over the chicken thighs to add a zesty flavor and help the seasoning stick. Pat the chicken thighs dry with a paper towel to ensure the skin becomes crispy during cooking. - Mix the Seasoning
In a small bowl, mix together the paprika, garlic powder, dried parsley, oregano, salt, and black pepper. This combination of spices will create a flavorful coating for the chicken. - Season the Chicken
Sprinkle the seasoning mixture evenly over both sides of the chicken thighs, ensuring every piece is fully coated for maximum flavor. - Preheat the Air Fryer
Preheat your air fryer to 400 degrees F for 5 to 10 minutes to ensure even cooking. This step is crucial for achieving a crispy outer layer. - Cook the Chicken (Skin-Side Down)
Place the chicken thighs in a single layer in the air fryer basket, skin-side down. Cook at 400 degrees F for 12 minutes. Avoid overcrowding the basket to ensure even cooking. - Flip and Continue Cooking
Carefully flip the chicken thighs using tongs and cook for an additional 12 to 15 minutes. Check that the internal temperature has reached 165 degrees F using an instant-read thermometer. - Rest and Serve
Remove the chicken thighs from the air fryer and place them on a serving platter. Let them rest for 5 minutes to ensure the juices are evenly distributed. Serve the chicken thighs hot and enjoy!
Notes
- Use a meat thermometer to check the internal temperature of the chicken thighs, ensuring it reaches a minimum of 165 degrees F for food safety.
- Patting the chicken dry before adding lemon juice helps the skin achieve extra crispiness in the air fryer.
- Experiment with different seasoning blends for variety—Mexican spice blends for a bold flavor or Mediterranean herbs for a light, aromatic profile.
- For the crispiest results, flip the chicken thighs halfway through cooking.
- Avoid overcrowding the air fryer basket. If necessary, cook the chicken thighs in batches.
- For even juicier chicken, marinate the thighs for a few hours in your favorite chicken marinade before air frying.
Nutrition
- Serving Size: 1 chicken thigh
- Calories: 250kcal
- Sugar: 1g
- Sodium: 400mg
- Fat: 16g
- Saturated Fat: 4g
- Unsaturated Fat: 12g
- Trans Fat: 0g
- Carbohydrates: 2g
- Fiber: 1g
- Protein: 21g
- Cholesterol: 100mg


