
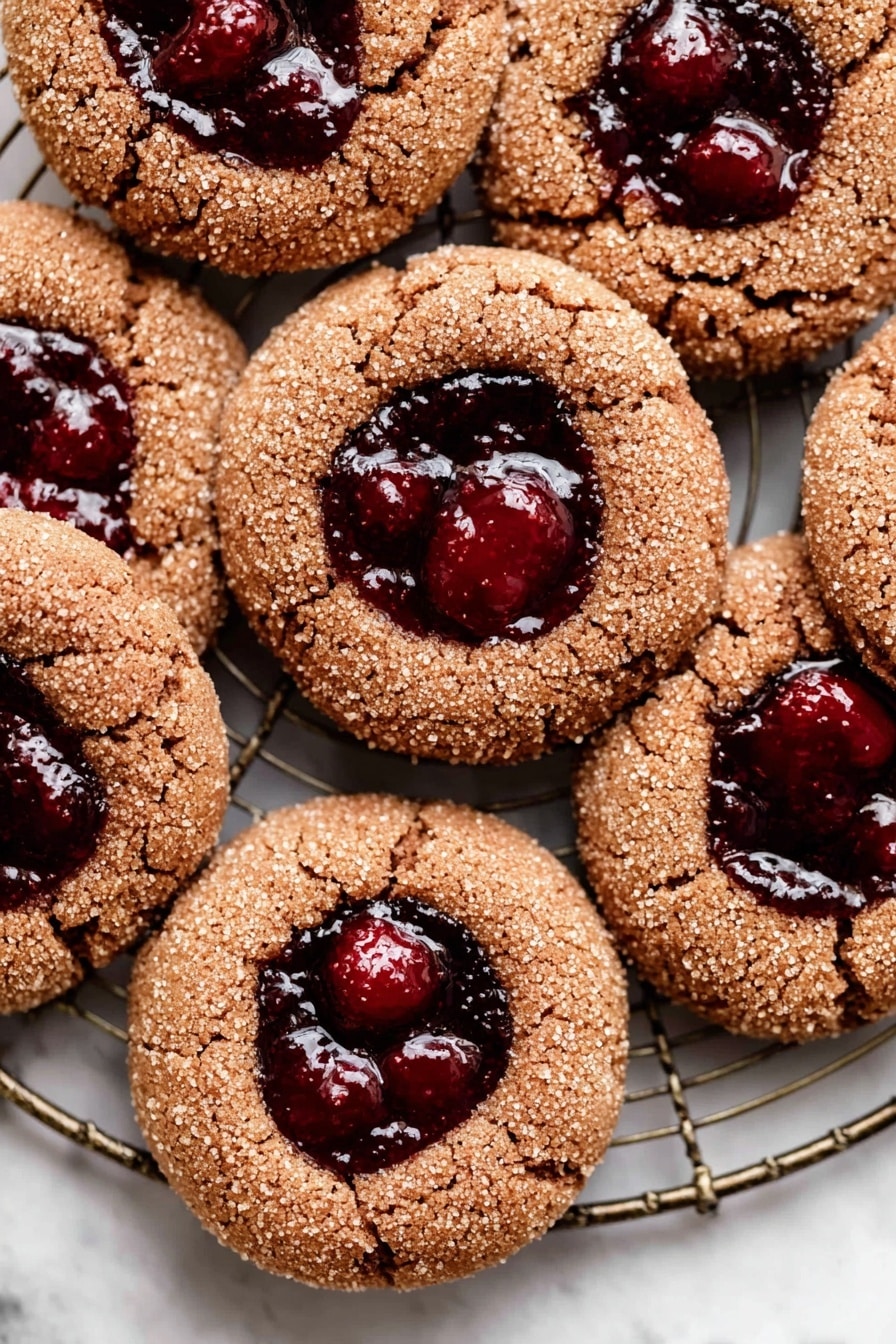
If you’re anything like me and adore the sweet and tart combo of cherries with rich chocolate, then this Chocolate Cherry Cookies Recipe is going to become your new obsession. I absolutely love how these cookies bake up soft and fudgy with a gooey cherry center that’s just pure magic. Trust me, once you try these, you’ll want to bake them again and again—perfect for cozy nights, gifting, or just anytime you want a special homemade treat.
Why You’ll Love This Recipe
- Perfect Flavor Balance: The natural tartness of cherries pairs beautifully with deep, chocolatey cookies for a flavor combo that’s hard to beat.
- Soft, Chewy Texture: These cookies stay tender and don’t dry out—exactly how I love my treats, and I’m sure you will too.
- Made From Scratch Cherry Filling: The homemade cherry pie filling makes all the difference, adding freshness and richness.
- Simple Ingredients & Steps: Even if you aren’t a baking pro, this straightforward recipe will guide you every step of the way.
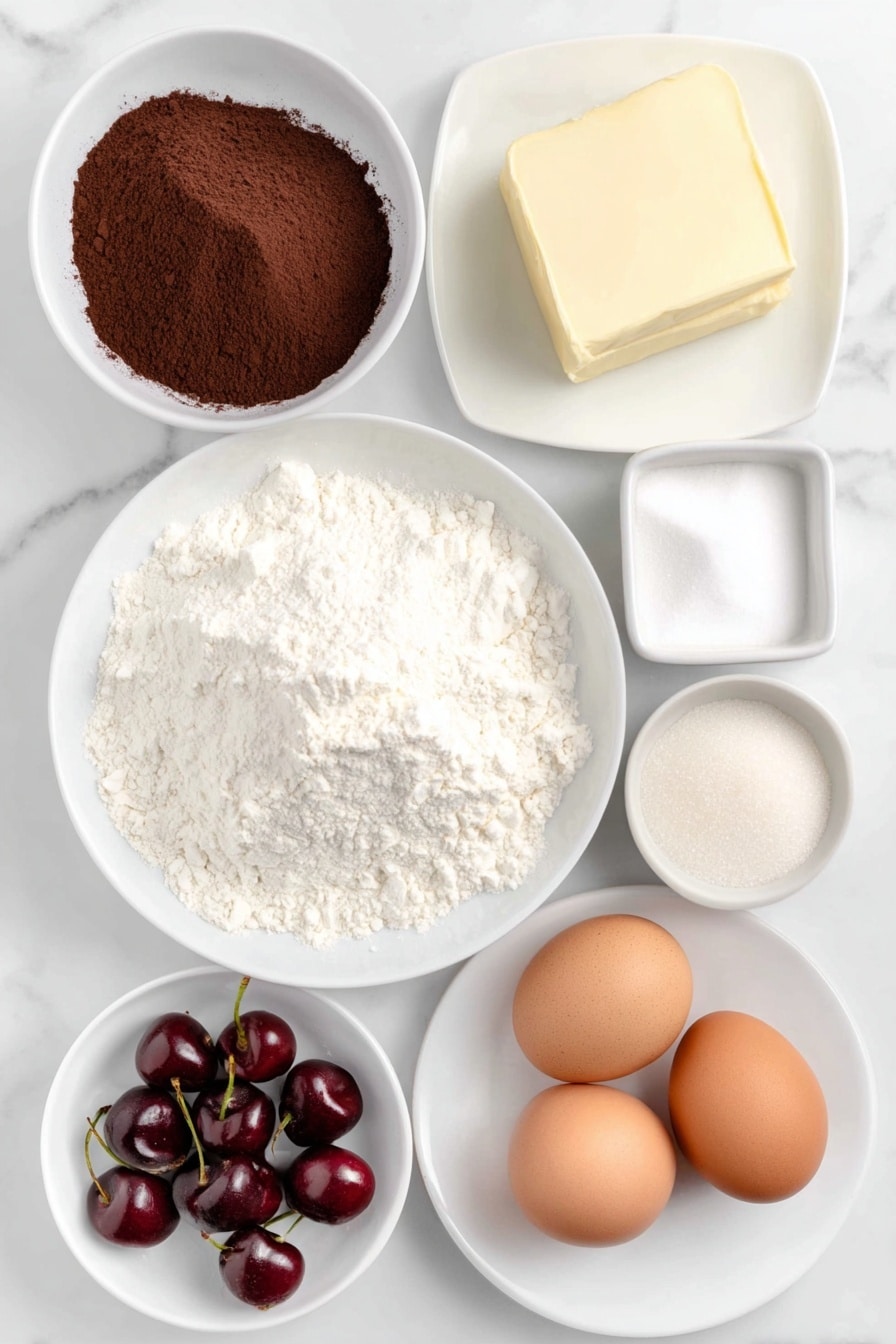
Ingredients You’ll Need
All the ingredients here come together for a perfect balance of chocolate and cherry flavor. You’ll want to use good-quality cocoa powder and ripe cherries (fresh or frozen both work!). I always recommend pitting cherries first because no one wants a hard bite in these delicious cookies.
- All-purpose flour: Spoon and level your flour for the best texture, or weigh it to avoid dry, crumbly cookies.
- Unsweetened cocoa powder: Choose a rich cocoa for deep color and flavor.
- Baking powder and baking soda: These leavening agents work together to give the perfect rise without puffing up too much.
- Salt: Just a pinch to enhance the flavors.
- Unsalted butter: Melt it and cool it to room temperature to mix smoothly with sugars.
- Brown sugar: Adds moisture and a subtle caramel flavor.
- Granulated sugar: Helps with sweetness and a slight crunch when rolling the cookies.
- Pure vanilla extract: Always boosts the flavor.
- Large eggs: Use room temperature eggs for even mixing and better texture.
- Cane sugar or granulated sugar for rolling: Gives the cookie edges a lovely sparkle and crunch.
- Cherries (fresh or frozen): Pitted! Fresh will give you a brighter flavor; frozen is great and super convenient.
- Cornstarch and water: To thicken your cherry pie filling into a luscious jam-like topping.
Variations
I love that this Chocolate Cherry Cookies Recipe can be easily tweaked to suit different tastes or dietary needs. Don’t hesitate to make it your own—trust me, you’ll enjoy experimenting!
- Variation: Swap cherries for raspberries or blueberry filling if you want a different fruity twist—I’ve tried this for a summer picnic and it was a hit!
- Variation: Use coconut oil instead of butter for a dairy-free cookie, just be sure to chill the dough a little longer before baking.
- Variation: Add chopped nuts like pecans or walnuts for an added crunch and flavor boost; my family goes crazy for this version during the holidays.
How to Make Chocolate Cherry Cookies Recipe
Step 1: Make the Cherry Filling First
Start by pitting a pound of fresh or frozen cherries. In a medium saucepan over medium heat, combine cherries, sugar, cornstarch, and water. Cook while stirring occasionally until the cherries soften and the mixture thickens into a jammy sauce—this is the heart of your cookie. Mashing a few cherries with a wooden spoon adds a nice texture, so don’t be shy! Once thickened, set the filling aside to cool completely while you prep the cookies. I learned this timing trick makes a big difference in keeping the filling from melting too much once baked on top.
Step 2: Whisk the Wet Ingredients
Next up, melt the butter and make sure it’s completely cooled to room temperature—this step is key or you risk scrambling the eggs. In a large bowl, whisk together the butter, brown sugar, granulated sugar, vanilla, and eggs until smooth and combined. I remember the first time I overlooked cooling the butter and ended up with a lumpy mess, so trust me on this!
Step 3: Blend the Dry Ingredients
Sift flour, cocoa powder, baking powder, baking soda, and salt into a bowl. This keeps everything light and lump-free. Then, add the dry mix gently to the wet ingredients and fold with a spatula until just combined. Overmixing can toughen cookies, so be gentle here—you want it just combined.
Step 4: Scoop, Roll, and Press the Cookies
Preheat your oven to 350°F and line two baking sheets with parchment. Using a large cookie scoop (around 3 TBSP), scoop dough balls. Roll each ball in cane sugar or regular granulated sugar for a sparkly, slightly crisp edge. Arrange six dough balls per sheet and then press a 1/8 cup measuring cup or the back of a spice jar into the center of each ball, creating a well for the filling. Trust me, this little trick ensures your cherry filling sits perfectly on top without running over during baking.
Step 5: Bake and Cool
Bake one sheet at a time for 13-15 minutes. Once out of the oven, press the measuring cup back into the cookie centers to deepen the well if needed, then let them rest on the hot pan for 5 minutes. This softens them just right before you transfer the cookies to a cooling rack. Patience here means softer cookies with perfect shape.
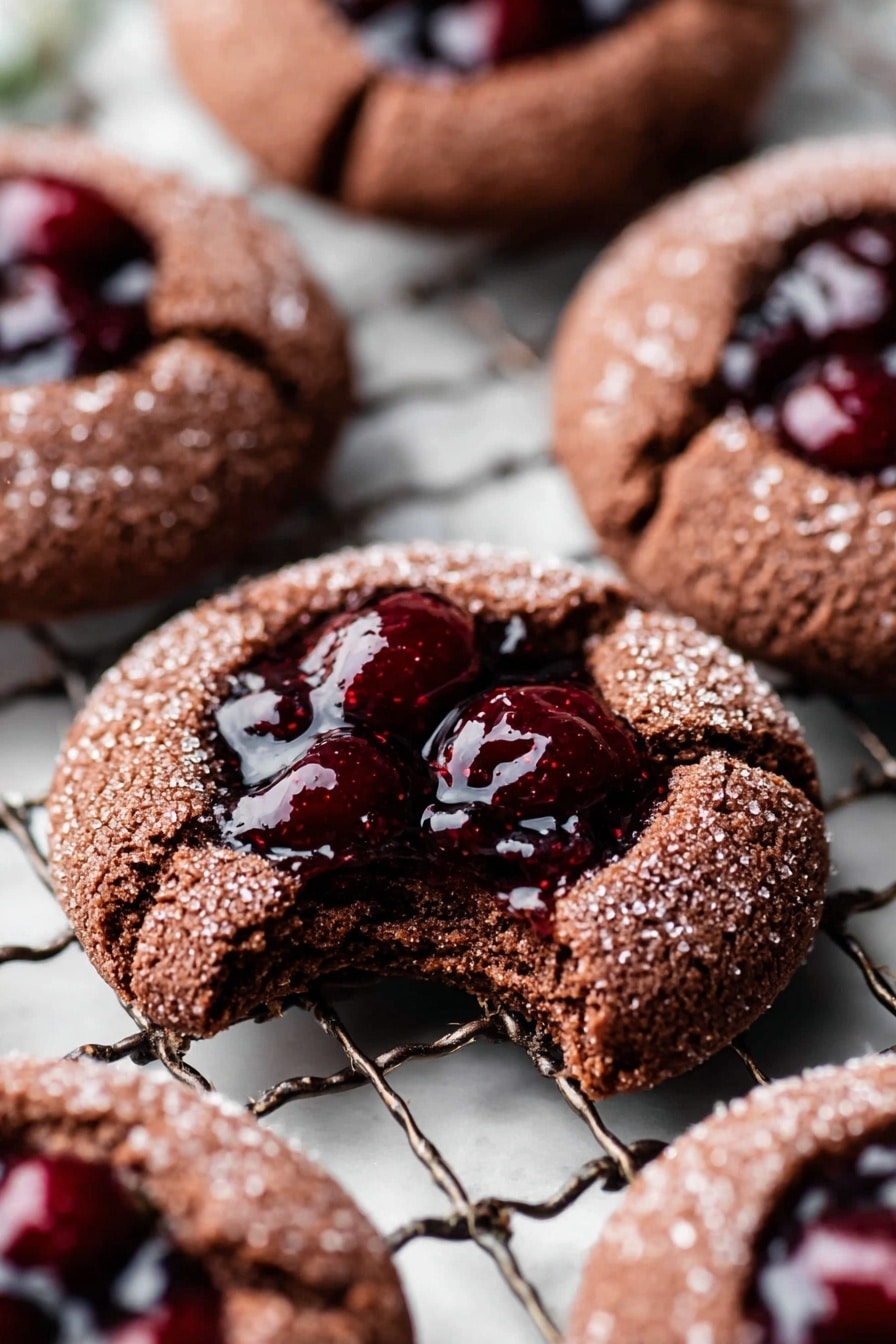
Step 6: Add the Cherry Filling and Serve
Once completely cool, spoon about 1/8 cup of the cherry filling into each cookie’s center. The fruity, chocolatey combo right at your fingertips is everything I hoped for when I first tried this recipe. Now comes the hardest part—waiting for your friends or family to try them (or sneak one yourself!).
Pro Tips for Making Chocolate Cherry Cookies Recipe
- Chill Your Butter: Always make sure melted butter is cooled before mixing with eggs to prevent curdling or an uneven batter.
- Don’t Skip the Sugar Roll: Rolling dough balls in sugar before baking adds a beautiful crunch and stops spreading too much.
- Use a Measuring Cup to Form Wells: Pressing a 1/8 cup measure into the cookie dough before baking creates the ideal space for your cherry filling.
- Let Cookies Cool Completely: Adding the cherry filling too early can cause it to melt or run off, so patience here pays off big time.
How to Serve Chocolate Cherry Cookies Recipe
Garnishes
I love to sprinkle a tiny pinch of powdered sugar over the top just before serving—it adds a lovely visual contrast and a touch more sweetness without overpowering the cherries. Sometimes, I toss a few fresh mint leaves on the side for a fresh aroma that pairs beautifully.
Side Dishes
These cookies are decadent enough to enjoy on their own, but if I’m serving them at a party, I like to pair them with a rich vanilla bean ice cream or even a cup of dark roast coffee to balance the sweet-tart notes.
Creative Ways to Present
For special occasions, I love arranging these Chocolate Cherry Cookies on a rustic wooden board with fresh cherries scattered around and a few sprigs of rosemary or thyme for a festive look. You can also stack them in cupcake liners for a charming gift presentation.
Make Ahead and Storage
Storing Leftovers
I store leftover cookies in an airtight container at room temperature for up to 3 days. Make sure they’re completely cool before storing to keep the cherry filling from making the cookies soggy.
Freezing
I’ve frozen the cookie dough balls before baking with great success—just scoop, roll in sugar, press the wells, and freeze them flat on a tray before transferring to a freezer bag. When ready to bake, just pop them in the oven straight from the freezer, adding a couple extra minutes to the bake time.
Reheating
To warm up refrigerated or leftover cookies, I pop them in the oven at 300°F for 5-7 minutes. This refreshes the cookie, softens the edges, and slightly warms the cherry filling—like they just came out of the oven all over again.
FAQs
-
Can I use frozen cherries for the cherry pie filling?
Absolutely! Frozen cherries work wonderfully and are usually more convenient when fresh aren’t in season. Just allow a little extra time for the filling to thicken since frozen cherries release more liquid.
-
What if I don’t have a 1/8 cup measuring cup to press the cookie wells?
No worries. You can use the back of a small drinking glass or a spice jar lid that’s about the same size. The idea is just to create a well that holds the cherry filling without flattening the cookie completely.
-
Can I make this recipe dairy-free?
Yes! Swap the butter out for solid coconut oil or a dairy-free butter substitute, and be sure to chill the dough a bit longer to get the right texture.
-
How do I avoid my cookies spreading too much in the oven?
Rolling the cookie dough balls in sugar before baking helps, as does chilling your dough if your kitchen is very warm. Also, make sure you measure your flour properly to avoid having too little dry ingredients.
-
Can I double this Chocolate Cherry Cookies Recipe?
Yes, you can easily double the ingredients but make sure to bake cookies one sheet at a time so they cook evenly. Also, keep an eye on the cherry filling and prepare extra if needed—it’s the best part!
Final Thoughts
This Chocolate Cherry Cookies Recipe holds a special place in my heart because it’s one of those treats that looks simple but tastes gourmet. I remember baking these for a family gathering and watching everyone’s faces light up with that first gooey, chocolate-cherry bite. You’ll enjoy the process and the result, no matter your baking skill level. Go ahead, give it a try—I promise it’ll be worth every bite.
Print
Chocolate Cherry Cookies Recipe
- Prep Time: 30 minutes
- Cook Time: 13 minutes
- Total Time: 43 minutes
- Yield: 12 cookies 1x
- Category: Dessert
- Method: Baking
- Cuisine: American
Description
Delight in these rich, chocolate cherry cookies featuring a tender cocoa dough and a luscious cherry pie filling at their center. Perfect for chocolate lovers who appreciate a burst of fruity sweetness, these cookies combine a classic cookie base with a homemade cherry topping baked to perfection.
Ingredients
Chocolate Cookies:
- 2 2/3 cups All-purpose flour
- 1/2 cup Unsweetened cocoa powder
- 1/2 tsp Baking powder
- 1/2 tsp Baking soda
- 1 tsp Salt
- 1 cup Unsalted butter, melted and cooled
- 1 cup Brown sugar, packed light or dark
- 1/2 cup White granulated sugar
- 1 tsp Pure vanilla extract
- 2 Large eggs, room temperature
- Cane sugar or regular white granulated sugar for rolling the cookies
Cherry Pie Filling:
- 1 lb Cherries, fresh or frozen, pitted
- 1/2 cup White granulated sugar
- 1 TBSP Cornstarch
- 1 TBSP Water
Instructions
- Prepare Cherry Filling: In a medium saucepan over medium heat, combine the pitted cherries, 1/2 cup white granulated sugar, cornstarch, and water. Stir gently as the cherries break down and soften, allowing the sauce to thicken slightly. Mash a few cherries with a wooden spoon. Remove from heat and let it cool completely.
- Sift Dry Ingredients: In a medium bowl, sift together the all-purpose flour, unsweetened cocoa powder, baking powder, baking soda, and salt. Set aside.
- Mix Wet Ingredients: In a large bowl, whisk melted and cooled unsalted butter with brown sugar, white granulated sugar, pure vanilla extract, and room-temperature eggs until fully combined.
- Combine Dough: Gradually add the dry ingredients to the wet mixtures, folding gently with a rubber spatula until just combined, careful not to overmix.
- Preheat Oven and Prepare Pans: Preheat the oven to 350°F (175°C). Line two cookie sheets with parchment paper. Let the dough rest while the oven heats.
- Scoop and Roll Cookies: Using a large (3 tbsp) cookie scoop, portion dough balls. Roll each ball in cane sugar or white granulated sugar to coat evenly.
- Shape and Create Indentations: Place six dough balls on each cookie sheet. Using a 1/8 cup measuring cup or the back of a spice jar, press a hole gently into each cookie, creating a well for the filling.
- Bake Cookies: Bake the cookies one sheet at a time for 13-15 minutes until edges are set but centers remain soft.
- Refine Indentations and Cool: Immediately after baking, press the 1/8 cup gently into each cookie indentation again to reform the wells. Let the cookies rest on hot pans for 5 minutes before transferring to a cooling rack to cool completely.
- Add Cherry Filling: Once cooled, scoop approximately 1/8 cup of the cooled cherry filling onto each cookie’s center indentation.
Notes
- Flour measurement: Spoon and level the flour or use a kitchen scale to prevent compacted flour which can lead to dry, dense cookies.
- High altitude baking: Increase flour by 2 tablespoons to adjust for elevation.
- Use room temperature dairy and eggs for better mixing and texture; remove from fridge at least 2 hours before baking.
Nutrition
- Serving Size: 1 cookie
- Calories: 210
- Sugar: 18g
- Sodium: 150mg
- Fat: 9g
- Saturated Fat: 5g
- Unsaturated Fat: 3g
- Trans Fat: 0g
- Carbohydrates: 29g
- Fiber: 3g
- Protein: 3g
- Cholesterol: 45mg


