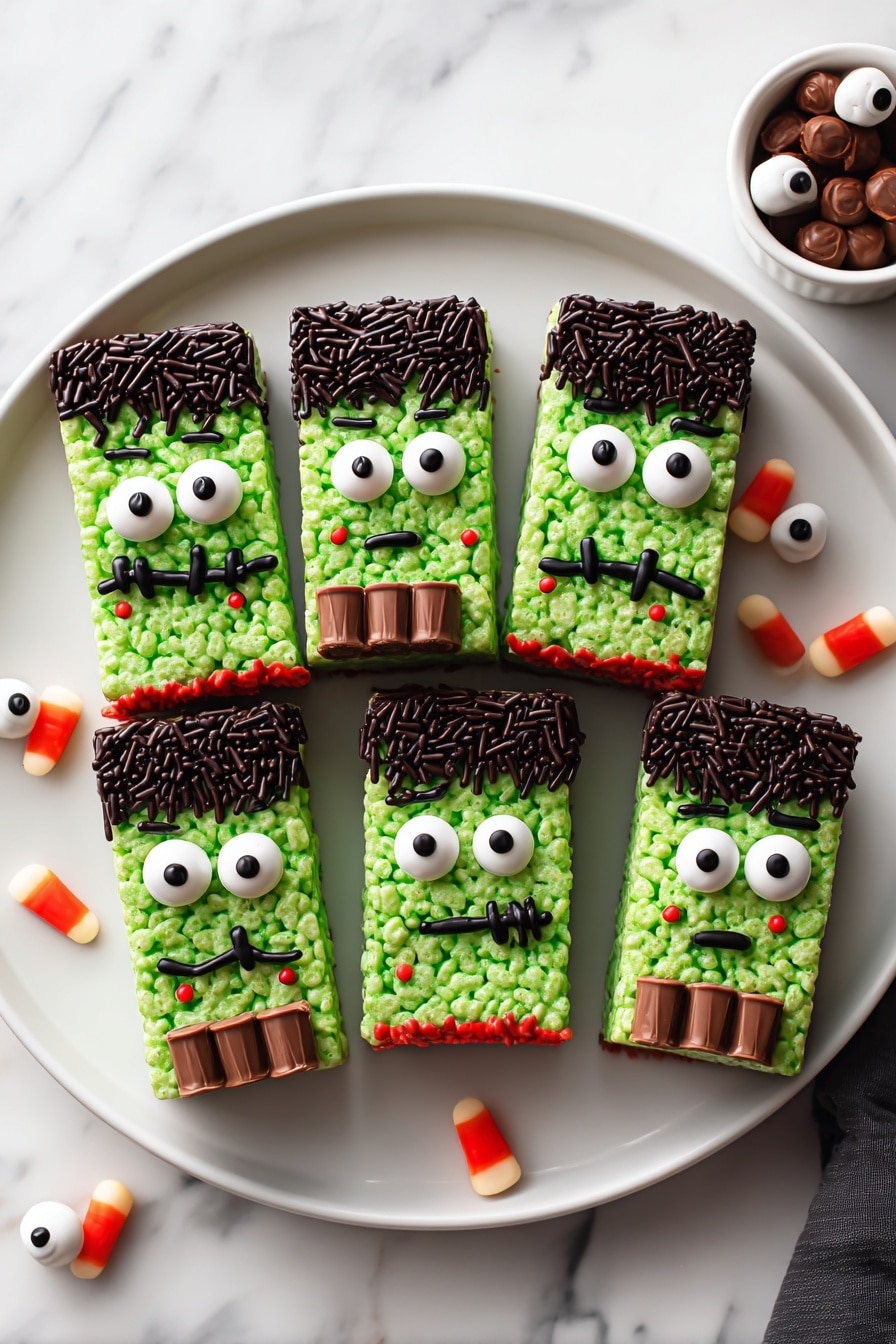
If you’re looking for a fun and spooky treat to whip up for the season, you’re going to adore this Halloween Rice Krispies Treats Recipe. It’s one of those recipes that’s super quick, kid-friendly, and absolutely irresistible. I love this because it combines everything we already adore about classic Rice Krispies treats—gooey, sweet, and crunchy—but with a playful Halloween twist that makes it perfect for parties or just a festive snack. Stick around, and I’ll walk you through how to make these creepy-cute green monsters come to life!
Why You’ll Love This Recipe
- Quick & Easy: You can pull these treats together in under an hour—even with the festive decorations!
- Perfect for All Ages: Kids love helping dip and decorate, and adults can’t resist sneaking a bite.
- Customizable Fun: The green color and goofy faces give you room to get creative with eyes and “stitches.”
- Classic Comfort with a Twist: It’s the childhood favorite you grew up with, but dressed up for Halloween spookiness.
Ingredients You’ll Need
The ingredients here are simple but purpose-driven to give you great texture and that iconic green-hued marshmallow base. When I first tried adding green food coloring, I was surprised at how vibrant the treats looked, which totally upped the Halloween vibes.
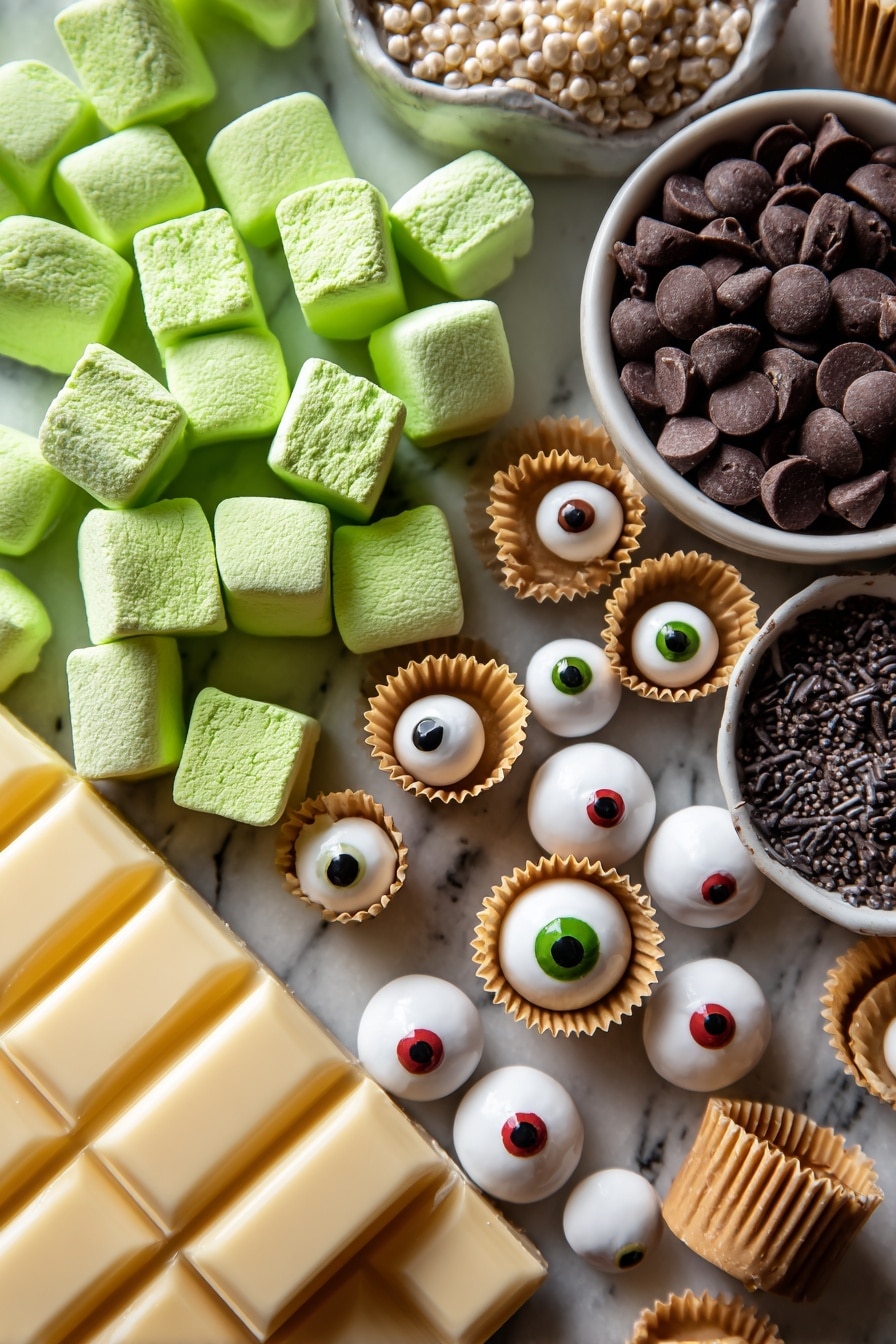
- Nonstick baking spray: Prevents the treats from sticking to your pan so they’ll come out perfectly shaped every time.
- Unsalted butter: Melts evenly to create that luscious marshmallow base—don’t skip this little, buttery magic!
- Mini marshmallows: They melt faster and mix better than larger marshmallows, which means no clumps and smooth marshmallow coating.
- Kosher salt: Just a pinch to balance all that sweetness and make the flavors pop.
- Green food coloring: The star of the show for that spooky, bright Frankenstein green color.
- Rice Krispies cereal: The classic crispy foundation for texture and crunch that everyone recognizes and loves.
- Semisweet chocolate chips: For dipping and decoration, adding that slightly bitter contrast and smoothness.
- Chocolate sprinkles: Adds fun texture and a little sparkle after dipping in chocolate.
- Candy eyeballs: Makes these treats come alive with fun, silly faces—definitely kid favorites!
- Reese’s Minis Unwrapped: Use these as the perfect “neck bolts” for your Frankenstein-inspired treats.
- Black writing gel: For creating spooky mouths and stitch details.
- Red writing gel (optional): Adds a dramatic “bloody” effect if you want to get extra creepy.
Variations
I love making this Halloween Rice Krispies Treats Recipe my own by switching up the decorations depending on who I’m making them for and the kind of party vibe. Don’t be afraid to play around—there’s something really satisfying about customizing these creepy treats.
- Spooky Color Swap: Instead of green, try orange or purple food coloring for a different Halloween palette—I once made a batch with orange that looked like candy corns and they were gone in minutes!
- Nut-Free Version: Replace Reese’s Minis with gummy worms or spooky candy to keep it allergen-friendly without losing the fun factor.
- Gluten-Free Option: Double-check your Rice Krispies cereal as some brands contain malt flavoring with gluten; there are gluten-free crispy rice cereals perfect for this swap.
- Extra Gooey: Add a handful of marshmallow creme or white chocolate chips for an extra melty, gooey inside.
How to Make Halloween Rice Krispies Treats Recipe
Step 1: Prep Your Pan and Start Melting Butter
Start by spraying your 13 x 9-inch pan with nonstick baking spray—this is key for easy removal later. Then, melt 4 tablespoons of unsalted butter in a large pot over medium-low heat. Be patient here; melting slowly helps prevent the butter from browning and keeps your treats from tasting off.
Step 2: Melt Marshmallows with Color and Salt
Once the butter is melted, toss in 10 ounces of mini marshmallows along with a pinch of kosher salt. Stir constantly until the marshmallows are completely melted and smooth. Here’s where the fun begins—add green food coloring a little at a time, stirring after each addition, until you get that bright, eerie green you love. I discovered this trick because sometimes one batch needs more color, and it’s easier to add a bit at a time than to overpower the mixture.
Step 3: Mix in the Cereal
Remove the pot from heat and pour in 5 cups of Rice Krispies cereal. Stir quickly but gently until every last bit of cereal is coated with the green marshmallow mixture. Don’t rush or over-stir or the cereal can get mushy; just make sure it’s evenly coated.
Step 4: Press Into Pan, Cool, and Cut
Transfer the mixture into your prepared pan. I like to spray my hands lightly with nonstick spray or use a sheet of parchment paper to press it firmly and evenly into the bottom. Let it stand at room temperature for about 15 minutes—it sets up nicely but remains soft enough to cut. When it’s ready, turn it onto a cutting board and cut the large rectangle in half lengthwise, then cut each half into 5 smaller pieces, which makes 10 treats total.
Step 5: Dip, Decorate, and Freak Out Your Friends
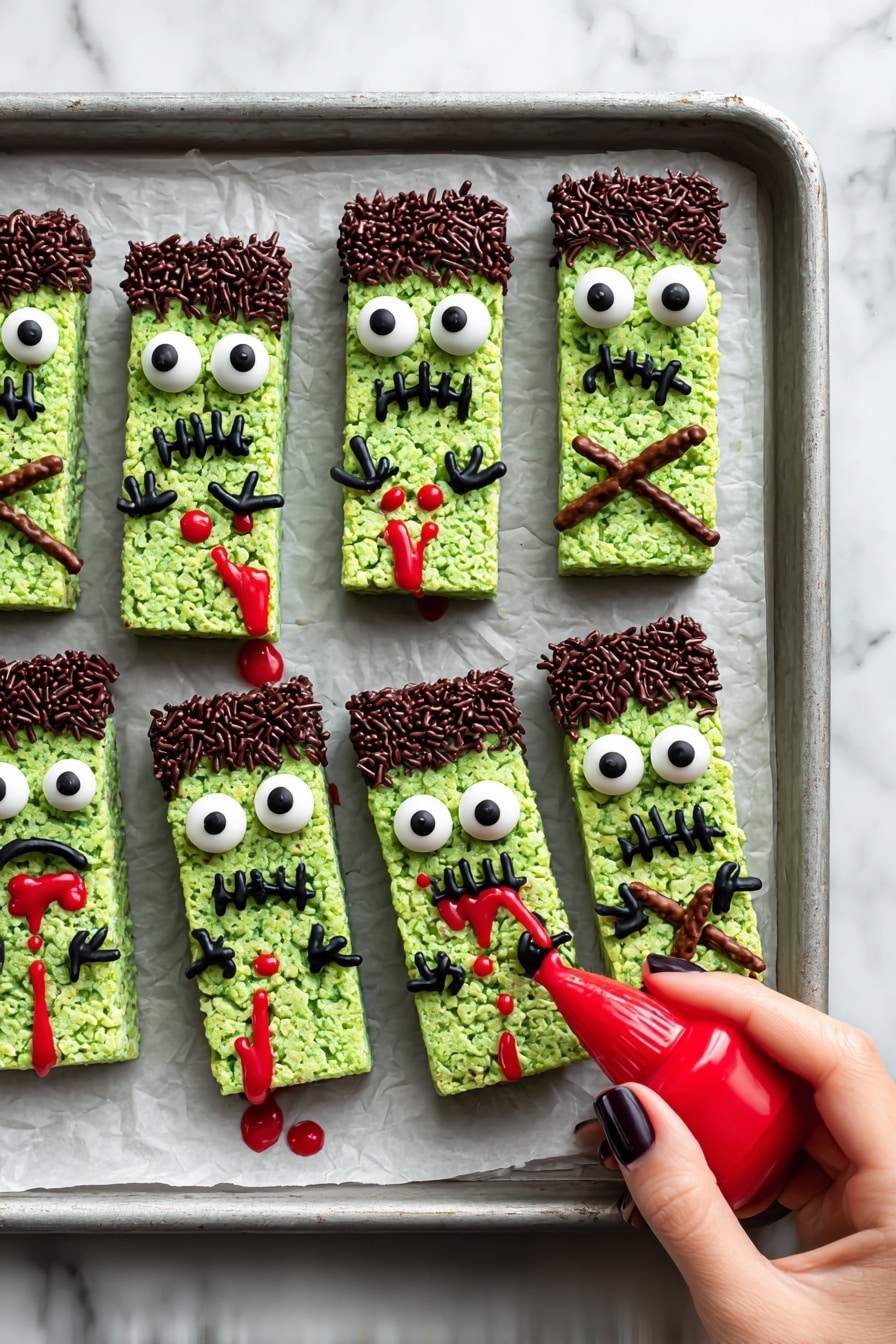
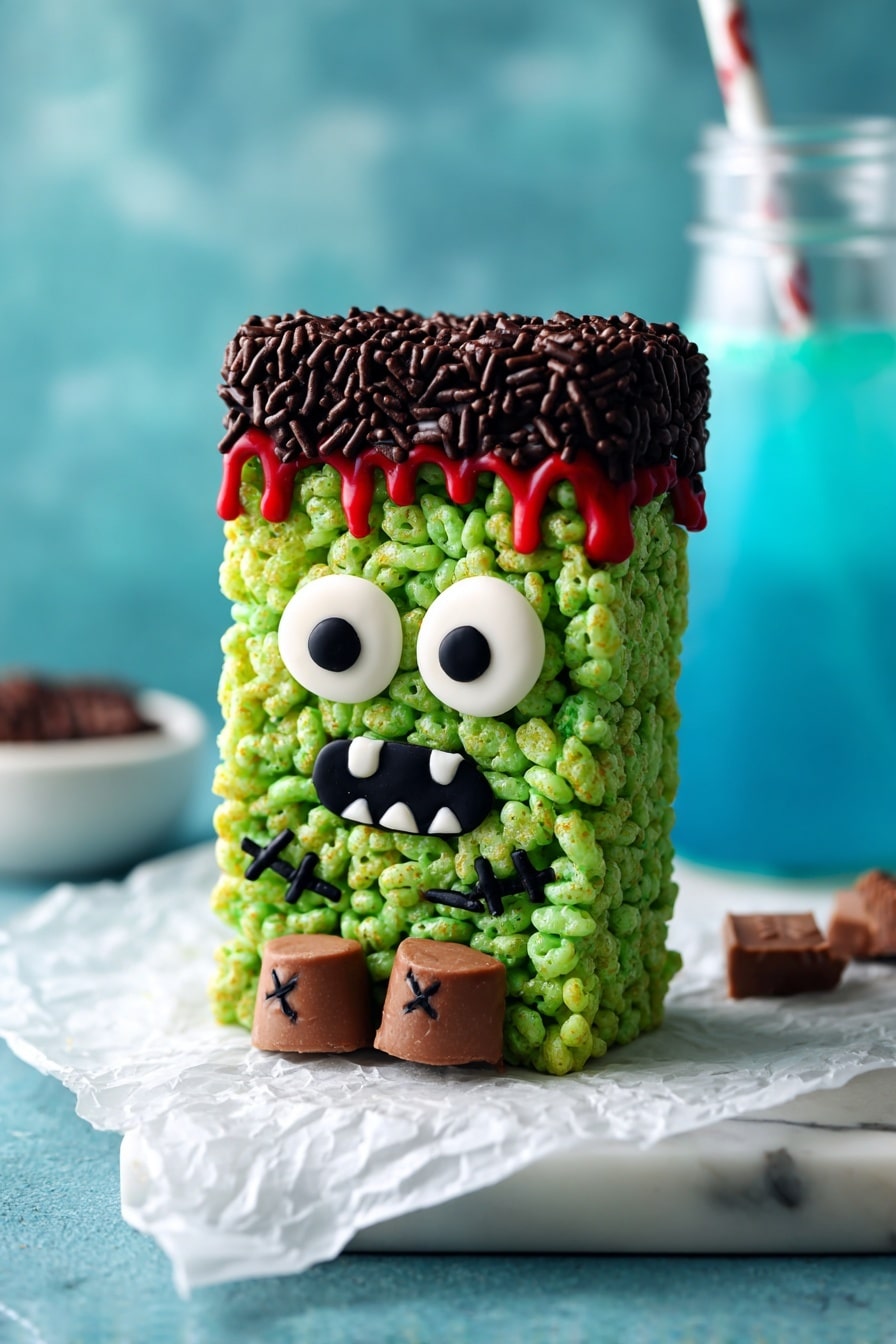
Now comes the fun decorating part! Microwave 8 ounces of semisweet chocolate chips in 30-second intervals, stirring in between, until smooth and glossy. Dip one end of each rectangular treat into the melted chocolate and place it on parchment paper. While the chocolate is still wet, sprinkle with ¼ cup chocolate sprinkles for a little extra texture. Then, use the remaining melted chocolate to “glue” on candy eyeballs and Reese’s Minis as neck bolts. Finally, finish each treat with a face using black writing gel for mouths and stitches—and if you’re feeling brave, add some red writing gel for a fun “bloody” effect. My family goes crazy for these silly, spooky faces!
Pro Tips for Making Halloween Rice Krispies Treats Recipe
- Use Greased Hands: Press the marshmallow mixture into the pan with lightly greased hands or parchment paper to avoid sticking and keep the surface smooth.
- Don’t Overheat Chocolate: Microwave in short bursts and stir often to prevent burning—it melts beautifully when handled gently.
- Customize Your Colors: Test a tiny bit of marshmallow mixture with food coloring first to know your exact shade before mixing the whole batch.
- Cut When Cool But Not Cold: Wait the full 15 minutes to set, but don’t refrigerate before cutting or it might crack.
How to Serve Halloween Rice Krispies Treats Recipe
Garnishes
I love to garnish these with a variety of candy eyes—sometimes big, googly, or even glow-in-the-dark options if you can find them! The Reese’s Minis neck bolts add a peanut-buttery punch that’s unexpected and delicious. If you want to get really creative, sprinkle a little edible glitter or orange sugar on the chocolate-dipped tips for extra shine.
Side Dishes
Pair these treats with simple, crowd-pleasing sides like pumpkin spice hot cocoa or apple cider for a classic fall combo. They also go great alongside popcorn—or if you’re hosting a Halloween party, try serving them with savory bites like mini sliders to balance the sweetness.
Creative Ways to Present
Once, I arranged these treats on a platter layered with spider web-patterned napkins and added some plastic spiders for effect. Another time, I wrapped each treat individually in cellophane tied with orange and black ribbons—super cute for gift-giving or party favors. Little touches like these turn simple Rice Krispies treats into a spooky centerpiece everyone notices!
Make Ahead and Storage
Storing Leftovers
These Halloween Rice Krispies Treats stay fresh in an airtight container at room temperature for up to 3 days. I usually cover them tightly with plastic wrap and then place them in a sealed container to keep them soft but not sticky. If you live somewhere humid, keeping them in a cool, dry spot is essential to maintain their classic texture.
Freezing
I’ve frozen these treats by wrapping each piece individually in plastic wrap and storing them in a freezer-safe bag. When you’re ready, just thaw at room temperature for about 30 minutes. They’ll be soft and delicious almost like freshly made—perfect if you want to prepare them way in advance for a party.
Reheating
If you want to refresh the chocolate dip shine, microwave the treats for just 5-8 seconds to soften the chocolate just enough to give it a gentle sheen. Avoid heating too long or the Rice Krispies may become mushy. A light touch is key to keeping that perfect snap and gooey factor.
FAQs
-
Can I use regular marshmallows instead of mini in this Halloween Rice Krispies Treats Recipe?
Yes, you can, but mini marshmallows melt more quickly and evenly which makes the texture smoother. If you use regular-sized marshmallows, chop them into smaller pieces to help them melt faster and mix better with the butter.
-
What if I don’t have candy eyeballs—what can I substitute?
No worries! You can substitute candy eyeballs with small round candies, mini chocolate chips, or even draw eyes with white and black writing gel. Sometimes I use gummy candies or jelly beans for a fun twist.
-
Can I make these treats without food coloring?
Absolutely! The treats will still taste amazing without the green coloring—it’s just a fun visual for Halloween. You could also experiment with other colors like orange or purple for a different spooky vibe.
-
How do I prevent my melted chocolate from seizing when dipping the treats?
To avoid chocolate seizing, make sure your dipping bowls and utensils are completely dry. Microwave the chips in short intervals and stir frequently to distribute heat evenly. Avoid adding any water or steam near the chocolate.
Final Thoughts
This Halloween Rice Krispies Treats Recipe is one of those kitchen wins that makes me look forward to October every year. It’s nostalgic, easy, and fun, plus the goofy decorating aspect turns it into a family activity that everyone enjoys. Whether you’re making these with kids, for classroom parties, or just because you need a festive sweet snack, I promise these treats deliver smiles. Give it a try—you’ll be thrilled with how quickly these spooky little monsters disappear!
Print
Halloween Rice Krispies Treats Recipe
- Prep Time: 30 minutes
- Cook Time: 5 minutes
- Total Time: 50 minutes
- Yield: 10 servings 1x
- Category: Dessert
- Method: Stovetop
- Cuisine: American
Description
These Halloween Rice Krispies Treats are a festive and fun twist on the classic treat, featuring bright green marshmallow-coated cereal, chocolate-dipped ends, and spooky decorations like candy eyeballs and mini peanut butter cup ‘neck bolts’. Perfect for Halloween parties or a fun seasonal snack, they combine the classic chewy texture of Rice Krispies treats with playful chocolate and candy accents.
Ingredients
Main Ingredients
- 4 tablespoons unsalted butter
- 10 ounces mini marshmallows (5–1/2 cups)
- Pinch kosher salt
- Green food coloring (enough to make mixture bright green)
- 5 cups Rice Krispies cereal
Decorations
- 8 ounces semisweet chocolate chips
- 1/4 cup chocolate sprinkles
- 20 candy eyeballs
- 20 Reese’s Minis Unwrapped (mini peanut butter cups)
- Black writing gel
- Red writing gel (optional)
Other
- Nonstick baking spray (for preparing pan)
Instructions
- Prepare the pan: Spray the bottom and sides of a 13 x 9-inch pan with nonstick baking spray to prevent sticking and make removal easier.
- Melt the butter: In a large pot, melt 4 tablespoons of unsalted butter over medium-low heat until fully melted but not browned.
- Add marshmallows and coloring: Stir in 10 ounces of mini marshmallows, a pinch of kosher salt, and green food coloring until fully combined and the marshmallow mixture is smooth and bright green. Add additional food coloring if needed to achieve vibrant color.
- Combine with cereal: Remove the pot from heat. Add 5 cups of Rice Krispies cereal to the marshmallow mixture and stir well until the cereal is fully coated.
- Press into pan and cool: Transfer the mixture to the prepared pan and press firmly and evenly using a piece of parchment paper or greased hands. Let the pan sit at room temperature for 15 minutes to set.
- Cut treats: Turn the set mixture onto a cutting board. Cut the rectangle in half lengthwise and then cut each half into 5 pieces crosswise, yielding 10 treats.
- Melt chocolate: Place 8 ounces of semisweet chocolate chips in a microwave-safe glass measuring cup or bowl. Microwave in 30 second intervals, stirring between each, until smooth and melted.
- Dip and decorate: Dip one end of each treat into the melted chocolate and place on parchment paper. Immediately sprinkle with ¼ cup chocolate sprinkles while the chocolate is wet.
- Attach candy eyeballs and neck bolts: Use the remaining melted chocolate as glue to attach 20 candy eyeballs and 20 Reese’s Minis (mini peanut butter cups) as ‘neck bolts’ for a spooky effect.
- Add final decorations: Use black writing gel to draw mouths and stitches on the treats. Optionally, use red writing gel to add a touch of “blood” for extra Halloween creepiness.
Notes
- Use parchment paper or lightly buttered hands to press the mixture into the pan for easy removal.
- Adjust green food coloring gradually for preferred color intensity.
- Microwave chocolate carefully in intervals to avoid overheating and burning.
- These treats are best enjoyed fresh but can be stored in an airtight container for up to 3 days.
- Red writing gel is optional to make the treats more festive and spooky.
Nutrition
- Serving Size: 1 treat (approximately)
- Calories: 240
- Sugar: 18g
- Sodium: 130mg
- Fat: 11g
- Saturated Fat: 6g
- Unsaturated Fat: 4g
- Trans Fat: 0g
- Carbohydrates: 32g
- Fiber: 1g
- Protein: 2g
- Cholesterol: 20mg

