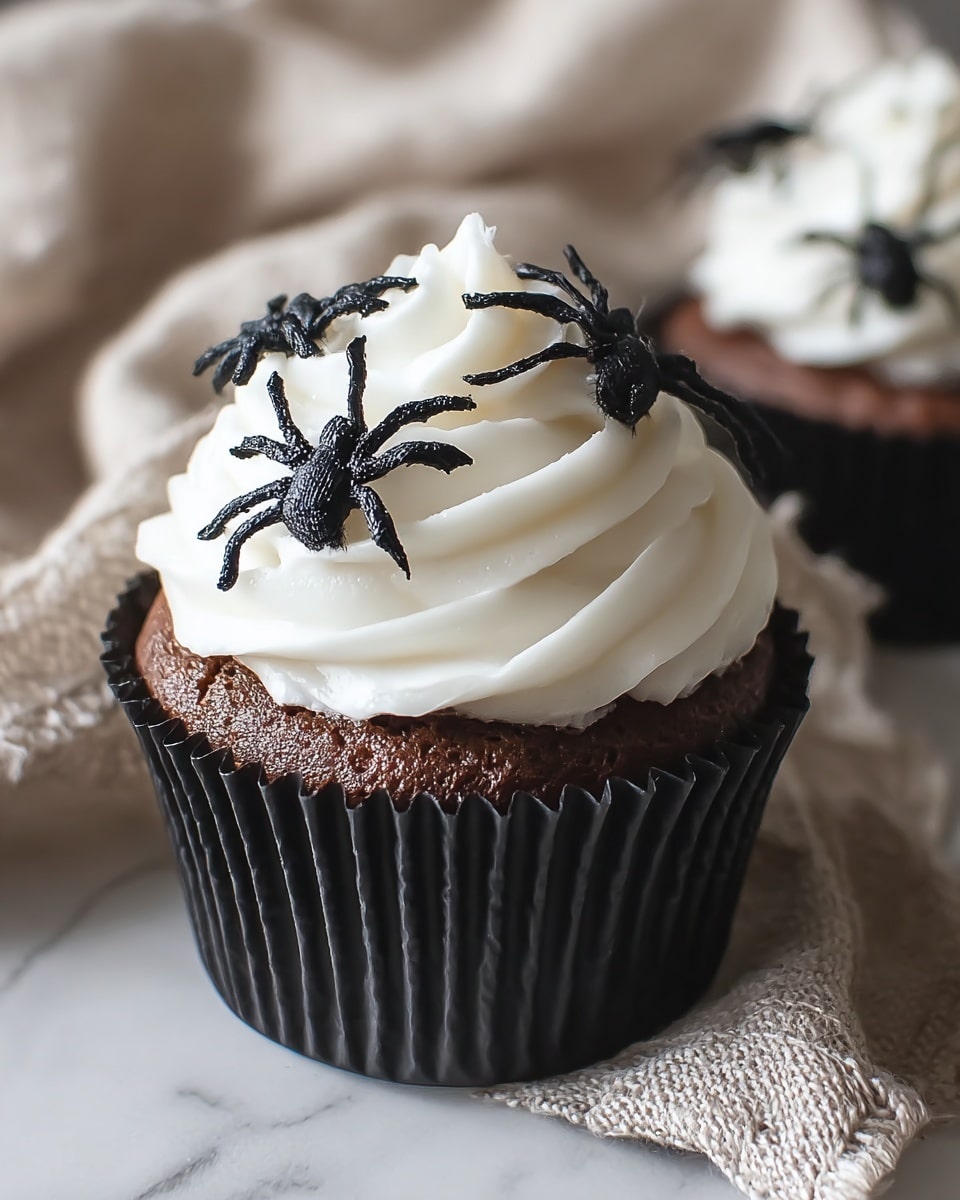
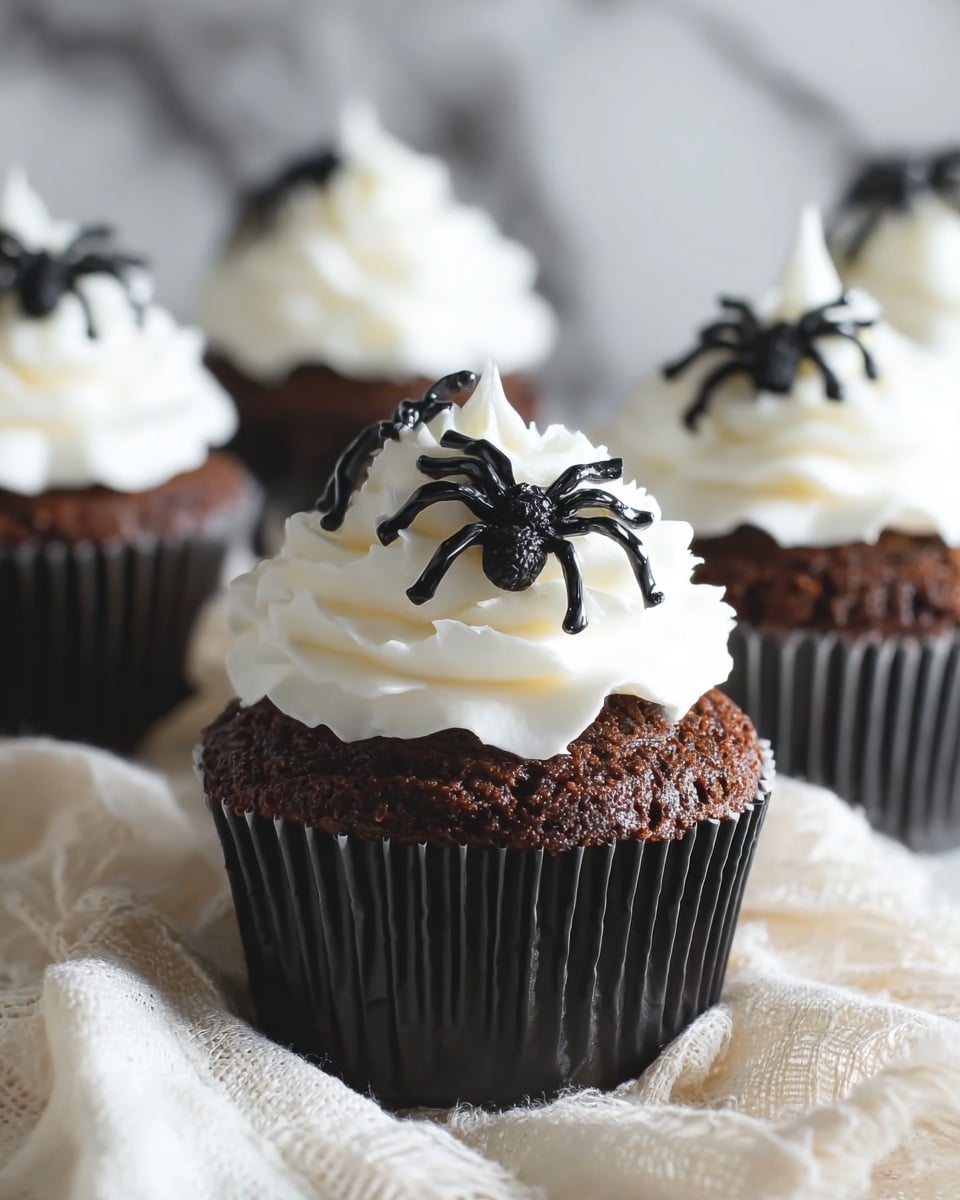
If you’re on the hunt for a fun, festive, and just a little bit spooky treat this season, I’ve got you covered. This Creepy Halloween Spider Cupcakes Recipe is one of my all-time favorites to whip up when friends and family come knocking around October. You’ll love how simple it is to put together yet how delightfully creepy and cute these spiders look perched on a swirl of creamy frosting—it’s that perfect mix of fun and spooky that really gets everyone in the Halloween spirit!
Why You’ll Love This Recipe
- Super Easy to Make: You don’t have to be a pro baker to nail these cupcakes perfectly.
- Eye-Catching Presentation: Those little plastic spiders look straight out of a Halloween party magazine.
- Kid-Approved Fun: My family goes crazy for these — they’re a real hit with the little ones (and adults too!).
- Customizable Flavors: You can easily swap cake mixes or add your twist to make these uniquely yours.
Ingredients You’ll Need
Let’s talk about the ingredients. This recipe leans on time-saving store-bought cake mixes, plus a simple, creamy frosting that you can flavor to suit your mood. The little plastic spiders are the star of the show and easy to find online or at party stores—just make sure they’re clean and food-safe!
- Cake Mix: I usually use a classic yellow or chocolate mix—whichever you prefer. They bake up moist and provide a perfect base.
- Eggs, Oil, Water: These are basic ingredients that come with your cake mix for moistness and fluff.
- Salted Butter: Softened butter adds richness to the frosting and balances the sweetness.
- Shortening: This keeps the frosting stable and fluffy, especially if it’s a warm day.
- Confectioners Sugar: Don’t skip the powdered sugar—it’s what makes the frosting silky smooth and sweet.
- Clear Vanilla Extract: A little vanilla goes a long way to deepen flavors without changing the cupcake’s color.
- Milk: Adjust it to get your frosting thickness just right—less milk for thicker, more for a creamier swirl.
- Small Plastic Spiders: These are the fun, decorative touch that turns regular cupcakes into spooky little critters.
Variations
I love trying out new twists to this Creepy Halloween Spider Cupcakes Recipe. It’s perfect for customizing—you can swap flavors, experiment with natural food coloring, or even switch up the spooky decoration depending on who you’re serving.
- Chocolate Lovers: I once added a few tablespoons of cocoa to the frosting, making it rich and decadent, and it was a total hit at our Halloween party.
- Allergy-Friendly: Use gluten-free cake mix and dairy-free butter alternatives if you’re serving guests with dietary needs.
- Colored Frosting: Adding a drop of black or purple gel food coloring to the frosting amps up the creepy vibe drastically!
- Spider Variation: Instead of plastic spiders, you can try drawing spiders with black licorice “legs” and candy eyes—my niece thinks it’s hilarious.
How to Make Creepy Halloween Spider Cupcakes Recipe
Step 1: Bake the Cupcakes to Perfection
Start by following the cake mix box instructions—you can’t beat convenience here. Mix the eggs, oil, and water as directed, then fill your cupcake liners about two-thirds full. Bake them for the suggested time, but keep an eye on them near the end—overbaking dries them out. I like to test with a toothpick: if it comes out clean, they’re ready! Once baked, transfer to a wire rack to cool completely. You don’t want warm cupcakes under the frosting, or you’ll end up with a melty mess.
Step 2: Whip Up the Creamy Frosting
Once your cupcakes are cool, it’s frosting time. Using a stand mixer fitted with a paddle attachment really helps here. Cream together your softened butter and shortening until super smooth—this took me a couple tries to get the texture just right. Then add clear vanilla extract for that subtle flavor kick. Gradually mix in half the confectioners sugar and most of your milk to start—adding slowly avoids a powdered sugar cloud! Whip it all up until well combined, then add the rest of the sugar and milk, beating on medium-high for about 3–4 minutes. You want your frosting silky, spreadable, but still able to hold its shape for piping.
Step 3: Pipe the Frosting and Add Spiders
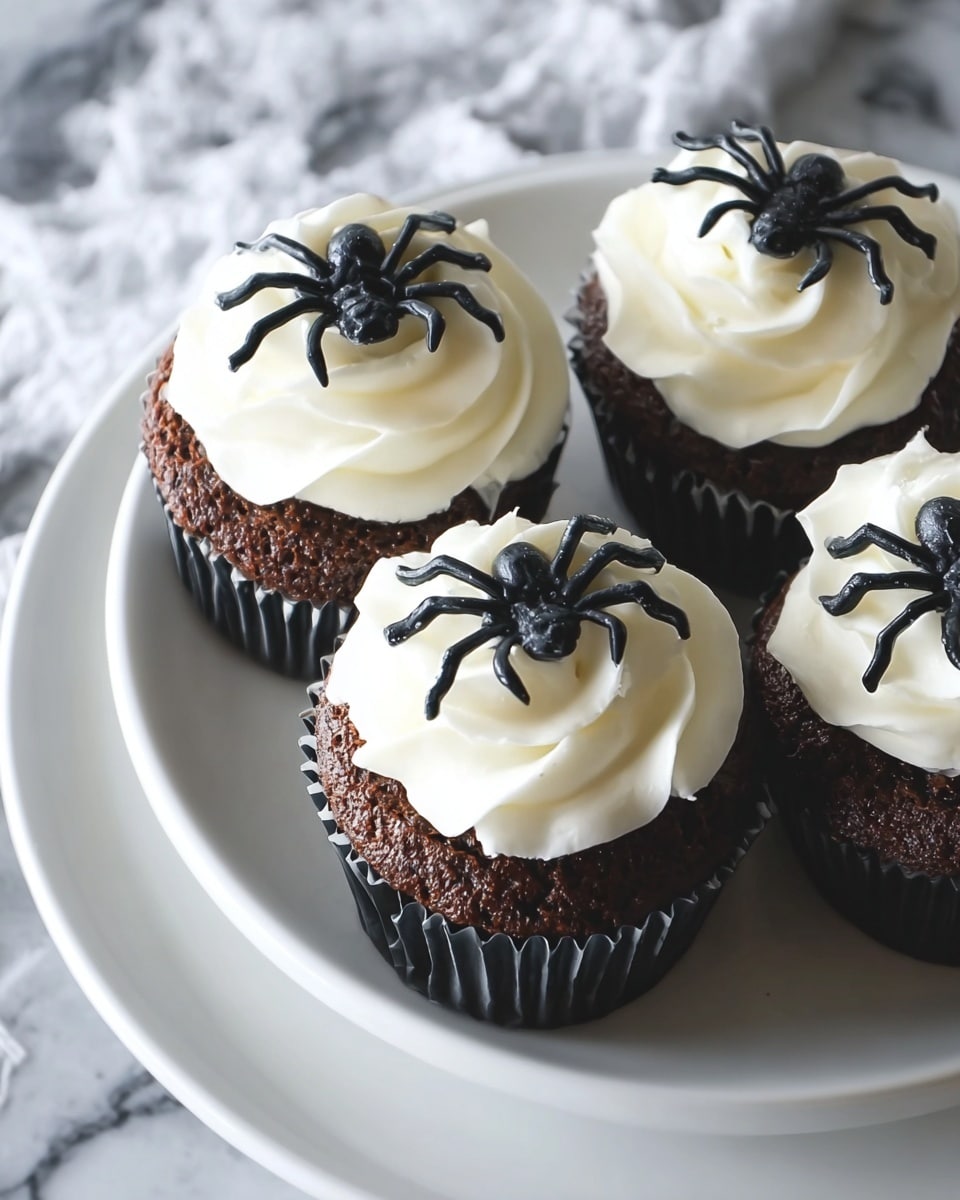
Grab a large open star piping tip—it creates those classic swirly frosting tops. I like to hold the piping bag at a 90-degree angle and pipe from the outside in a circular motion upward. The swirl should look fluffy and inviting. Then, the fun part: place several plastic spiders around the top of each cupcake. Don’t be shy! These creepy crawlers really bring the spooky vibe and will have your guests cracking up. Just double-check that the spiders are clean and safe for use on food.
Pro Tips for Making Creepy Halloween Spider Cupcakes Recipe
- Cool Completely Before Frosting: Trust me on this—warm cupcakes will melt your frosting and ruin those perfect swirls.
- Use a Stand Mixer: It makes frosting mixing so much easier, and the texture comes out smooth and fluffy every time.
- Slowly Add Milk and Sugar: This helps avoid a lumpy or runny frosting, giving you control over thickness.
- Plastic Spiders Safety Check: Always wash plastic spiders before using, and avoid piercing the frosting too much for clean-looking cupcakes.
How to Serve Creepy Halloween Spider Cupcakes Recipe
Garnishes
While the plastic spiders steal the show, I sometimes add a dusting of edible black glitter or a few candy eyes stuck into the frosting for extra creep factor. If you want to get really crafty, edible spider webs or little chocolate “legs” made from licorice add a unique touch that really wows guests.
Side Dishes
Pair your spider cupcakes with other Halloween treats like mini pumpkin cookies, caramel apples, or even a spooky punch with dry ice for that extra eerie ambiance. These cupcakes also go great with a simple cup of fresh coffee or a warm pumpkin spice latte if you want to keep it cozy.
Creative Ways to Present
I love placing the cupcakes on a cake stand surrounded by fake spider webs and Halloween confetti. Another fun trick is to place each cupcake on a mini “graveyard” plate—using crushed oreos as dirt makes your spiders look like they just crawled out of the ground! This really amps up the spooky factor at parties.
Make Ahead and Storage
Storing Leftovers
If you have leftovers (which might be tough!), store cupcakes in an airtight container in the fridge to keep the frosting fresh and prevent those little spiders from moving. Bring them to room temperature before serving to get the best flavor and texture.
Freezing
I’ve frozen undecorated cupcakes before without a hitch—just wrap them well in plastic wrap and pop them in a freezer bag. When ready, thaw fully and then frost. Freezing with frosting on is tricky because it can get watery, so I recommend frosting after thawing.
Reheating
Since cupcakes taste best at room temperature, I usually let refrigerated cupcakes sit out for about 30 minutes before serving. If you’re eager, a quick 5-10 second zap in the microwave can help the cake feel warm—but be careful not to melt the frosting.
FAQs
-
Can I make the frosting ahead of time for the Creepy Halloween Spider Cupcakes Recipe?
Absolutely! You can prepare the frosting a day ahead and keep it covered tightly in the fridge. Just give it a good stir or re-whip with your mixer before piping to bring back its fluffy texture.
-
Are the plastic spiders safe to use on cupcakes?
Yes, as long as they’re clean and come from a food-safe source. I always wash mine before placing them on the cupcakes, and I make sure guests know they’re for decoration only to avoid any accidental nibbling.
-
Can I substitute the cake mix with a homemade recipe?
Definitely! If you have a go-to homemade cupcake recipe, feel free to use it here—the frosting and spider decoration will still make it just as fun and festive for Halloween.
-
How do I keep the frosting from melting on warm days?
Using shortening along with butter helps stabilize the frosting. Also, try to keep the cupcakes chilled until just before serving and avoid direct sunlight or heat to maintain that perfect swirl.
-
What’s the best way to pipe the frosting for that spooky look?
I recommend using a large open star piping tip for classic swirly edges that look great. Practice on parchment paper first if you’re new to it, and remember to pipe with consistent pressure for an even swirl!
Final Thoughts
This Creepy Halloween Spider Cupcakes Recipe holds a special place in my heart because it brings out the playful side of baking. When I first tried this, the reaction around the table was priceless—everyone couldn’t stop smiling at these creepy little critters. It’s a recipe that’s approachable and fun, perfect for making memories with friends or family. Give it a try, and I promise these spider cupcakes will become a Halloween tradition you look forward to every year!
Print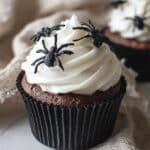
Creepy Halloween Spider Cupcakes Recipe
- Prep Time: 15 minutes
- Cook Time: 25 minutes
- Total Time: 40 minutes
- Yield: 24 cupcakes 1x
- Category: Dessert
- Method: Baking
- Cuisine: American
Description
These Creepy Halloween Spider Cupcakes are a festive and fun treat perfect for Halloween parties. Moist cupcakes are topped with a rich, creamy buttercream frosting piped into swirls and adorned with spooky plastic spider decorations for an eerie effect that kids and adults will love.
Ingredients
Cake
- 1 box Cake Mix (any flavor)
- Additional ingredients as per box instructions: eggs, oil, water
Frosting
- 1/2 cup salted butter, softened
- 1/2 cup shortening
- 8 cups confectioners sugar (about 1 – 2 lb bag), no sifting
- 2 tsp clear vanilla extract
- 1/3 to 1/2 cup milk (adjust for desired frosting consistency)
- 1 package small plastic spiders
Instructions
- Prepare the Cupcakes: Mix the cake batter according to the directions on the cake mix box, combining the mix with eggs, oil, and water as specified. Pour the batter into cupcake liners in a muffin tin and bake for about 25 minutes or until a toothpick inserted in the center comes out clean.
- Cool the Cupcakes: Remove the cupcakes from the oven and let them cool completely on a wire rack to ensure the frosting does not melt when applied.
- Make the Frosting: In a stand mixer fitted with the paddle attachment, cream the softened butter and shortening until smooth and creamy. Add the vanilla extract and mix to combine.
- Add Sugar and Milk: Gradually add half of the confectioners sugar along with most of the milk, stirring slowly until the mixture is moist, then whip the frosting until well combined and fluffy.
- Finalize the Frosting: Add the remaining confectioners sugar and milk and beat on medium-high speed for 3-4 minutes, scraping down the sides of the bowl occasionally. The frosting should have a very smooth texture suitable for piping.
- Pipe the Frosting: Using a piping bag fitted with a large open star tip, pipe the frosting in a swirl pattern on top of each cooled cupcake.
- Decorate with Spiders: Place several small plastic spider decorations on top of the frosting to complete the spooky Halloween look. Serve immediately or store until ready to enjoy.
Notes
- Use your favorite cake mix flavor to customize the cupcakes.
- Ensure cupcakes are completely cooled before frosting to prevent melting.
- Adjust milk quantity to achieve desired frosting consistency.
- Plastic spiders are for decoration only; make sure to remove before eating or inform guests.
- Store cupcakes in an airtight container to maintain freshness.
- For a more festive touch, add edible glitter or colored sprinkles before placing the spiders.
Nutrition
- Serving Size: 1 cupcake
- Calories: 320
- Sugar: 28g
- Sodium: 180mg
- Fat: 15g
- Saturated Fat: 6g
- Unsaturated Fat: 7g
- Trans Fat: 0g
- Carbohydrates: 43g
- Fiber: 1g
- Protein: 2g
- Cholesterol: 35mg

