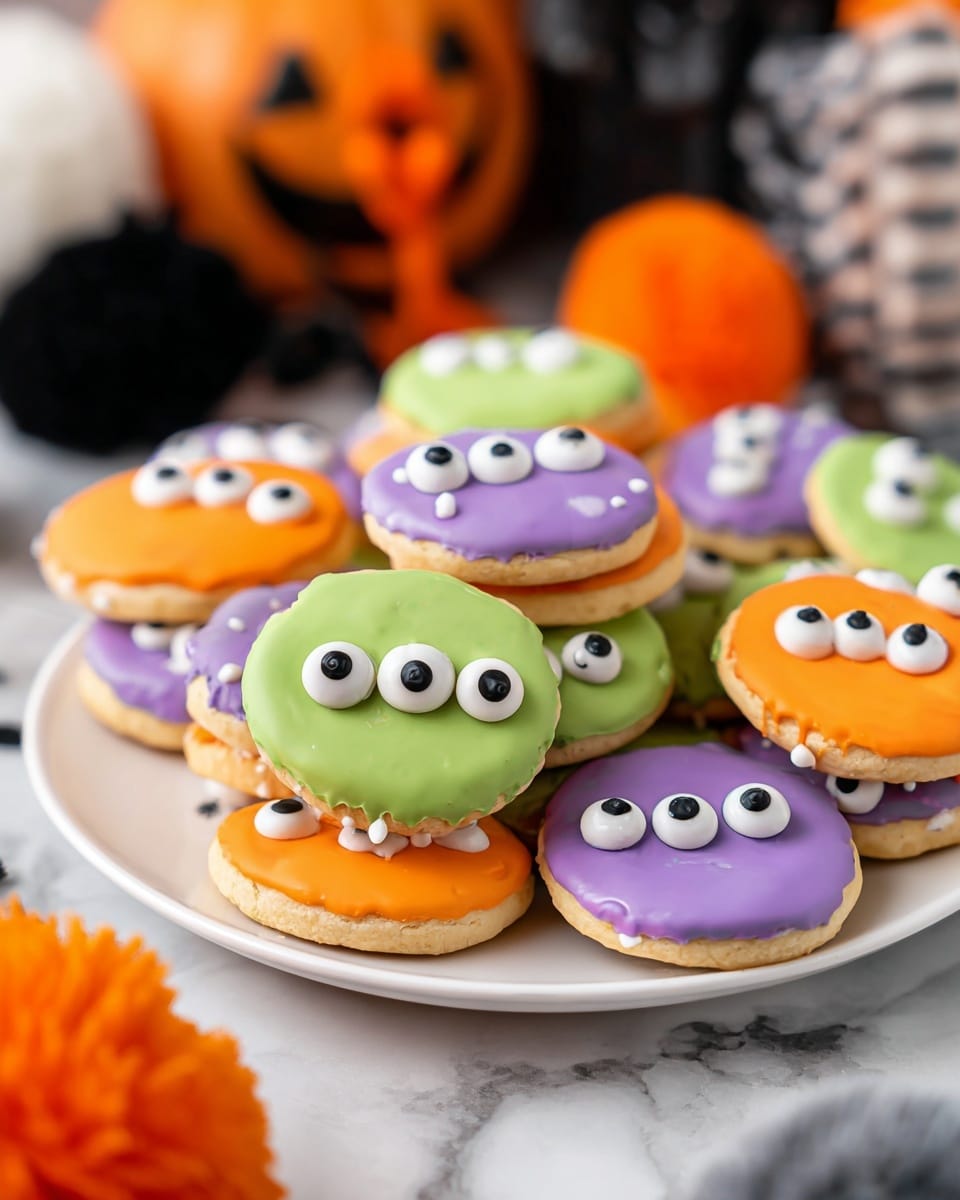
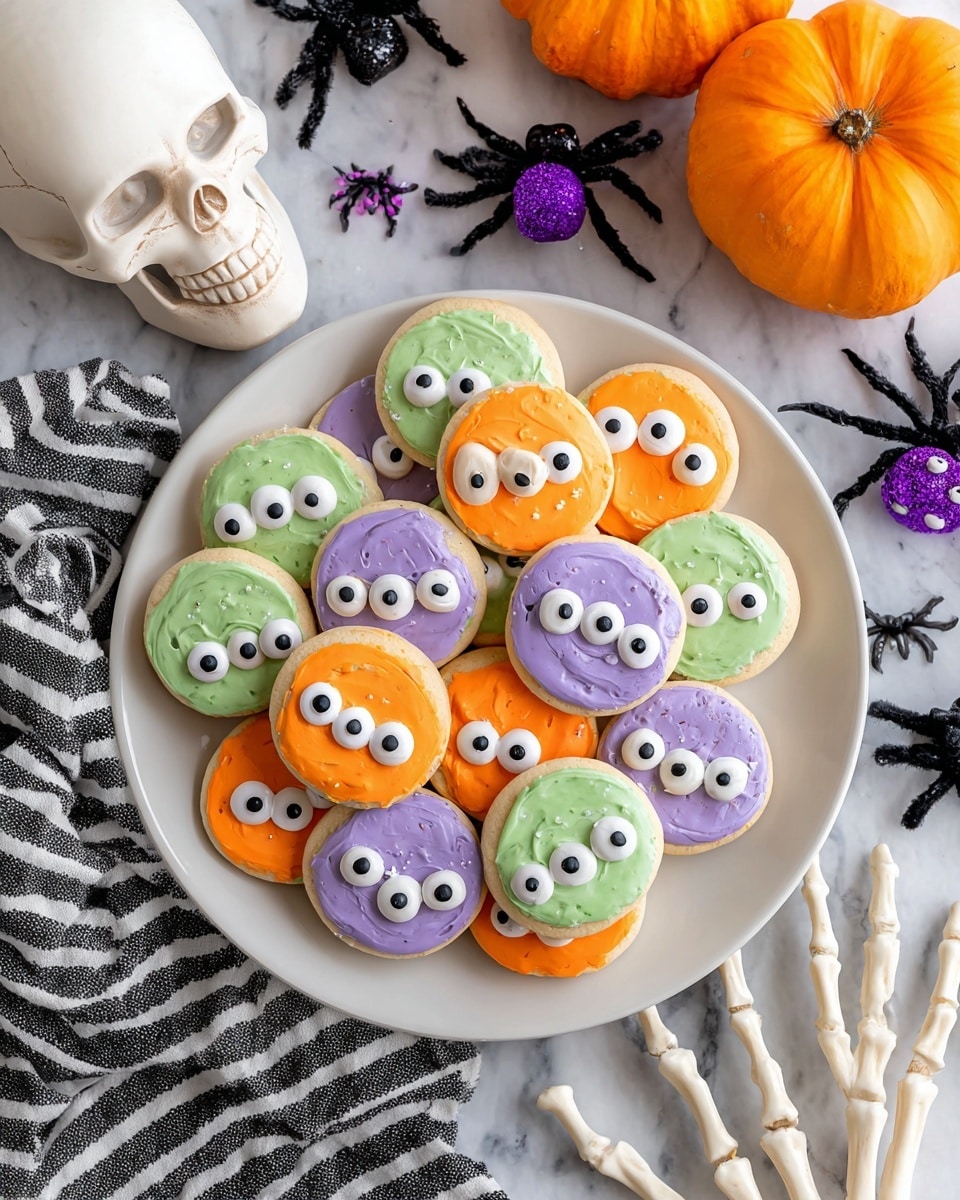
If you’re looking for a fun, easy, and downright adorable treat to whip up in no time, I absolutely love sharing this Peanut Butter Monster Snacks Recipe with friends. These colorful little monster faces aren’t just cute—they’re super tasty and perfect for snack time, parties, or whenever you want to surprise someone with something silly and sweet. Trust me, once you try this, you’ll be hooked on how simple and fun it is to make, plus everyone goes crazy for them!
Why You’ll Love This Recipe
- Super Simple: You don’t need any fancy baking skills—perfect for a quick snack fix or a kids’ activity.
- Fun and Colorful: The vibrant candy melts make these snacks irresistible and exciting to decorate.
- Kid-Approved: My kids absolutely adore making and eating these monster faces, and yours will too!
- Customizable: You can mix up colors, candy eyes, or even nut butters to make them uniquely yours.
Ingredients You’ll Need
This Peanut Butter Monster Snacks Recipe comes together with simple, easy-to-find ingredients that work beautifully to create a delicious, crunchy, and creamy bite. When you shop, look for smooth peanut butter and bright candy melts to get those perfect, vibrant colors.
- Ritz crackers: These buttery crackers are the perfect sturdy base for your sandwiches.
- Creamy peanut butter: Use smooth for easy spreading and a nice creamy texture inside the snacks.
- Orange candy melts: Great for adding a pop of bright, fun color.
- Green candy melts: These give a spooky and playful monster vibe.
- Purple candy melts: A fun and funky color that really makes the monsters stand out.
- Candy eyeballs: Definitely not optional—these bring your monsters to life!
Variations
I love how this Peanut Butter Monster Snacks Recipe is so versatile—once you get the hang of it, you can really let your creativity shine! Feel free to swap out the peanut butter or candy colors to match any occasion or dietary needs.
- Swap nut butters: I once made these with almond butter for a friend with peanut allergies and the results were just as delicious!
- Use different colored candy melts: For Halloween, I go heavy on green and purple, but for a birthday party, red and blue work beautifully.
- Try adding sprinkles: For a fun texture twist, sprinkle colorful nonpareils while the melts are still soft.
- Make mini versions: Using smaller crackers turns these into perfect bite-sized snacks for little hands.
How to Make Peanut Butter Monster Snacks Recipe
Step 1: Assemble Your Peanut Butter Sandwiches
Start by laying out a piece of parchment paper on your counter or a baking sheet—this helps keep everything tidy and makes cleanup a breeze. Take 16 Ritz crackers and place them on the parchment. Spread about a tablespoon of creamy peanut butter on each cracker, smoothing it to the edges so every bite is evenly nutty and moist. Then, top each with another cracker to make a little sandwich. You’ll want to handle them gently so they don’t break, and smoothing the peanut butter well helps keep everything stuck together snugly.
Step 2: Melt the Candy Melts
Next, melt your candy melts in three separate bowls—one each for orange, green, and purple. The microwave method works great for this: heat them in 20-second bursts, stirring well in between, until smooth and runny. Once, I learned the hard way that heating too long without stirring causes the melts to clump up, so take your time and stir often! The texture should be thin enough to coat the crackers easily but not too watery.
Step 3: Dip and Decorate Your Monster Snacks
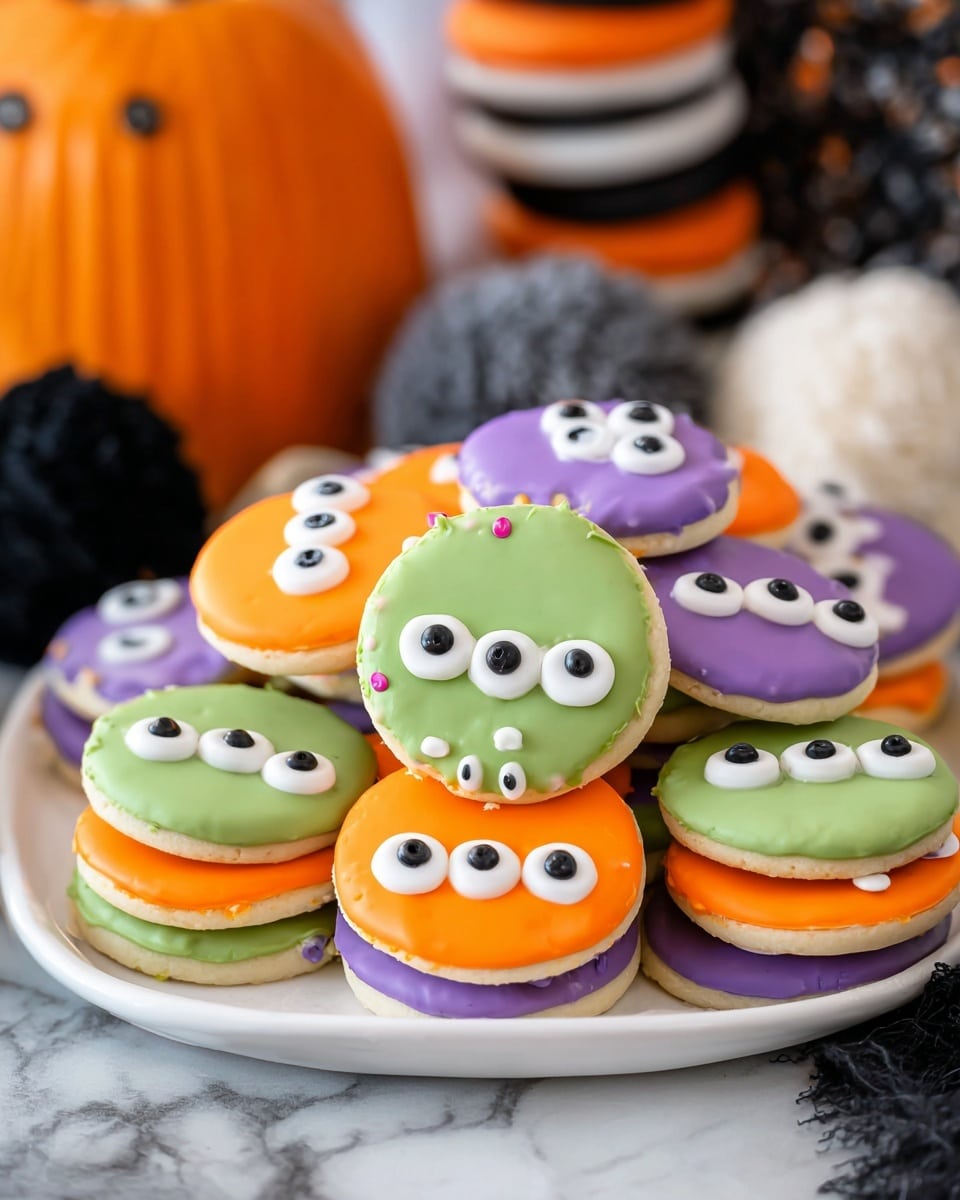
Grab a fork and dip each peanut butter sandwich into one of your melted candy bowls, turning to coat it completely. Lift it out carefully and place it on the parchment paper to set. While the candy coating is still soft, press candy eyeballs onto each snack—the eyes are what make these monsters truly come alive! This part is always the most fun, especially doing it with kids who love picking out their favorite eye designs.
Step 4: Let Them Set
Now comes the hardest part—waiting! Let the candy melts fully set at room temperature (about 20 minutes or so). If you’re impatient like me, you can pop them in the fridge for a faster chill. Once set, these Peanut Butter Monster Snacks are ready to delight!
Pro Tips for Making Peanut Butter Monster Snacks Recipe
- Use room temperature peanut butter: It spreads so much smoother, making your sandwiches neat and less crumbly.
- Don’t overheat candy melts: Melting in short bursts and stirring reduces clumping and ensures a silky coating.
- Dip with a fork, not fingers: Helps keep your hands clean and gives better control when coating the snacks.
- Set on parchment paper: Prevents sticking and keeps your monsters looking perfect when you lift them off.
How to Serve Peanut Butter Monster Snacks Recipe
Garnishes
I like to add extra fun little touches like edible glitter or sprinkles alongside the candy eyeballs when the melts are still soft. It adds a bit of sparkle that kids (and adults) can’t resist! Sometimes, a drizzle of contrasting colored candy melt on top gives them even more character.
Side Dishes
Since these are sweet and fun on their own, I often serve them alongside simple snacks like fresh fruit slices, carrot sticks, or even a cup of cold milk or hot cocoa to balance the flavors. They also pair perfectly with a savory snack tray if you’re hosting a party.
Creative Ways to Present
For birthdays or Halloween, I arrange these monster snacks on a platter with Halloween-themed tableware or sprinkle spooky confetti around them. Once, I even set up a little “monster snack decorating station” at a kid’s party where everyone could choose their candy melt and eyes—such a hit!
Make Ahead and Storage
Storing Leftovers
I store these in an airtight container at room temperature, separated by parchment paper layers to keep them from sticking together. They stay fresh and crunchy for a couple of days, which is perfect if you want to make a batch ahead.
Freezing
I’ve frozen these snacks by placing them in a single layer on a baking sheet first, then transferring them to a freezer-safe container once frozen solid. When you want a treat, just thaw at room temperature for about 30 minutes—surprisingly, they maintain their texture and flavor well!
Reheating
Since these are best enjoyed cool and crunchy, I don’t recommend reheating. However, if the candy melts are a little firm after refrigeration, letting them sit out for 10–15 minutes softens them just right for eating without a mess.
FAQs
-
Can I use crunchy peanut butter instead of creamy?
Absolutely! Crunchy peanut butter adds a nice texture contrast, but it can be a bit harder to spread. I recommend warming it slightly or stirring well before spreading to avoid cracking your cracker sandwiches.
-
What if I don’t have candy melts?
You can substitute with colored white chocolate or even regular chocolate chips melted with a bit of vegetable oil to make them thinner. Just keep in mind that colors won’t be as vibrant, but the taste will still be delicious!
-
Can I make these peanut-free?
Yes! Use sunflower seed butter or soy nut butter as a great peanut-free alternative—just be sure to check the ingredients for any allergy concerns for your guests.
-
How long do these Peanut Butter Monster Snacks last?
Stored in an airtight container at room temperature, they stay fresh up to 3 days. Beyond that, the crackers might soften, but they’re still tasty!
Final Thoughts
I have to say, this Peanut Butter Monster Snacks Recipe always brings a smile to my face. It’s such a simple way to make snack time magical and fun, whether you’re making it with your kids or surprising your coworkers. The colors, the crunch, and those googly eyes just make it unforgettable. Give it a try—you’ll enjoy not only how easy it is but how much joy it brings to everyone who gets to eat one!
Print
Peanut Butter Monster Snacks Recipe
- Prep Time: 20 minutes
- Cook Time: 0 minutes
- Total Time: 20 minutes
- Yield: 16 snacks 1x
- Category: Snack
- Method: No-Cook
- Cuisine: American
Description
Peanut Butter Monster Snacks are fun and colorful treats made by sandwiching creamy peanut butter between Ritz crackers, then dipping them in vibrant colored candy melts and decorating with candy eyeballs for a whimsical monster look. Perfect for parties, Halloween, or a playful snack.
Ingredients
Snack Ingredients
- 32 Ritz crackers
- 1/2 cup creamy peanut butter
Candy Coating
- 4 oz orange candy melts
- 4 oz green candy melts
- 4 oz purple candy melts
Decorations
- Candy eyeballs
Instructions
- Prepare Work Surface: Lay a piece of parchment paper onto a clean working surface or on a baking sheet to prevent sticking and make clean-up easier.
- Make Peanut Butter Sandwiches: Arrange 16 Ritz crackers on the parchment. Spread about a tablespoon of creamy peanut butter evenly on each cracker and top each with another cracker to create 16 sandwich crackers.
- Melt Purple Candy Melts: Place 4 oz of purple candy melts in a small microwave-safe bowl. Heat in 20-second increments, stirring between each, until the melts are smooth and thin enough for dipping.
- Melt Orange and Green Candy Melts: Repeat the melting process separately for 4 oz orange and 4 oz green candy melts so you have three bowls with different colored melted candy melts ready for dipping.
- Dip Sandwiches: Using a fork, gently dip each peanut butter cracker sandwich into the melted candy melts, coating them fully. Then place them back on the parchment paper to set.
- Add Candy Eyes: While the chocolate coating is still soft, decorate the dipped snacks by pressing candy eyeballs onto them to create monster faces.
- Set and Serve: Let the chocolate coating fully harden at room temperature before serving to ensure the outer shell is firm and the candy eyes stay in place.
Notes
- Use parchment paper to prevent sticking and make cleanup easy.
- Microwave the candy melts in short increments to prevent burning.
- Ensure the candy coating is not too thick or too thin for an even dip.
- You can store the finished snacks in an airtight container at room temperature for up to 3 days.
- For a nut-free version, substitute peanut butter with sunflower seed butter and ensure candy melts are nut-free.
Nutrition
- Serving Size: 1 snack
- Calories: 150
- Sugar: 9g
- Sodium: 190mg
- Fat: 8g
- Saturated Fat: 3g
- Unsaturated Fat: 4g
- Trans Fat: 0g
- Carbohydrates: 16g
- Fiber: 1g
- Protein: 4g
- Cholesterol: 0mg

