If you’re looking for a fun and festive twist on a classic comfort food, this Spooky Grilled Cheese Recipe is going to be your new go-to. It’s simple, quick, and packs that perfect mix of melty cheese and toasty bread—with a Halloween-themed surprise cut right in the middle. I absolutely love how this turns out because it’s not just tasty, but also playful enough to make kids and adults alike smile at the dinner table. Trust me, once you try this, you’ll find it hard to go back to plain grilled cheese again.
Why You’ll Love This Recipe
- Super Quick and Easy: This grilled cheese comes together in just about 8 minutes, perfect for busy nights.
- Halloween Fun: The spooky cut-out shapes make it a hands-down hit for themed parties and family dinners.
- Perfectly Melty Cheese: Achieve that gooey, melty center with a crispy outside every single time.
- Versatile Ingredients: Easy to find staples come together to create a magical, festive meal.
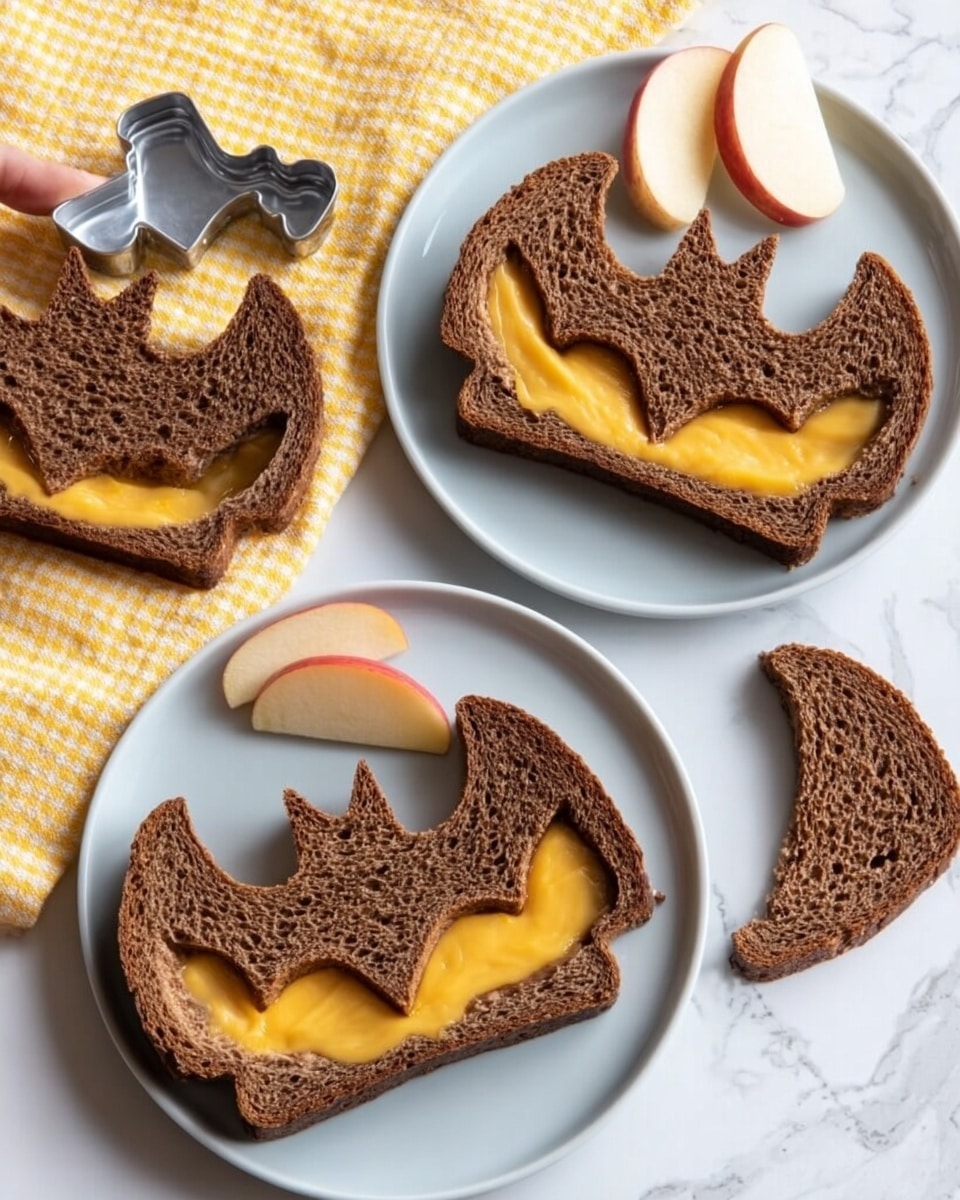
Ingredients You’ll Need
Let’s talk ingredients before you start. This recipe leans on simple, bold flavors and a cool Halloween twist. Using darker breads like pumpernickel or rye adds an earthy, slightly sweet note that pairs beautifully with sharp cheddar. Here are the essentials, along with some of my tips for picking the best versions.
- Butter: The key to getting that golden, crisp crust—use real butter, it browns beautifully and adds richness.
- Pumpernickel or dark rye bread: I like to use pumpernickel because its deep color makes the spooky shapes stand out, plus it holds up well in the pan without getting soggy.
- Cheddar cheese: Sharp cheddar melts perfectly and delivers that satisfying cheesy punch, but feel free to mix in your favorites if you like more complexity.
- Halloween-themed cookie cutter: This is the fun part—grab a cutter shaped like ghosts, bats, or pumpkins to create the iconic cut-out look.
Variations
I love that this Spooky Grilled Cheese Recipe is so customizable. You can personalize it easily to suit your family’s tastes or dietary needs without losing that fun, spooky vibe. Here are some ideas I’ve tried and loved.
- Variation: Swap the cheddar for mozzarella for a gooier stretch, or add a sprinkle of pepper jack for a little heat—I tried the pepper jack once and it gave the sandwich a fun, spicy kick that my family couldn’t get enough of.
- Variation: For gluten-free friends, substitute your favorite gluten-free bread; just watch the cooking time as some breads crisp faster.
- Variation: Add slices of apple or a smear of fig jam inside for a sweet-and-savory combo that tastes incredible with the rich cheddar.
How to Make Spooky Grilled Cheese Recipe
Step 1: Cut Out Your Spooky Shapes
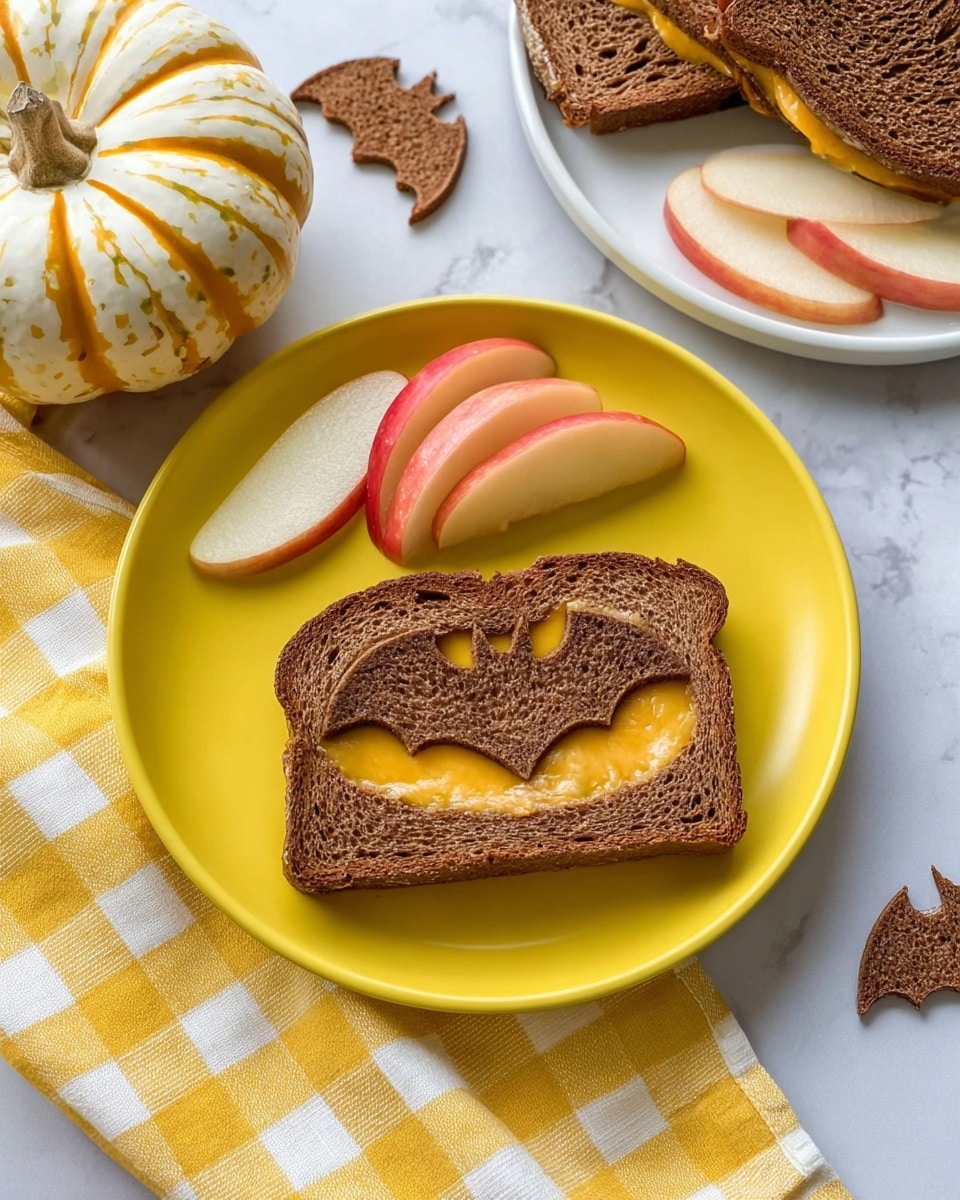
The magic starts here. Take four slices of your dark bread and press your Halloween cookie cutter firmly in the center to carve out fun shapes—ghosts, bats, pumpkins—it’s up to you! Don’t toss those little cut-outs; you’ll use them to sandwich the cheese and create that layered effect. I remember the first time I tried this, I was worried the cut-outs would fall apart, but they hold up surprisingly well!
Step 2: Butter and Heat Your Pan
Preheat a skillet or griddle over medium heat and melt some butter—that golden sizzle is what makes a grilled cheese crave-worthy. I like to spread a thin layer on each slice beforehand to avoid over-buttering the pan. This method helps your bread get that perfect crunch without greasiness.
Step 3: Cook the Bread and Assemble
Start by placing both the hollowed-out bread pieces and the solid slices on the skillet for about 3 minutes. Flip the solid slices, then add a slice of cheddar cheese on top. Now stack the hollowed-out pieces on the cheese, creating that cool spooky window effect. Cover and cook for another 3 minutes or so until the cheese melts to gooey perfection. Keep an eye on things so nothing burns—you want a beautiful, golden crust.
Pro Tips for Making Spooky Grilled Cheese Recipe
- Butter Spread Technique: Lightly butter each slice instead of dumping butter into the pan; this helps your grilled cheese get crispier without excess grease.
- Low and Slow Cooking: Cooking on medium heat prevents burning and ensures your cheese melts thoroughly.
- Cover the Pan: Placing a lid on your skillet lets the heat circulate so the cheese melts evenly and quickly.
- Save Those Cut-Outs: Don’t throw away the hollowed pieces—you’ll use them to cap the cheese and keep the spooky shapes intact!
How to Serve Spooky Grilled Cheese Recipe
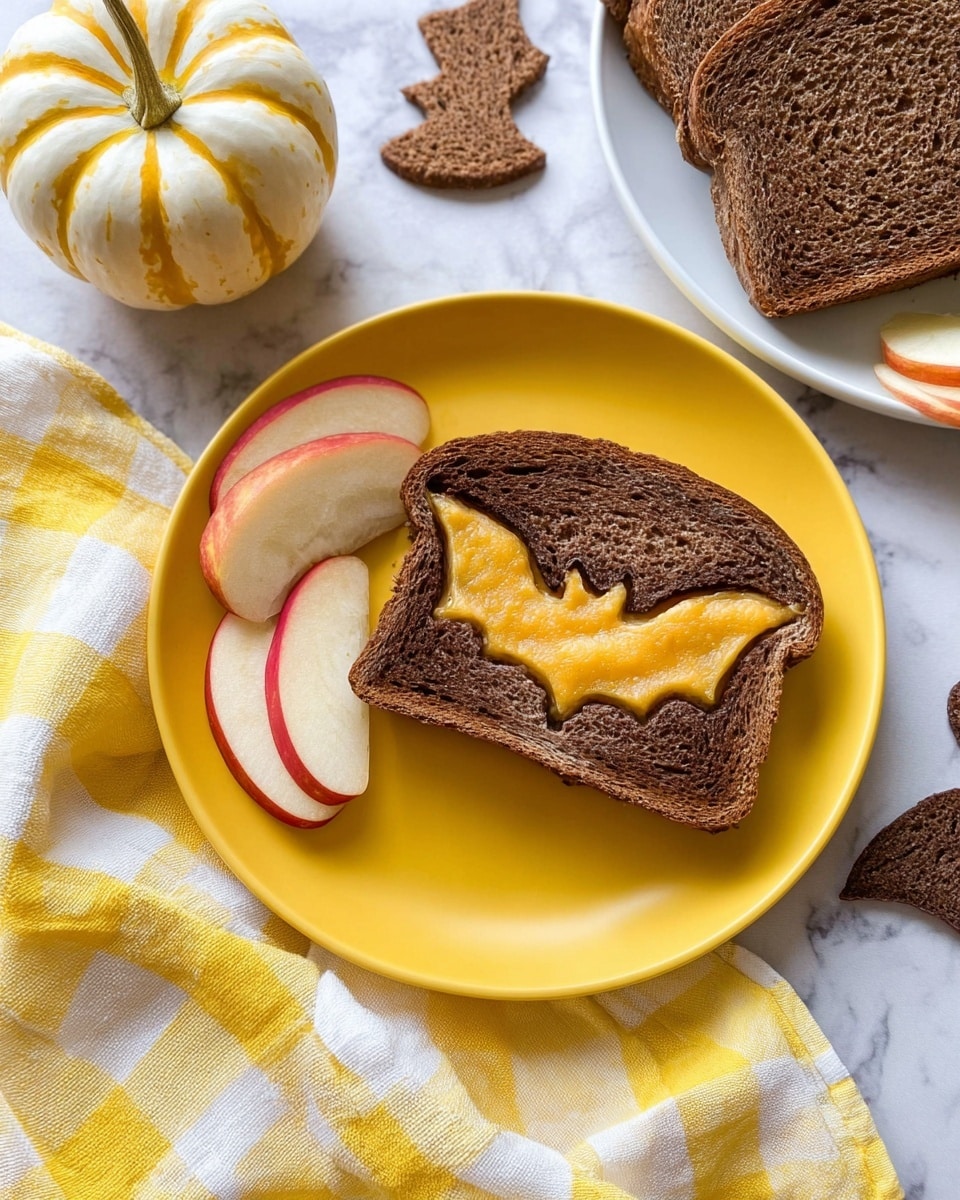
Garnishes
I love adding a little fresh garnish alongside the sandwich to keep things balanced. A handful of baby arugula or a sprinkle of chopped fresh herbs like chives adds color and a peppery bite that cuts through the richness. Plus, it makes your plate look extra inviting.
Side Dishes
My go-to side is a bowl of homemade tomato soup—there’s something so classic and soul-warming about dunking your spooky grilled cheese into a tangy, warm tomato base. For something lighter, crisp veggie sticks or a simple green salad with a vinaigrette complement the sandwich nicely.
Creative Ways to Present
For Halloween parties, I’ve taken to arranging the grilled cheese sandwiches on a slate board with edible “spider webs” made from sour cream and drizzle patterns. You can also use themed plates or even serve individual sandwiches with little flags featuring spooky sayings—it’s such a simple way to amp up the festive vibe!
Make Ahead and Storage
Storing Leftovers
If you happen to have leftovers (which sometimes happens, but honestly, my family usually devours them!), wrap each sandwich tightly in plastic wrap or foil and store them in the fridge. This keeps them fresh for up to 2 days. I recommend reheating with care to keep that crispy exterior.
Freezing
I’ve frozen these sandwiches before, especially after making a big batch for a party. To freeze, wrap each sandwich in parchment paper and then place in an airtight container or freezer bag. They keep well for up to a month. When you’re ready, thaw overnight in the fridge before reheating.
Reheating
When reheating, avoid the microwave if you want to keep that crunch. Instead, I pop the sandwich in a preheated skillet over low heat, flipping frequently until warmed through and golden. The cheese melts back perfectly, and the bread stays satisfyingly crisp.
FAQs
-
Can I use other types of cheese for the Spooky Grilled Cheese Recipe?
Absolutely! While sharp cheddar is classic and melts beautifully, cheeses like mozzarella, gouda, or fontina also work well. Just pick cheeses that melt nicely without releasing too much moisture.
-
What bread works best for the Spooky Grilled Cheese Recipe?
Pumpernickel and dark rye are ideal because their sturdy texture holds up well, plus their deep color makes the spooky cut-outs pop visually. But you can experiment with sourdough or your favorite sandwich bread, just adjust cooking times accordingly.
-
How do I prevent the bread from burning before the cheese melts?
Cooking on medium heat and covering the pan helps the cheese melt while the bread toasts slowly and evenly. Avoid high heat settings and watch the sandwich closely to flip at the right time.
-
Can kids help make the Spooky Grilled Cheese Recipe?
Definitely! Kids love using cookie cutters to make fun shapes, and assembling the sandwiches is simple and safe. It’s a great way to get the whole family involved in a festive cooking activity.
Final Thoughts
This Spooky Grilled Cheese Recipe holds a special place in my heart because it combines the cozy nostalgia of grilled cheese with the festive fun of Halloween. It’s easy enough for a quick weeknight meal but fun and creative enough to serve at themed parties or with the family on chilly autumn evenings. I hope you enjoy making and eating it as much as I do—it’s truly a simple idea that brings big smiles and satisfied bellies. Give it a go and let your inner spooky chef shine!
Print
Spooky Grilled Cheese Recipe
- Prep Time: 2 minutes
- Cook Time: 6 minutes
- Total Time: 8 minutes
- Yield: 4 servings 1x
- Category: Sandwich
- Method: Stovetop
- Cuisine: American
Description
Spooky Grilled Cheese is a fun and festive twist on the classic grilled cheese sandwich, perfect for Halloween. Using pumpernickel or dark rye bread with cut-out shapes adds a playful surprise, while gooey cheddar cheese provides a deliciously melty center. Ready in under 10 minutes, this sandwich is ideal for a quick, themed snack or meal.
Ingredients
Ingredients
- Butter, enough for cooking
- 8 slices pumpernickel or dark rye bread
- 4 slices cheddar cheese
Instructions
- Prepare the bread: Using a Halloween-themed cookie cutter, cut out the centers of four slices of bread to create spooky shapes.
- Heat the skillet: Heat butter in a griddle or skillet over medium heat until melted and hot.
- Cook the bread pieces: Place the cut-out center bread pieces and the whole bread slices in the skillet. Cook for 3 minutes, allowing the bread to toast lightly on one side.
- Assemble sandwiches: Flip the whole bread slices. Immediately place a slice of cheddar cheese on top of the toasted side, then cover with the cut-out center piece of bread, un-toasted side down.
- Melt the cheese: Cook for an additional 3 minutes, or until the cheese has melted and the bread is golden brown.
- Serve: Remove sandwiches from the skillet and serve warm to enjoy the festive grilled cheese with spooky cut-outs.
Notes
- You can use any Halloween-themed cookie cutter shapes such as bats, pumpkins, or ghosts.
- Adjust the heat as needed to avoid burning the bread before the cheese melts.
- For added flavor, consider adding a slice of tomato or a pinch of smoked paprika inside the sandwich.
- This recipe serves 4 and is easily doubled for larger gatherings.
Nutrition
- Serving Size: 1 sandwich
- Calories: 320
- Sugar: 2g
- Sodium: 550mg
- Fat: 18g
- Saturated Fat: 10g
- Unsaturated Fat: 6g
- Trans Fat: 0g
- Carbohydrates: 28g
- Fiber: 3g
- Protein: 12g
- Cholesterol: 45mg

