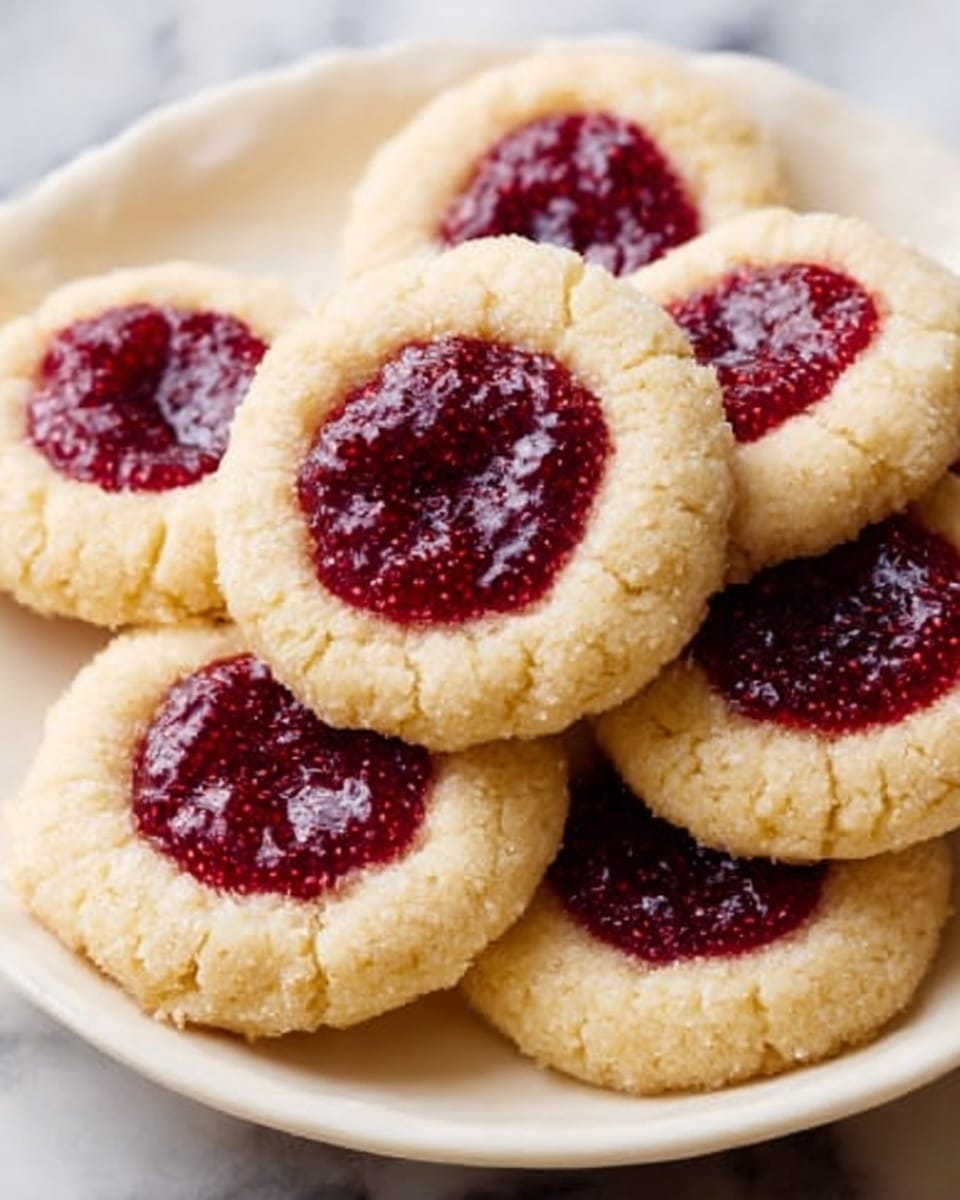
There’s something undeniably charming about these Thumbprint Cookies with Raspberry Preserves Recipe — they’re like little bites of buttery heaven crowned with vibrant jam that bursts with flavor. I love this recipe because it hits that perfect balance between a tender, crumbly cookie and the sweet-tart surprise of raspberry preserves nestled right in the middle. If you’ve been craving a cozy treat that feels both nostalgic and fancy enough for special occasions, this one definitely delivers.
Whenever I make these cookies, they’re a guaranteed hit whether it’s for holiday gatherings, afternoon tea, or just a midweek pick-me-up. The raspberry preserves add a fresh, fruity contrast that feels uplifting with every bite, making this Thumbprint Cookies with Raspberry Preserves Recipe truly worth trying in your kitchen. You’ll find that the simple ingredients come together in a way that feels impressive but is actually straightforward to follow.
Why You’ll Love This Recipe
- Perfect Texture: These cookies are tender and buttery with just the right crumb, making every bite melt-in-your-mouth delicious.
- Vibrant Jam Filling: The raspberry preserves add a punch of fruity sweetness that complements the mild cookie base beautifully.
- Easy to Make: The dough comes together quickly with basic ingredients, and chilling it prevents spreading for perfect thumbprints.
- Versatile for Any Occasion: Whether you’re baking for a holiday, party, or simple treat, these cookies always impress without fuss.
Ingredients You’ll Need
The magic of this Thumbprint Cookies with Raspberry Preserves Recipe starts with a few simple, well-matched ingredients that are probably already in your pantry. Knowing a little about each helps you understand how they contribute to the cookie’s flavor and texture — and I’ve got a few helpful shopping tips too!
- Unsalted butter: Make sure it’s softened to room temperature so it creams easily with the sugars, creating that tender crumb I adore.
- Sugar: Both white and light brown sugars bring sweetness and moisture; the brown sugar adds a slight caramel note that deepens the flavor.
- Egg yolk: This adds richness and helps bind the dough — I like separating eggs fresh for the best texture.
- Vanilla extract: Adds warm, inviting flavor; don’t skimp here — pure vanilla really does make a difference!
- All-purpose flour: The base for your cookies; using fresh flour ensures the dough won’t feel heavy or taste stale.
- Cornstarch: This little addition is a secret to keeping the cookie tender and soft instead of tough.
- Salt: Just a pinch enhances the sweetness and balances the flavors perfectly.
- Granulated sugar for rolling (optional): This gives your cookies a lovely, sparkly exterior and a tiny crunch.
- Raspberry preserves: I go for high-quality fruit preserves that are smooth and spread easily, but you can use your favorite jam for variety.
Variations
I love how flexible this Thumbprint Cookies with Raspberry Preserves Recipe is — you can tweak it to suit your mood or the occasion. Over the years, I’ve experimented with all kinds of jams and tweaks, so feel free to make it your own!
- Jam variations: I’ve swapped in apricot, strawberry, or even lemon curd. Each one brings a uniquely delicious twist to the cookies.
- Nutty addition: Adding finely chopped nuts (like pecans or almonds) to the cookie dough or rolling the cookie balls in crushed nuts before the sugar for added texture — I tried this once and my family couldn’t stop snacking!
- Gluten-free option: You can substitute an all-purpose gluten-free flour blend; just make sure it contains xanthan gum for structure.
- Spice it up: Adding a pinch of cinnamon or cardamom to the dough adds warmth and seasonal flair.
How to Make Thumbprint Cookies with Raspberry Preserves Recipe
Step 1: Cream the Butter and Sugars
Start by placing your softened unsalted butter into the bowl of a stand mixer (or a large mixing bowl if you’re using a hand mixer). Beat on medium speed until it gets creamy and smooth, which usually takes around 30 seconds. Then scrape down the sides and add both your white and brown sugars. Beat the mix again, gradually increasing to medium-high speed until everything is combined well and fluffy—about 30 to 60 seconds. This step is crucial because it gives your cookies a lovely light texture.
Step 2: Add Egg Yolk and Vanilla
Next, add the egg yolk and vanilla extract to your creamed butter and sugar. Beat them into the mix thoroughly. This is when the dough starts to come together with richness and flavor. Pro tip: Make sure your egg yolk is at room temperature too, as it blends more easily and prevents the dough from turning lumpy.
Step 3: Mix the Dry Ingredients Separately
In another bowl, whisk together the all-purpose flour, cornstarch, and salt. This dry mix will keep your cookies tender and perfectly balanced. Whisking helps distribute the salt and cornstarch evenly so you don’t get clumps or uneven texture in your dough.
Step 4: Combine Wet and Dry Mixtures Carefully
With your mixer on low speed, gradually add the flour mixture to the wet ingredients until it’s all combined. The dough will feel dry and crumbly — don’t worry, that’s exactly how it should be. Pause occasionally to scrape down the sides and bottom of the bowl to ensure everything is evenly mixed. If your mixer starts to strain, switch to using your hands to gently bring the dough together. This hands-on step really helps you feel if the dough is ready.
Step 5: Shape, Roll, and Chill the Dough
Scoop tablespoon-sized portions of dough and roll them between your palms until smooth and round — no cracks or seams! This smooth shaping keeps your thumbprints intact during baking. If you like, roll each ball in granulated sugar for a little sparkle and crunch. Place the dough balls on a wax-paperlined plate or cookie sheet, then use your thumb or the back of a teaspoon to gently press a small well into the center of each ball. Freeze them for about 30 minutes. Chilling solidifies the butter so your cookies hold their shape nicely and your jam won’t run.
Step 6: Prepare Jam and Preheat Oven
While your dough chills, preheat your oven to 375°F (190°C). Place the raspberry preserves in a small microwave-safe bowl and heat for 5-10 seconds — you want it soft enough to stir and fill the wells easily, but not hot. This little warming trick makes portioning jam simple and ensures it won’t cool to a hard blob in the cookies.
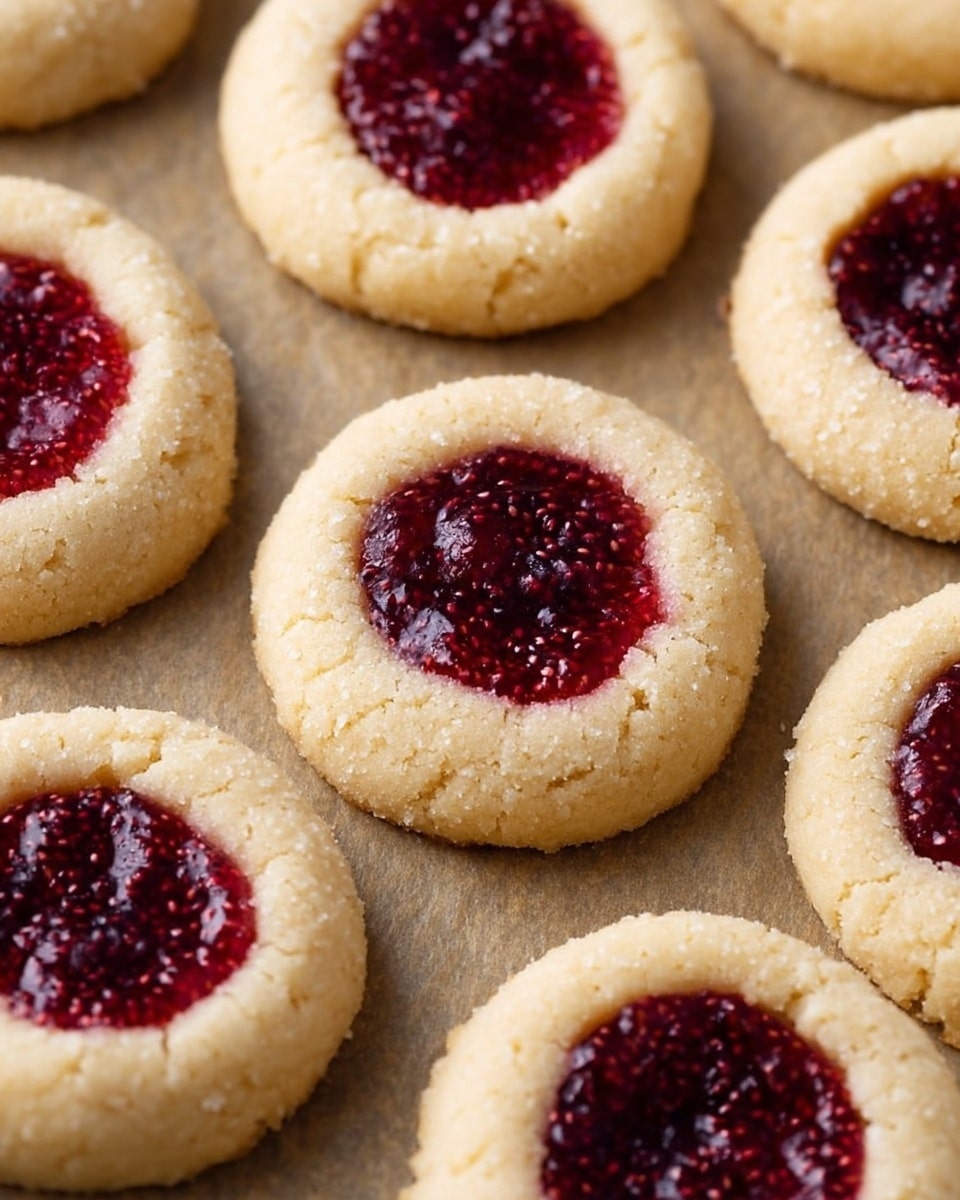
Step 7: Fill Thumbprints and Bake
Spoon a generous dollop of jam into each thumbprint well, filling it right to the brim. Arrange the cookies on a parchment paper-lined baking sheet with at least two inches spacing between them. Bake in your preheated oven for 11 minutes or until the edges just begin to turn light golden brown. Keep an eye on them during the last few minutes to avoid over-baking — you want soft cookies with that gorgeous jam center.
Step 8: Cool Completely Before Enjoying
Let the cookies cool completely on the baking sheet before you move or taste them. This step helps the jam set perfectly and lets the cookies firm up just right. I know it’s tempting, but trust me, waiting makes the flavor and texture so much better!
Pro Tips for Making Thumbprint Cookies with Raspberry Preserves Recipe
- Soft Butter Is Key: I learned that butter softened at room temperature (not melted!) gives the best dough consistency and texture.
- Don’t Skip Chilling: Freezing the shaped dough is crucial to prevent spreading and cracked jam wells — it really makes your cookies look polished.
- Jam Prep Matters: Slightly warming the preserves ensures smooth filling without tearing the cookie edges.
- Watch Oven Time Carefully: I once left these in too long and they got hard, so keep the timer close and remove when edges just turn golden.
How to Serve Thumbprint Cookies with Raspberry Preserves Recipe
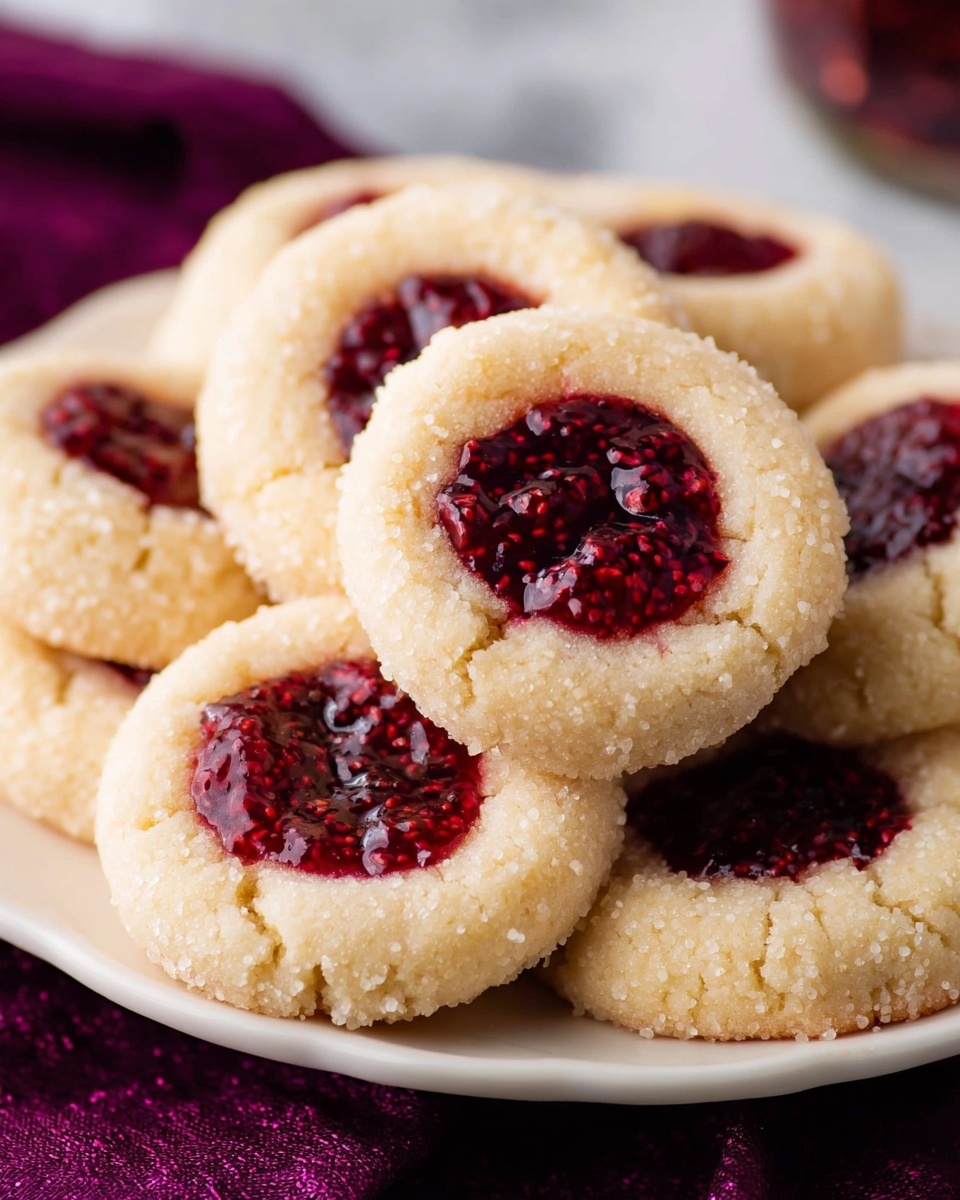
Garnishes
For a simple yet elegant touch, I sprinkle a tiny bit of powdered sugar over the cooled cookies. It’s a classic look that adds a delicate sweetness without overpowering the raspberry filling. Sometimes, I also toss on a couple of fresh raspberries for a pop of color and freshness — especially when serving to guests.
Side Dishes
These cookies pair wonderfully with a cup of hot tea, coffee, or even a glass of cold milk. For a festive feel, I serve them alongside a cheese platter with mild cheeses and nuts — the cookies balance out savory and sweet beautifully during gatherings.
Creative Ways to Present
When I’ve made these Thumbprint Cookies with Raspberry Preserves Recipe for parties, I love arranging them on a tiered dessert stand with fresh flowers and greenery around the edges. Another fun idea is packaging them in small treat boxes tied with a ribbon—perfect for gifts or party favors. It’s a cozy, charming presentation that always earns compliments.
Make Ahead and Storage
Storing Leftovers
If you have leftovers, store these cookies in an airtight container at room temperature. They stay fresh and soft for up to 4-5 days. I learned the hard way that storing them without sealing lets them dry out quickly, so airtight is a must for maintaining that melt-in-your-mouth texture.
Freezing
I often freeze unbaked cookie dough balls after shaping and chilling them. That way, I can bake fresh cookies whenever the mood strikes. Just thaw them in the refrigerator overnight and proceed with filling and baking. Freezing baked cookies is also possible — just wrap them tightly and keep for up to 2 months.
Reheating
To warm up leftover cookies, I pop them in a preheated 300°F oven for about 5 minutes. This revives the buttery texture and slightly softens the jam filling without drying the cookie out. Microwaving tends to make them chewy or too soft, so the oven method is my go-to.
FAQs
-
Can I use other jam flavors in this Thumbprint Cookies with Raspberry Preserves Recipe?
Absolutely! While raspberry preserves are classic and delicious, you can swap in strawberry, apricot, blueberry, or even lemon curd — whatever suits your taste or what you have on hand.
-
Why do my thumbprint cookies crack when baking?
Cracks often happen if the dough isn’t chilled enough before baking or if the cookie balls aren’t shaped smoothly without cracks. Chilling the dough helps it hold its shape, and rolling the dough carefully to seal cracks prevents breakage.
-
Can I prepare these cookies ahead of time?
Yes! You can prepare the dough balls and chill or freeze them ahead. Just fill with jam and bake when you’re ready — it’s a great way to save time for parties or busy days.
-
What if I don’t have cornstarch?
Cornstarch helps keep the cookies tender, but if you don’t have any, you can substitute with an equal amount of arrowroot powder or tapioca starch. Without it, the cookies may turn out a bit denser.
-
How do I stop my jam from leaking during baking?
Warming the jam slightly before filling the cookies makes it easier to fill and less likely to overflow during baking. Also, make sure your dough indentations are deep enough to hold the preserves securely.
Final Thoughts
This Thumbprint Cookies with Raspberry Preserves Recipe holds a special place in my heart because it feels like homemade love wrapped in the perfect bite. It’s straightforward to make, yet the result feels elegant and nostalgic, the kind of treat you want to share with friends over coffee or wrap up as a thoughtful gift. I truly encourage you to give this recipe a try — once you’ve tasted that buttery cookie with sweet raspberry jam, I bet you’ll be making them again and again, just like my family does.
Print
Thumbprint Cookies with Raspberry Preserves Recipe
- Prep Time: 20 minutes
- Cook Time: 11 minutes
- Total Time: 1 hour 1 minute
- Yield: 24 cookies 1x
- Category: Dessert
- Method: Baking
- Cuisine: American
Description
These Thumbprint Cookies are buttery, tender, and filled with your favorite jam for a perfect balance of sweet and fruity flavors. Rolled in sugar and chilled before baking, these classic cookies are ideal for holiday treats or anytime indulgence.
Ingredients
Cookie Dough
- 1 cup (226 g) unsalted butter, softened to room temperature
- 1/3 cup (70 g) sugar
- 1/3 cup (70 g) light brown sugar, tightly packed
- 1 large egg yolk
- 3/4 teaspoon vanilla extract
- 2 1/4 cups (280 g) all-purpose flour
- 2 teaspoons cornstarch
- 1/2 teaspoon salt
For Rolling & Filling
- 1/2 cup granulated sugar (optional, for rolling)
- 1/3 cup (105 g) jam or preserves of your choice (raspberry used in recipe)
Instructions
- Cream the Butter: Place the softened butter in the bowl of a stand mixer or a large bowl if using a hand mixer. Beat on medium speed until the butter is creamy.
- Add Sugars: Scrape down the sides of the bowl, then add both the granulated sugar and light brown sugar. Beat, gradually increasing to medium-high speed, for about 30-60 seconds until well combined and fluffy.
- Incorporate Egg Yolk and Vanilla: Add the egg yolk and vanilla extract to the butter mixture and beat well to combine completely.
- Mix Dry Ingredients: In a separate bowl, whisk together the all-purpose flour, cornstarch, and salt until evenly combined.
- Combine Wet and Dry Ingredients: With the mixer on low speed, slowly add the flour mixture to the wet ingredients. Pause occasionally to scrape the sides and bottom of the bowl. The dough will be dry and crumbly; if the mixer struggles, finish kneading by hand until a cohesive dough forms.
- Form Dough Balls: Scoop the dough into 1 tablespoon-sized balls, rolling each carefully to make smooth, crack-free spheres to prevent thumbprint cracks while baking.
- Roll in Sugar and Make Indents: Optionally roll each dough ball in granulated sugar. Place on a wax paper-lined plate or small cookie sheet. Use your thumb or the back of a teaspoon to gently press a hollow indent in the center of each ball.
- Chill Dough: Transfer the arranged cookie dough to the freezer and chill for 30 minutes to firm up.
- Preheat Oven and Prepare Jam: After chilling, preheat your oven to 375°F (190°C). Place the jam in a microwave-safe bowl and warm it briefly (5-10 seconds) until it’s soft and easy to stir but not hot.
- Fill Thumbprints: Spoon the softened jam into each indent, filling to the brim.
- Bake Cookies: Place the cookies on a parchment-lined baking sheet at least 2 inches apart. Bake at 375°F (190°C) for 11 minutes or until the edges start to turn a light golden brown.
- Cool and Serve: Allow the cookies to cool completely on the baking sheet before serving for best texture and flavor.
Notes
- You can use any type of jam or preserves for the filling — raspberry, strawberry, apricot, or even marmalade work well.
- Rolling cookies in sugar before making the thumbprint adds a slight crunch and extra sweetness to the edges.
- Chilling the dough before baking helps prevent spreading and keeps the thumbprint indents intact.
- If the dough is too crumbly to form balls with a mixer, use your hands to gently press it together.
- Store baked cookies in an airtight container at room temperature for up to 5 days or freeze for longer storage.
Nutrition
- Serving Size: 1 cookie
- Calories: 120
- Sugar: 7g
- Sodium: 55mg
- Fat: 7g
- Saturated Fat: 4.5g
- Unsaturated Fat: 2g
- Trans Fat: 0g
- Carbohydrates: 14g
- Fiber: 0.5g
- Protein: 1.2g
- Cholesterol: 25mg

