
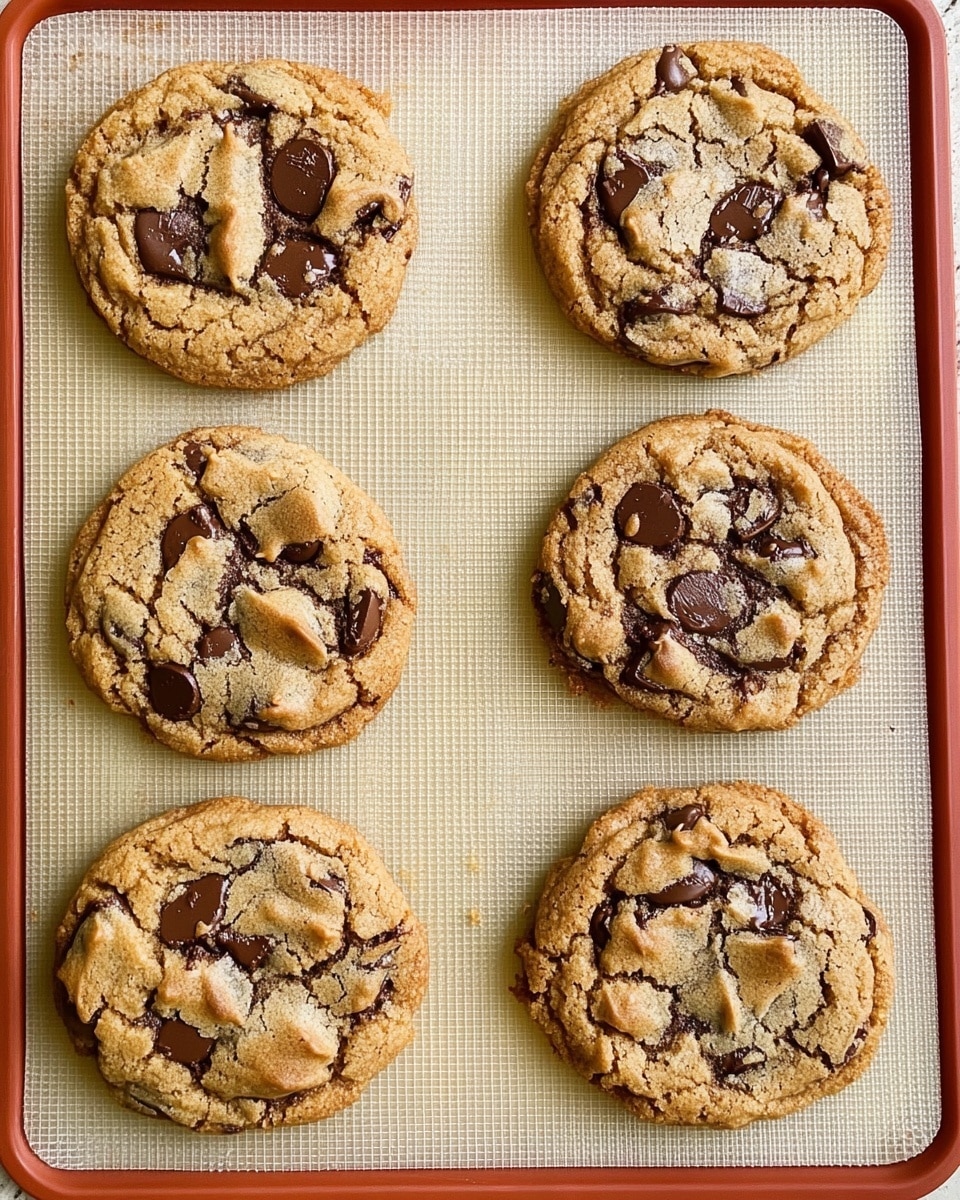
Oh, I absolutely love this Cookie Butter Cookies Recipe! It’s one of those magical recipes that combines the richness of buttery dough with the unforgettable, warm spiced flavor of cookie butter, making every bite irresistibly soft and chewy. Whether you’re baking for a cozy afternoon treat or bringing something special to a gathering, these cookies always impress without any complicated steps.
When I first tried this recipe, I was blown away by how those little chunks of Biscoff cookies inside elevated the texture and flavor—they add just the right crunch! You’ll find that these cookies are not overly sweet but perfectly balanced, which means you can enjoy them with your morning coffee, afternoon tea, or even as a late-night snack.
Why You’ll Love This Recipe
- Deliciously Soft Texture: These cookies stay soft and chewy long after baking, which means you savor every bite.
- Perfect Balance of Flavors: The cookie butter and crushed Biscoff give just the right hint of spice and sweetness without overpowering.
- Simple Yet Impressive: You’ll love how easy it is to whip these up, even if you’re a beginner baker.
- Fun Rustic Look: Thanks to a neat shape trick, these cookies look bakery-level fancy but come out beautifully homemade every time.
Ingredients You’ll Need
The magic truly happens when these ingredients come together—flour blends with a touch of cornstarch for softness, and cookie butter adds that signature caramelized spice flavor. When you gather these pantry staples, you’re just steps away from buttery bliss.
- All-purpose flour: Provides the perfect structure while keeping cookies tender.
- Cake flour: Helps keep these cookies delightfully soft and less dense.
- Cornstarch: A little secret ingredient to boost tenderness and softness.
- Baking soda and baking powder: Work together for just the right rise and texture.
- Salt: Balances sweetness and enhances the cookie butter flavor.
- Unsalted butter: Use cold butter cut into cubes for better texture and flavor.
- Creamy cookie butter: This is the star ingredient—Lotus Biscoff is my go-to!
- Brown sugar: Adds moisture and a deep caramel flavor.
- Sugar: Gives sweetness and helps with crisp edges.
- Egg and egg yolk: Provide richness and help bind everything perfectly.
- Cookie butter emulsion or vanilla extract: Boosts the cookie butter flavor; vanilla works fine too.
- Chocolate chips: Adds melty pockets of sweetness—choose your favorite type!
- Biscoff cookies, crushed: For chunks of crunchy goodness scattered throughout.
Variations
I love making this Cookie Butter Cookies Recipe my own depending on what I have on hand and who I’m baking for. You can easily switch up the add-ins or swap flours to suit your taste or allergy needs.
- Nut-free variation: Simply omit any nuts or nut products if using the cookie butter emulsion; it keeps the flavor intact.
- Chocolate swap: Try dark chocolate chips for a richer, less sweet cookie, or white chocolate for a creamy twist—my family goes crazy for dark chocolate-chunk versions!
- Gluten-free: Use a gluten-free flour blend with xanthan gum to closely mimic the texture without sacrificing softness.
- Extra crunch: Add chopped pecans or walnuts for a nuttier profile I sometimes crave on chilly afternoons.
How to Make Cookie Butter Cookies Recipe
Step 1: Prep Your Dry Ingredients
Start by whisking together your all-purpose flour, cake flour, cornstarch, baking powder, baking soda, and salt in a large bowl. This evenly distributes leavening agents and salt, giving your cookies a perfectly consistent flavor and rise. I like to take a quick break here and make sure there are no lumps because even mixing pays off big during baking.
Step 2: Cream the Butter and Sugars
Using a stand mixer fitted with a paddle attachment, cream the cold unsalted butter cubes with the creamy cookie butter and the brown and white sugars. This usually takes 2-3 minutes on medium speed. You want the mixture smooth and fluffy because this is where the light texture starts forming. If you don’t have a stand mixer, a sturdy hand mixer works just fine. Just be patient and scrape down the sides to blend everything evenly.
Step 3: Add the Eggs and Flavors
Next, add in your egg, egg yolk, cookie butter emulsion (or vanilla), and vanilla extract. Mixing these well brings richness and boosts those signature warm tones cookie butter is known for. I always scrape the sides again here to make sure no pockets of flour are hiding, so your cookie dough stays nicely mixed.
Step 4: Combine Dry Ingredients and Add Mix-Ins
Gradually fold your whisked dry ingredients into the wet mixture, making sure not to overmix. Then toss in the chocolate chips and crushed Biscoff cookies. I love leaving some chunkier bits of cookie for extra texture—it’s like unexpected little crispy bites in every mouthful.
Step 5: Shape and Bake Your Cookies
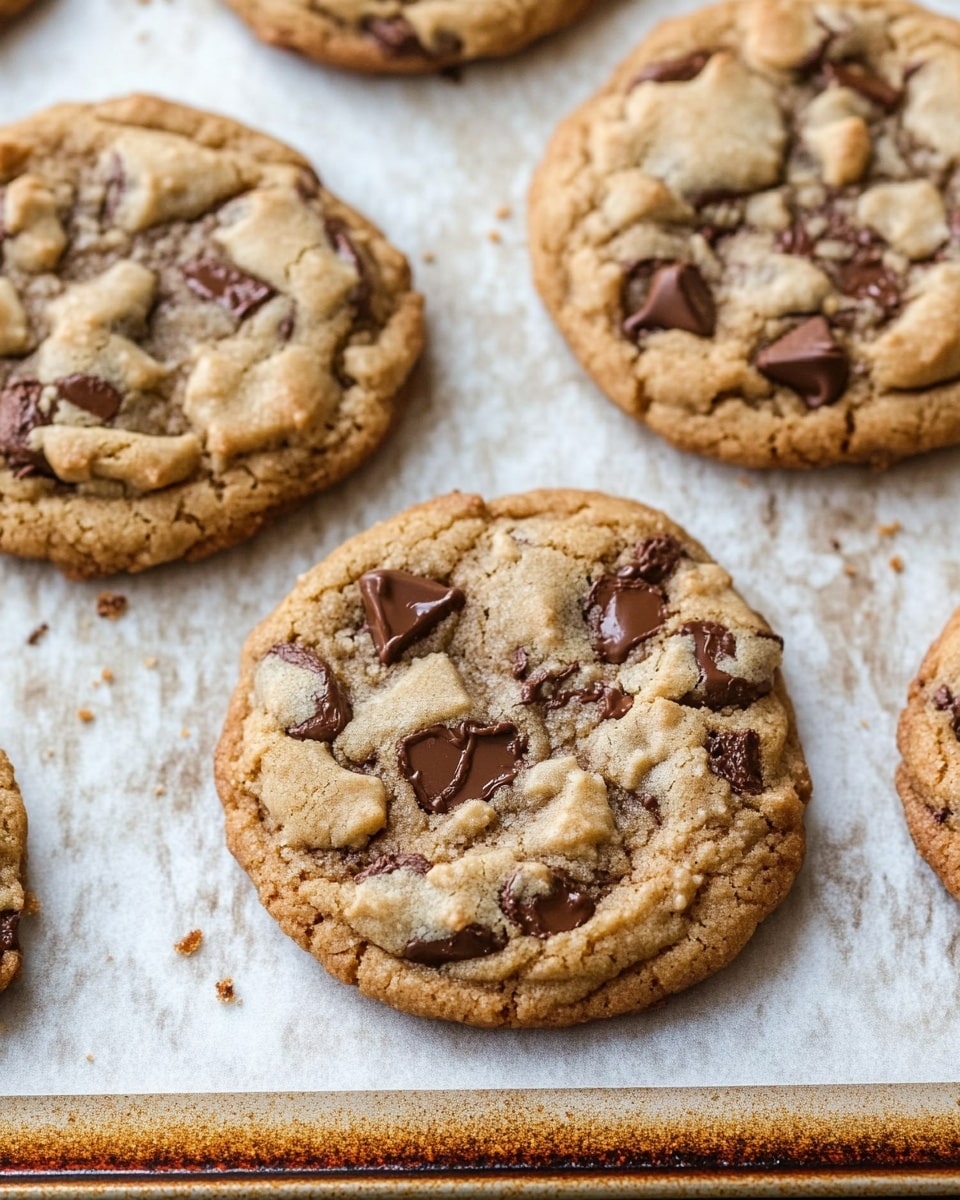
Divide the dough into about 8 large balls—think of these as your ticket to huge, bakery-style cookies. Then here’s a little trick I discovered: pull each ball in half, and place the two halves back together with the rough cut sides facing up. It sounds odd, but it creates that perfect rustic look that will make everyone think you brought home bakery treats.
Place your cookies on parchment or silicone mats, then bake at 375°F for about 10-12 minutes until the edges just start to turn golden. Don’t worry if they seem soft; they’ll set as they cool.
Right out of the oven, gently swirl each cookie inside a circular cutter or glass larger than the cookie itself. I first discovered this after finding the Crumbl cookie YouTube videos and it’s a game changer! It smooths uneven edges into perfect rounds so your cookies look professionally crafted with minimal effort.
While still warm, I sprinkle them with extra chocolate chips and even drizzle melted cookie butter spread on top to amp up that sweet richness. Let the cookies cool on the baking sheet for 15 minutes before moving them to a wire rack—this prevents any breakage since they are very soft fresh out of the oven.
Pro Tips for Making Cookie Butter Cookies Recipe
- Cold Butter Works Best: Using cold butter cubes slows absorption, giving you a better crumb and prevents greasy cookies.
- Don’t Overmix Dry Ingredients: Stir just until combined to avoid tough cookies; gentle mixing makes for tender results.
- Crush Cookies by Hand: Leaving larger chunks of Biscoff cookies adds texture and surprise pockets of crunch I keep coming back for.
- Use the Circular Swirl Trick: It’s my secret to perfectly shaped cookies that look like you spent hours crafting them.
How to Serve Cookie Butter Cookies Recipe
Garnishes
I like to garnish my Cookie Butter Cookies with a few melted chocolate drizzles or ribboned cookie butter spread because it adds a glossy finish and extra sweetness. Sometimes, I lightly sprinkle crushed Biscoff cookies on top just before serving—it looks beautiful and amps up the cookie butter flavor punch.
Side Dishes
These cookies pair wonderfully with a cup of hot chai tea or strong coffee to complement their spiced profile. For a decadent treat, I serve them with vanilla ice cream or a simple glass of cold milk—the contrast in temperatures and textures always delights my guests.
Creative Ways to Present
For special occasions, I like stacking these cookies between sheets of parchment and tying them up with twine for a rustic gift. You can also sandwich two cookies with a spread of cookie butter or chocolate ganache for a fun twist. They make a thoughtful homemade gift or a classy addition to a dessert buffet!
Make Ahead and Storage
Storing Leftovers
I store leftover Cookie Butter Cookies in an airtight container at room temperature, layering parchment between them to avoid sticking. They stay soft and chewy for up to 4 days, making them perfect for batch baking. If I want them softer, I just add a slice of bread in the container overnight—it’s a neat trick I picked up!
Freezing
I’ve had great success freezing unbaked dough balls wrapped tightly in plastic wrap. When ready, just thaw slightly and bake as normal. If freezing baked cookies, wrap them well and freeze for up to 2 months—just thaw overnight before enjoying.
Reheating
To warm up leftover cookies, I pop them in a 300°F oven for about 5 minutes to restore softness and bring back the fresh-baked warmth. Avoid microwaving too long as it can make them overly soft or chewy in a bad way.
FAQs
-
Can I use peanut butter instead of cookie butter in this recipe?
You can substitute peanut butter, but keep in mind the flavor will be much different—more nutty and less spiced caramel. Also, adjust sugar amounts since peanut butter tends to be saltier or less sweet compared to cookie butter.
-
Why use both all-purpose and cake flour in the Cookie Butter Cookies Recipe?
Using a blend balances structure and tenderness. All-purpose flour provides strength for shape, while cake flour keeps the cookies soft and delicate—combining them creates the perfect chewy texture.
-
What if I don’t have cookie butter emulsion?
No worries! Vanilla extract can be used instead. It won’t be exactly the same but still adds beautiful aroma and complements the cookie butter flavor already in the recipe.
-
How can I make my cookie butter cookies less soft?
If you prefer firmer cookies, bake them for an extra 1-2 minutes but keep a close eye so they don’t overbake. Also, chilling the dough for 30 minutes before baking can help control spread.
Final Thoughts
This Cookie Butter Cookies Recipe quickly became a favorite in my home because it’s delicious, comforting, and foolproof. I love how easy it is to bake up soft, tender cookies that taste like a hug in dessert form! You really can’t go wrong with these whether you’re a seasoned baker or just starting out. So go ahead, give it a try—I promise you’ll be craving these Cookie Butter Cookies long after your first batch!
Print
Cookie Butter Cookies Recipe
- Prep Time: 10 minutes
- Cook Time: 10 minutes
- Total Time: 40 minutes (including cooling time)
- Yield: 8 large cookies 1x
- Category: Dessert
- Method: Baking
- Cuisine: American
Description
Indulge in these soft and irresistibly rich Cookie Butter Cookies, featuring a perfect blend of creamy cookie butter, chocolate chips, and crushed Biscoff cookies for that signature rustic look and delicious flavor.
Ingredients
Dry Ingredients
- 1 1/2 cups all-purpose flour
- 3/4 cup cake flour
- 2 tsp. cornstarch
- 1/2 tsp. baking soda
- 1/2 tsp. baking powder
- 1/2 tsp. salt
Wet Ingredients & Mix-Ins
- 1/2 cup unsalted butter, cold, cut into cubes
- 1/2 cup creamy cookie butter (Lotus Biscoff recommended)
- 3/4 cup brown sugar, packed
- 1/4 cup sugar
- 1 large egg
- 1 large egg yolk
- 1 Tbsp. cookie butter emulsion (or less to taste, vanilla extract as alternative)
- 1 tsp. vanilla extract
- 1 1/2 cups chocolate chips (milk chocolate, semi-sweet, or dark)
- 10 Biscoff cookies, crushed (chunks allowed for texture)
Instructions
- Preheat Oven and Prepare Baking Sheets: Preheat your oven to 375°F. Line two baking sheets with parchment paper or silicone baking mats to ensure cookies don’t stick and bake evenly.
- Mix Dry Ingredients: In a large bowl, whisk together all-purpose flour, cake flour, cornstarch, baking soda, baking powder, and salt thoroughly. Set aside for later incorporation.
- Cream Butter and Sugars: Using a stand mixer fitted with the paddle attachment, cream cold unsalted butter, creamy cookie butter, brown sugar, and white sugar together on medium speed for about 2-3 minutes until the mixture is well combined and fluffy.
- Add Eggs and Flavorings: Add the large egg, egg yolk, cookie butter emulsion, and vanilla extract into the creamed mixture. Scrape down the sides of the bowl as needed to ensure even mixing.
- Combine Wet and Dry Ingredients: Gradually add the dry flour mixture to the wet ingredients while mixing on low speed. Once combined, fold in the chocolate chips and crushed Biscoff cookies ensuring they are evenly distributed throughout the dough.
- Shape Dough Balls: Form approximately 8 large dough balls. For a rustic and unique look, pull each dough ball in half, then press the two halves back together with the jagged edges facing outward as demonstrated in the Crumbl cookie method video.
- Bake: Place the shaped dough balls on the prepared baking sheets and bake for 10-12 minutes or until the edges and top edges start looking lightly golden but the center remains soft.
- Smooth the Edges: While the cookies are still warm, use a circular cookie cutter or large drinking glass slightly bigger than the cookie itself to surround the cookie and gently spin it. This motion helps smooth out uneven edges for a perfect circle.
- Add Final Garnishes and Cool: Immediately after removing from the oven, garnish with additional chocolate chips if desired. Allow cookies to cool for 15 minutes on the baking sheet, then transfer to a wire rack to cool completely. Optionally, drizzle with melted Biscoff spread and sprinkle crushed Biscoff cookie chunks on top for extra flair.
- Enjoy: These cookies are very soft and delicious when cooled slightly but best enjoyed fresh with a cold glass of milk or your favorite beverage.
Notes
- Using cold butter helps create a tender texture and prevents excess spreading.
- Cookie butter emulsion adds extra flavor but vanilla extract works as an excellent substitute.
- Adjust cookie butter emulsion quantity according to your flavor preference.
- The unique shaping method gives the cookies a rustic, bakery-style appearance.
- Letting cookies cool on the baking sheet ensures they set properly without breaking.
- For vegan or dairy-free versions, substitute butter and chocolate chips accordingly, though texture and flavor may vary.
Nutrition
- Serving Size: 1 large cookie
- Calories: 320
- Sugar: 22g
- Sodium: 150mg
- Fat: 15g
- Saturated Fat: 8g
- Unsaturated Fat: 6g
- Trans Fat: 0g
- Carbohydrates: 40g
- Fiber: 2g
- Protein: 4g
- Cholesterol: 55mg
